Scaffold Mapping Tools: Inserting Organs In Whole Body Scaffold
This tutorial shows how to use the Scaffold Mapping Tools to insert organ scaffolds into a fitted whole body scaffold with the Organ Inserter plugin. By following these steps, you will learn how to configure the workflow, choose the correct insertion modes, and visualize the results in Argon Viewer.
The Organ Inserter supports three modes of insertion—common trunk, pass through, and default.
In this example, we will insert the following organ scaffolds into a fitted whole body scaffold (DOI: 10.26275/5bii-f6vc):
- the brainstem scaffold (DOI: 10.26275/ofgg-9x6j via the default mode
- the diaphragm scaffold (DOI: 10.26275/5bii-f6vc) via the pass through mode
- the left vagus scaffold (DOI: 10.26275/l9ut-jogg) via the common trunk mode
Step 1: Create and execute a workflow
Download the scaffold files from here to a local folder. You should have the following files:
- Fitted whole body scaffold:
Geometry_Fitter_Wholebody.exf - Brainstem scaffold:
brainstem.exf - Diaphragm scaffold:
diaphragm.exf - Left vagus scaffold:
f006-left_vagus_scaffold.exf - Template left vagus scaffold:
M000-left_vagus_scaffold.exf
Launch MAP Client Mapping Tools from the Start Menu under MAP-Client-mapping-tools vX.Y.Z (X, Y, and Z will be the actual version numbers).
Set up a new workflow named insert_organs_in_whole_body on your Desktop by
creating a new folder on the Desktop named insert_organs_in_whole_body. In MAP Client Mapping Tools, go to File → New Workflow (Ctrl+Shift+N). Select the insert_organs_in_whole_body directory you just created.
To set up the organ inserter workflow, add the following steps to the workflow area:
- One File Chooser step
- Two Multiple File Chooser steps
- One Organ Inserter step
- One Muxer step
- One Argon Viewer step
File Chooser step
Edit the File Chooser configuration by using whole_body as the identifier and selecting Geometry_Fitter_Wholebody.exf under File. Connect its output port to the first input port of the Organ Inserter step.
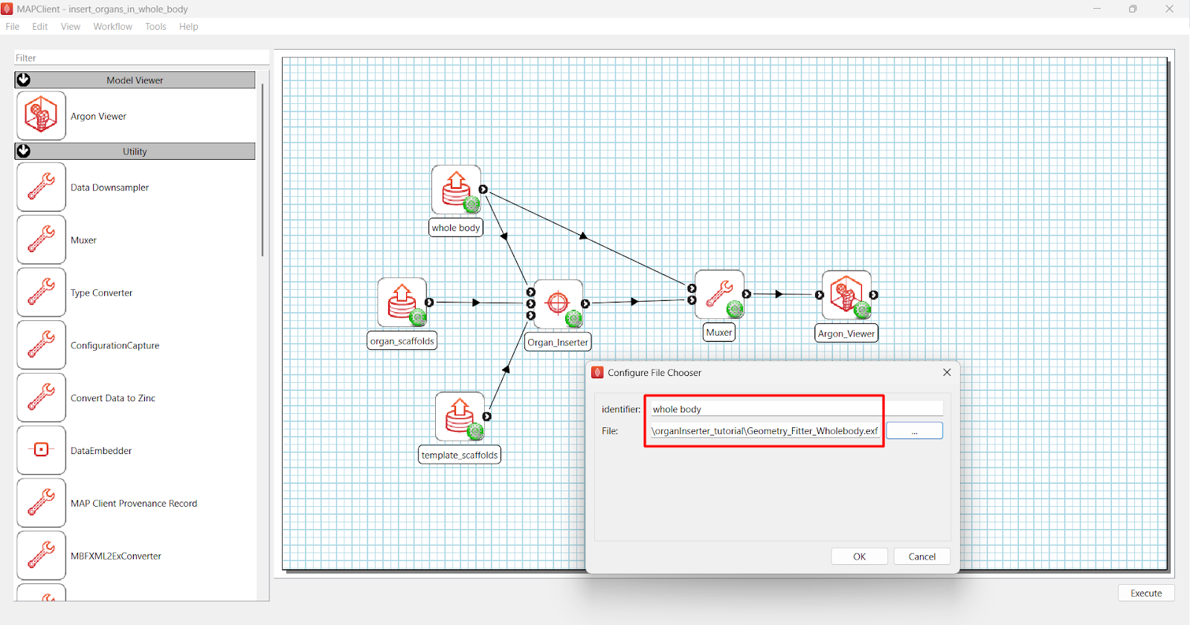
Figure 1. Configuring the File Chooser step.
First Multiple File Chooser step
Configure the first Multiple File Chooser by using organ_scaffolds as the identifier and point it to the downloaded folder. All files will appear in the list, but only the brainstem, diaphragm, and f006-vagus scaffold files are required. Remove the unnecessary files as shown in Figure 2. Connect its output port to the second input port of the Organ Inserter step.
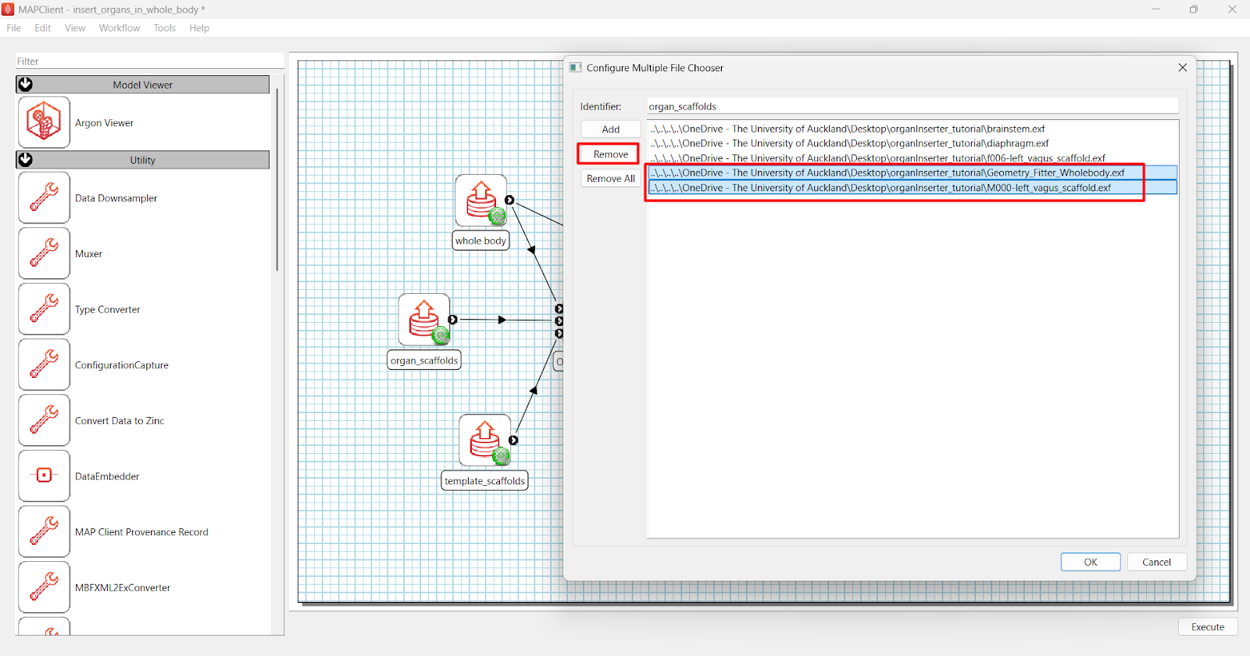
Figure 2. Selecting organ scaffold files in the first Multiple File Chooser step.
Second Multiple File Chooser step
Configure the second Multiple File Chooser by using template_scaffolds as the identifier and pointing it to the downloaded folder. Remove all files except M000-left_vagus_scaffold.exf. Since this tutorial demonstrates insertion of a left vagus scaffold, only a single left template file is required. Connect its output port to the third input port of the Organ Inserter step.
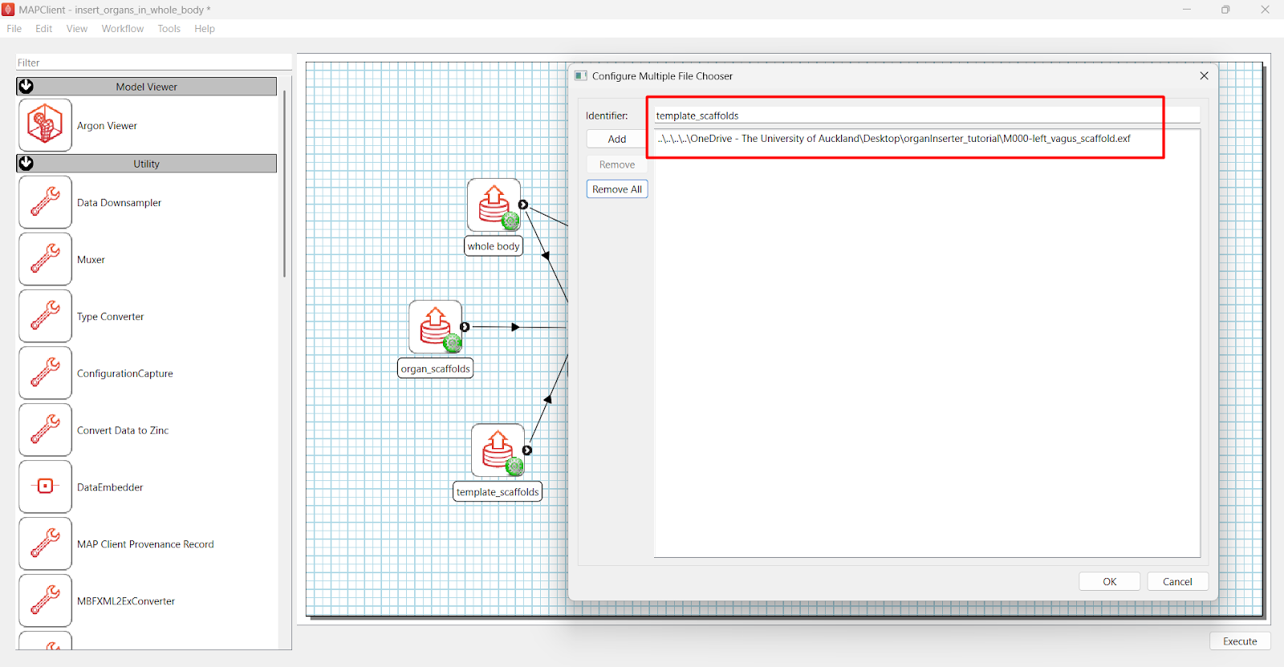
Figure 3. Selecting template scaffold file in the second Multiple File Chooser step.
Note: When inserting multiple organs via the common trunk mode, ensure that the corresponding template scaffold files are included in this second Multiple File Chooser.
Organ Inserter configuration
Click the configuration wheel icon in the Organ Inserter step. The dialog is pre-populated with keywords corresponding to different insertion modes. Keywords are case-insensitive and can be modified by the user.
The filename of the vagus scaffold matches the regex in the common trunk keywords field (see Figure 4), so it will be inserted using the common trunk mode. The diaphragm scaffold will be inserted using the pass through mode while the brainstem scaffold will be inserted using the default mode.
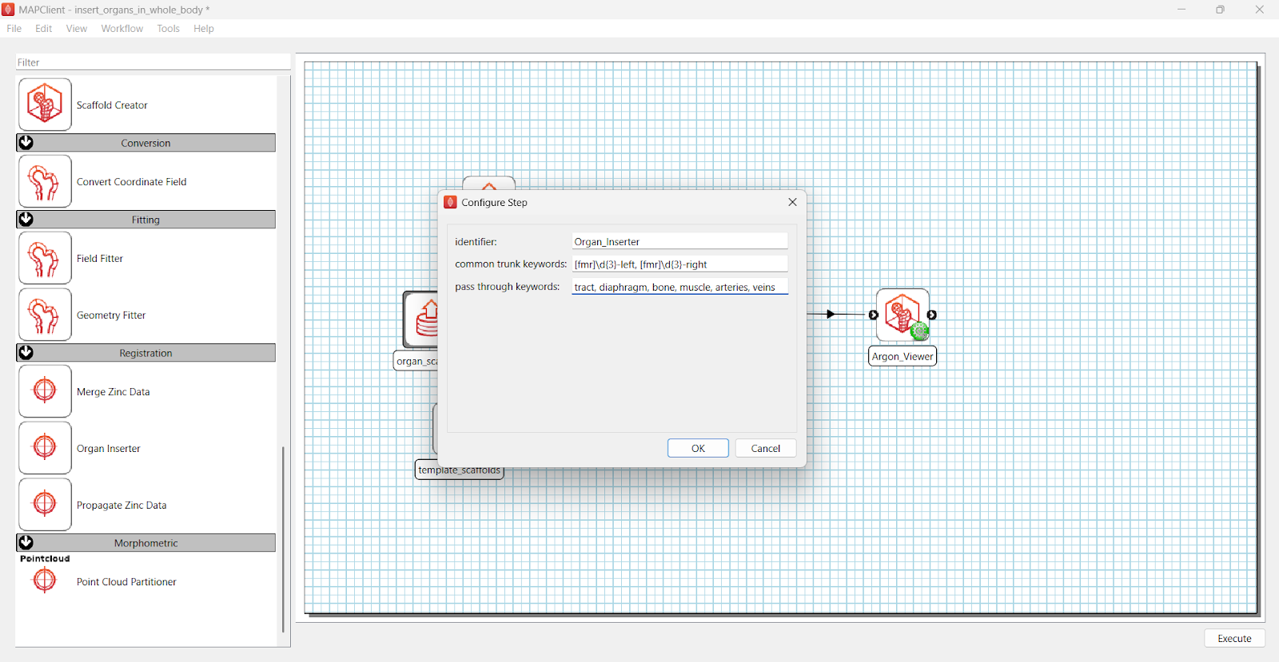
Figure 4. Organ Inserter pre-set configuration dialog.
Muxer step
Connect the output port of the Organ Inserter step to a Muxer step, then connect the Muxer to Argon Viewer. This allows both the Organ Inserter outputs and the whole body scaffold to be passed into Argon Viewer for visualization. Configure the Muxer step as shown in Figure 5 by connecting the whole_body file chooser to the first input port of the Muxer step and the output of Organ Inserter to the second input port of the Muxer step.
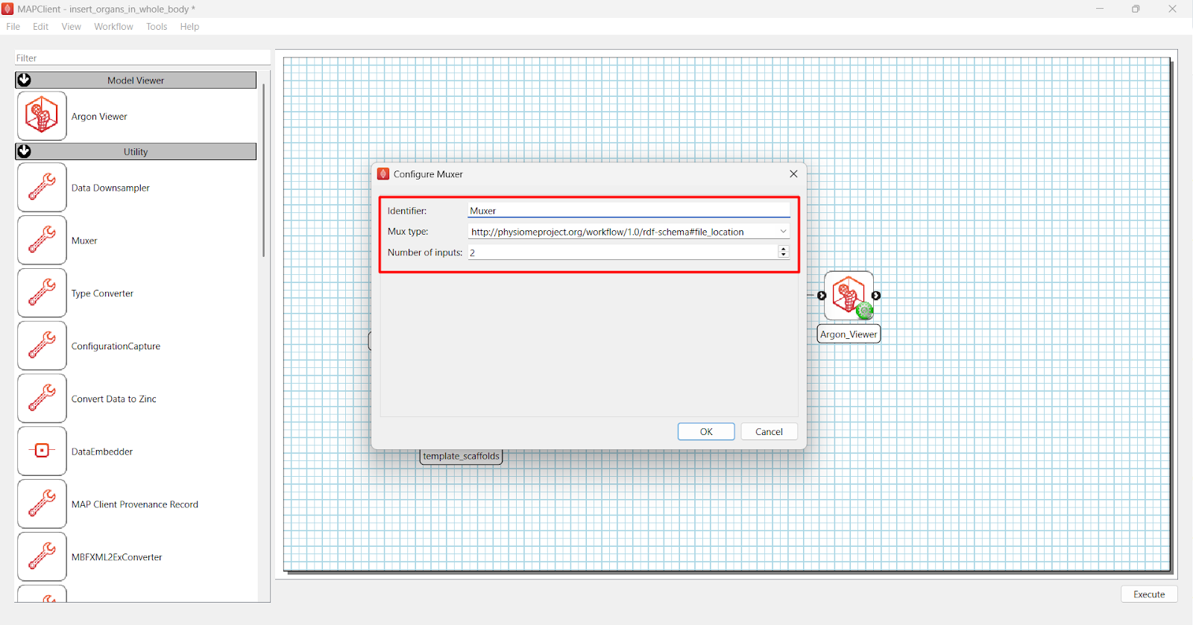
Figure 5. Configuring the Muxer step.
Once the workflow is complete, save it (Ctrl+S) and click Execute.
The Organ Inserter has no user interface and may take some time to process the files.
Step 2: Visualize inserted organs
When processing is finished, the Argon Viewer interface will open.
Add a View and open the Region Editor. Create four child regions using add child region and name them as shown in Figure 6.
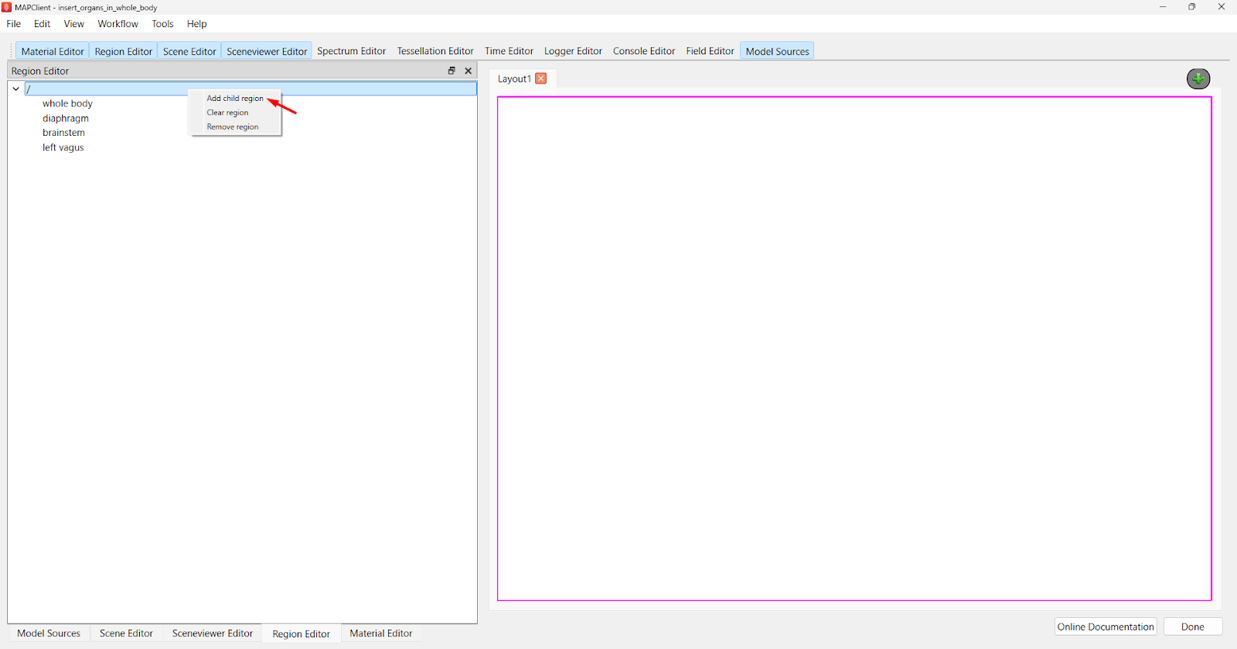
Figure 6. Adding child regions in Region Editor.
Next, open the Model Sources tab in the top panel. Assign each scaffold file to its corresponding child region by clicking the green plus icon (Figure 7).
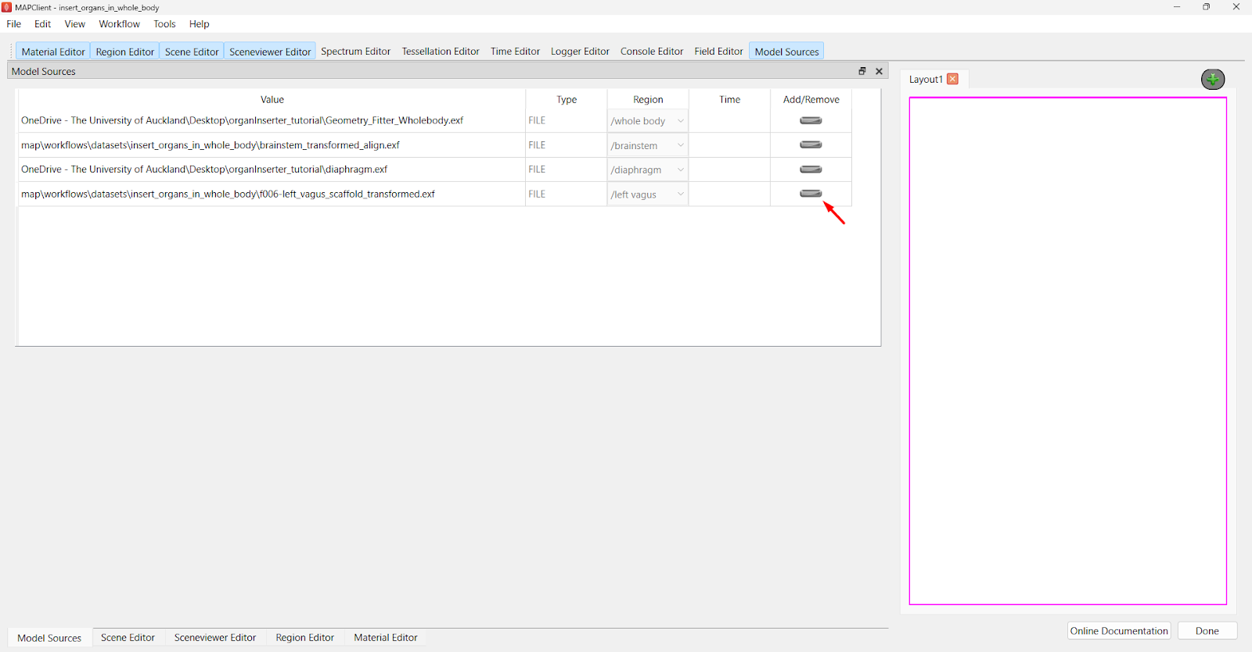
Figure 7. Assigning scaffold files in Model Sources.
Before adding graphics, make the existing tissue material translucent to see the inserted organs clearly by going to Material Editor, double-clicking on tissue and renaming it tissue_translucent. Set Alpha to 0.5.
Since translucent materials are used, also adjust the scene settings in the Sceneviewer Editor by setting Transparency mode to slow.
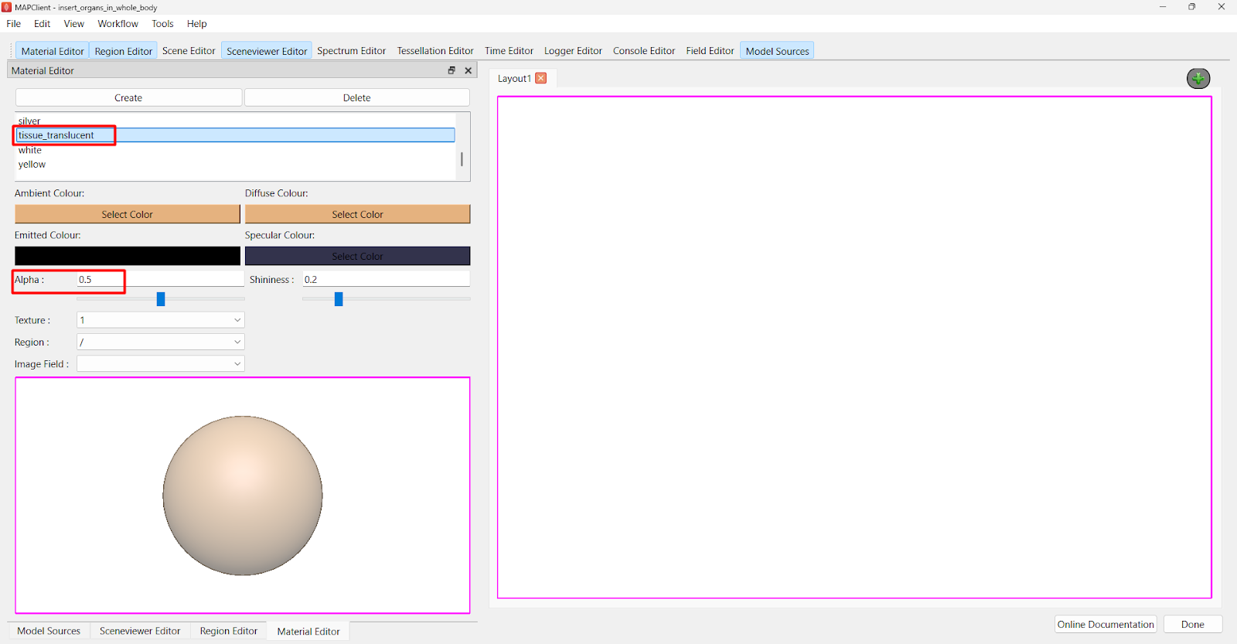
Figure 8. Creating a translucent tissue material.
Now, open the Scene Editor and select /whole body from the Region drop-down menu. Add surfaces with the following settings:
- Boundary mode:
boundary - Face:
any = face - Material:
tissue_translucent
Go to the /brainstem region and add surfaces with the following settings:
- Boundary mode:
boundary - Face:
any = face - Material:
orange
Go to the /diaphragm region and add surfaces with the following settings:
- Boundary mode:
all - Face:
all - Material:
green
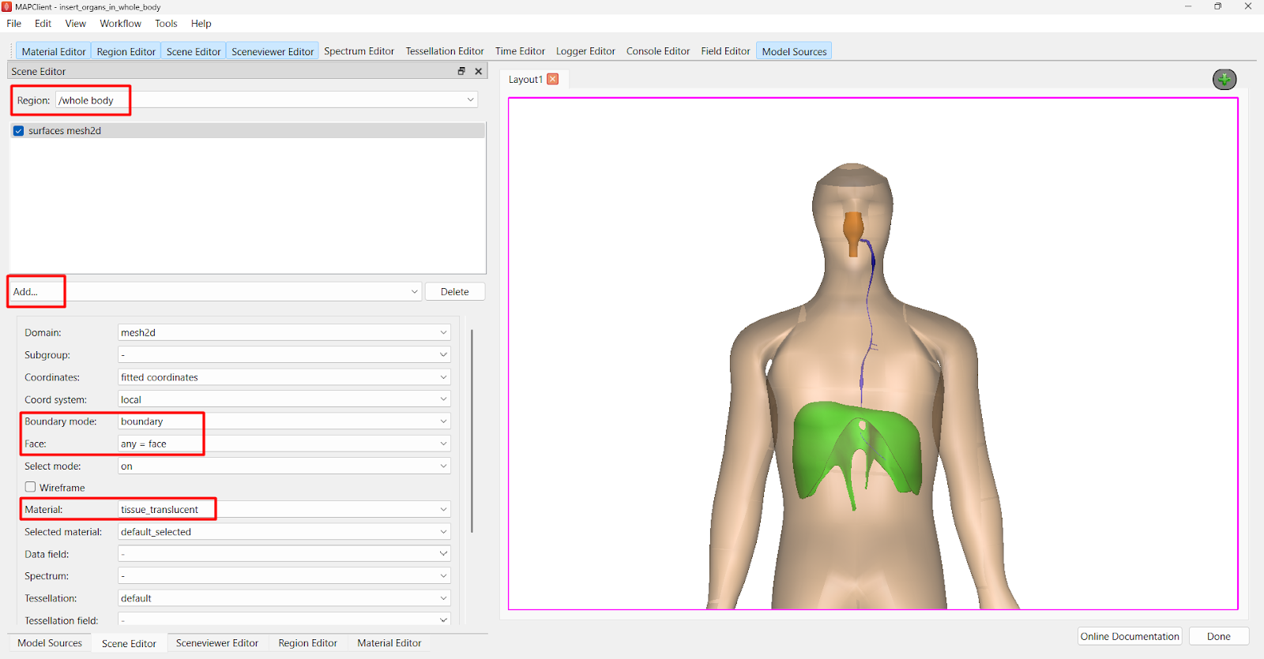
Figure 9. Adding surfaces for the whole body, brainstem, and diaphragm scaffolds.
For the left vagus scaffold, add surfaces the same way, but with one change:
- Subgroup:
epineurium - Boundary mode:
all - Face:
all - Color:
blue
The configuration is shown in Figure 10.
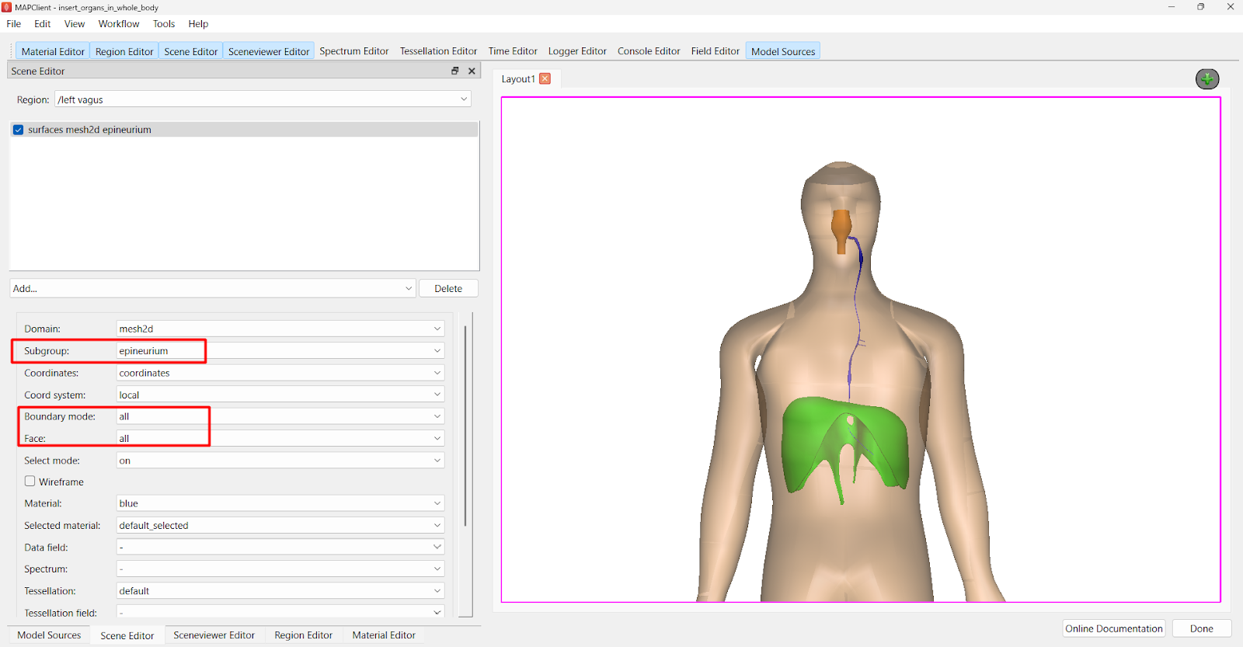
Figure 10. Adding surfaces for the left vagus scaffold.
You have now completed a workflow that inserts multiple organ scaffolds into a fitted whole body scaffold. By configuring the Organ Inserter plugin and visualizing in Argon Viewer, you can clearly see how each scaffold aligns within the body model.
This process can be extended to include additional organs and template scaffolds as needed, simply by updating the workflow configuration. With practice, you can adapt these steps to build increasingly complex scaffold assemblies for your research.
For example, this workflow can be used to insert vagus scaffolds obtained from different subjects, as illustrated in Figure 11.
To do this, create another folder named “insert_multiple_vagus_in_whole_body” and create another workflow following the same steps described at the beginning of this section (Figure 1). On the first *Multiple File Chooser step, select both left vagus files and execute the workflow.
On the Argon viewer, create three child regions named ‘whole body’, ‘subject 1’ and ‘subject 2’. Add surfaces to all these regions following the same steps as before, which should result in a similar image to the one shown in Figure 11.
Using this approach, all vagus scaffolds are aligned within a common coordinate framework, enabling direct comparison of their structures across subjects—something that would be challenging to achieve otherwise.
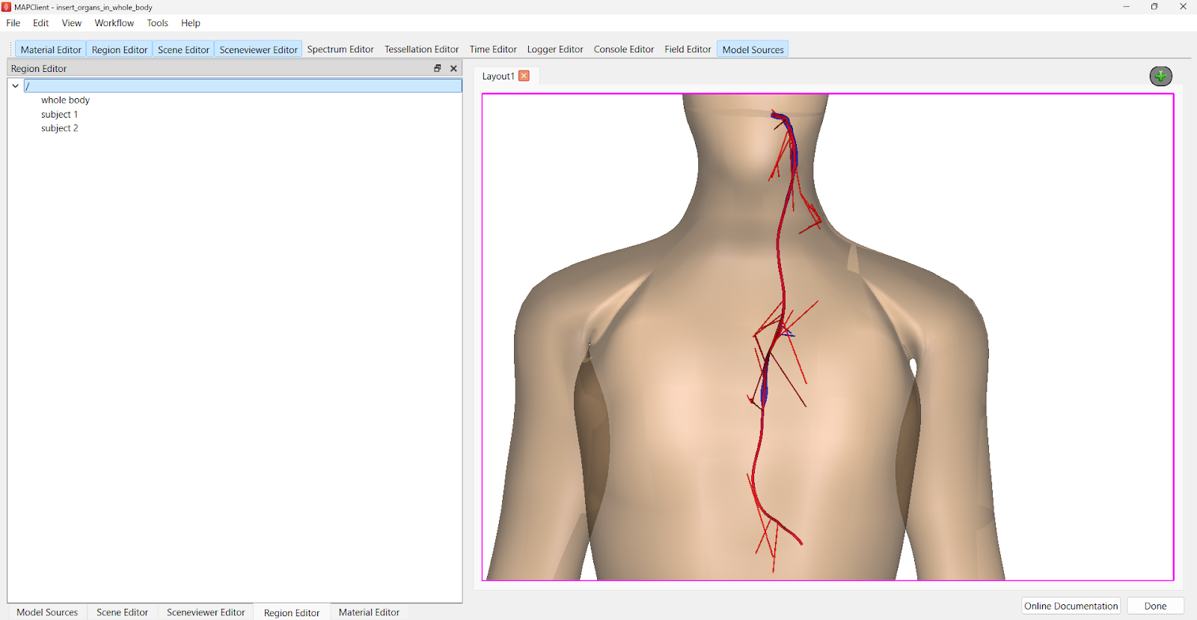
Figure 11. Inserting vagus scaffolds from two different subjects for comparison.
Updated 6 months ago