Demo of Use of Segmentation Conversion Tools for Scaffold Mapping
Background
The SPARC MAP-Core team has established robust data pipelines that enable researchers to map neural, vascular, and anatomical features from 2D and 3D microscopy image data onto anatomical organ scaffolds.
SPARC researchers have used neuron reconstruction and tissue mapping software designed by MBF Bioscience (e.g., Neurolucida 360, Tissue Mapper) to reconstruct morphologies present in microscopy data -- and to represent these morphologies in the standardized, FAIR Neuromorphological File Format. The Neuromorphological File Format is an Extensible Markup Language (XML) format that can be embedded into SPARC MAP-Core anatomical organ scaffolds, as described in MAP-Core Scaffold Mapping Tools.
Purpose
The following instructions will enable researchers to convert neural and anatomical reconstruction data (or “segmentation data”), derived from defined sources outside of MBF Bioscience software, into the Neuromorphological File Format.
The segmentation conversion tools are Python widgets that can be run on Windows or Mac OS. They are designed to be utilized by both the public (pre-dataset submission) and by SPARC mapping curators (post-dataset submission).
Getting Started
Accessing Conversion Tools
a. To gain access to conversion tools, please email [email protected].
b. Download and install the latest version of Python here.
Supported Input Formats
Two conversion widgets are currently available: a FIJI-to-XML and an IMS-XML converter.
- The IMS-to-XML converter supports non-image data derived in Imaris applications (.ims). Please note that Imaris MegaSurface elements are not fully supported for conversion at this time.
- The FIJI-to-XML converter supports input of ROI (.txt) and CellCounter (.xml) data derived in FIJI (ImageJ).
IMS-to-XML Conversion Tool
Step 1. Get Started
In the folder containing the IMS to XML Conversion Tool, double-click “install_requirements.bat” to install the widget. Next, identify locations of the file(s) in need of conversion. After the IMS-to-XML conversion, the output file (.xml) will appear in the same file location as the input file (.ims).
Step 2. Run
a. Launch the IMS-to-XML converter by double clicking “mfpentry.pyw”.
b. Select “Add files” and select all .ims files from your file directory that require conversion.
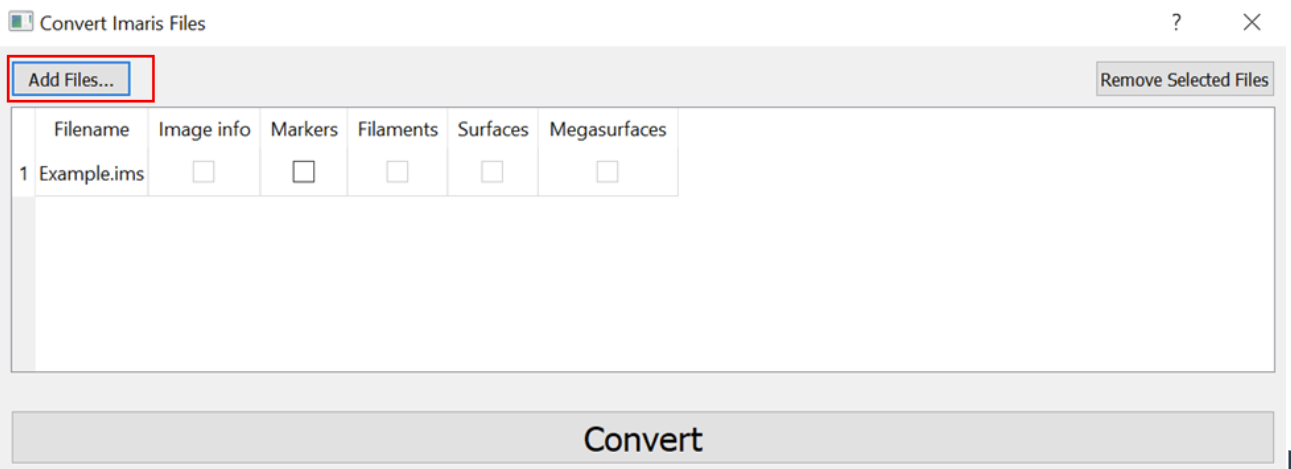
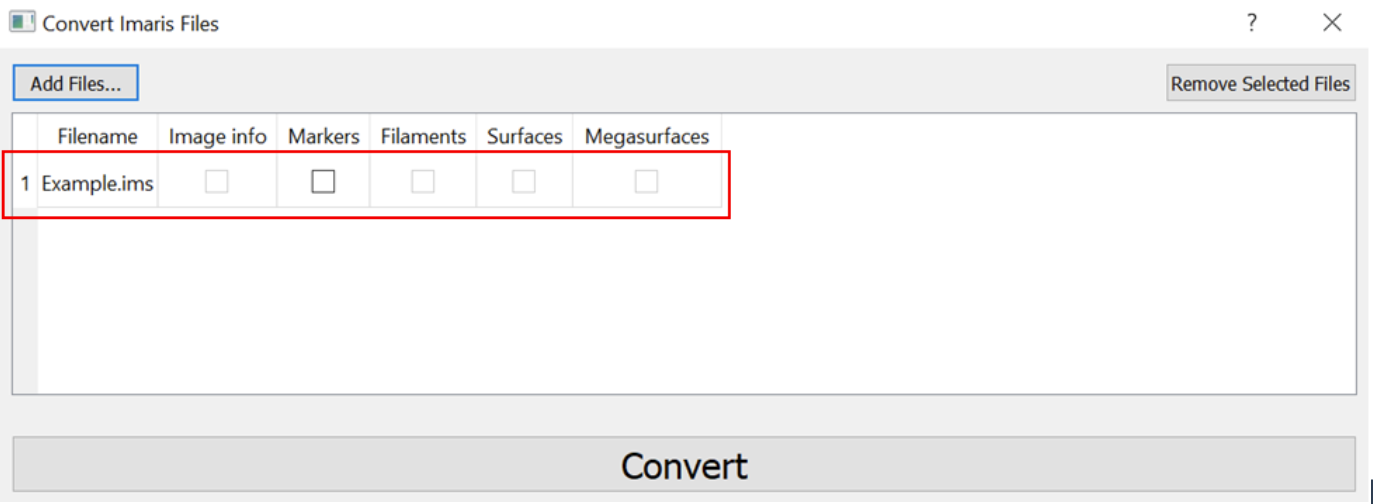
c. The selected files will now appear in numbered rows in the conversion window. The column headers identify what Imaris segmentation features were detected in each individual file. Only those features detected will be eligible for selection. Select which features you would like to be converted to .xml format. (Note: megasurfaces can be detected, but conversion is not fully supported at this time).
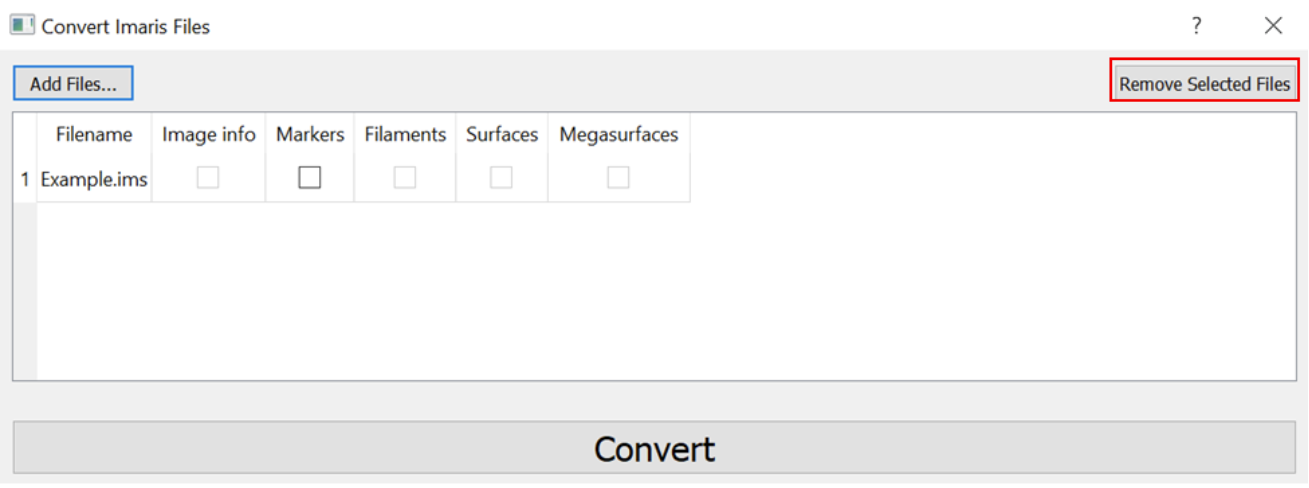
d. If applicable, select unwanted Imaris files in the conversion window by selecting each file and clicking “Remove Selected Files”. If there are no files to be removed, continue to the next step.
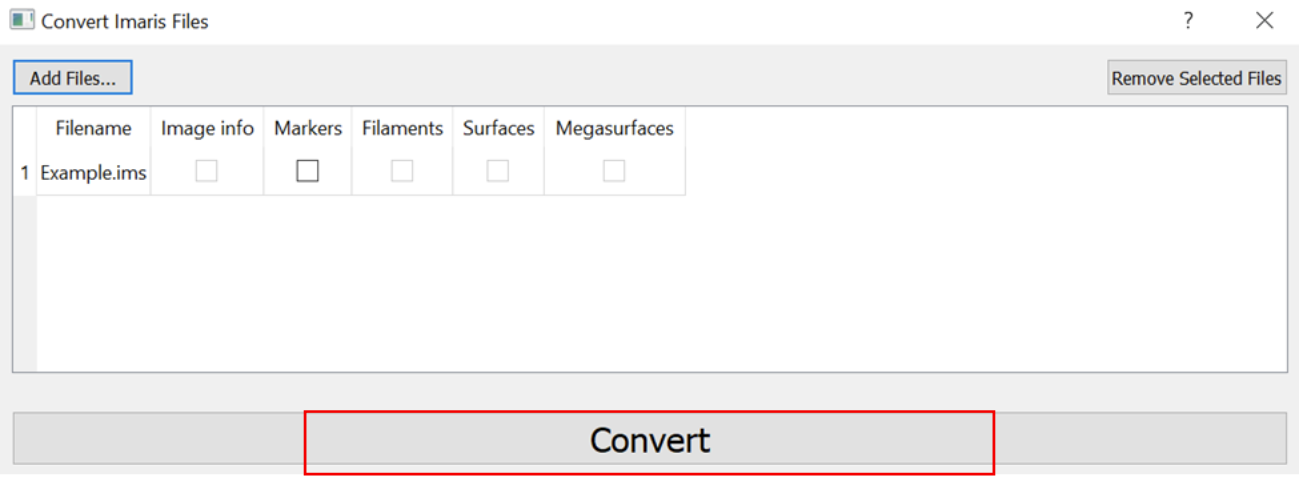
e. Once all desired features for conversion are selected, click “Convert” to convert your .ims file(s) to .xml.
f. Check, add, and/or amend subject metadata using the Verify SPARC XML tool (instructions below).
FIJI-to-XML Conversion Tool
Step 1. Get Started
Prior to conversion, the .roi file(s) must be exported as .txt in FIJI. For assistance, please contact a SPARC MBF representative at [email protected]. The CellCounter data (.xml) can be imported directly into the FIJI-to-XML conversion tool.
In the folder containing the FIJI to XML Conversion Tool, double-click “install_requirements.bat” to install the widget. Next, identify locations of the file(s) in need of conversion.
Step 2. Run
a. Launch the FIJI-to-XML converter by double clicking “main.pyw”.
b. Select “Add…” and select all FIJI .txt and .xml files that require conversion. The selected files will appear in the conversion window.
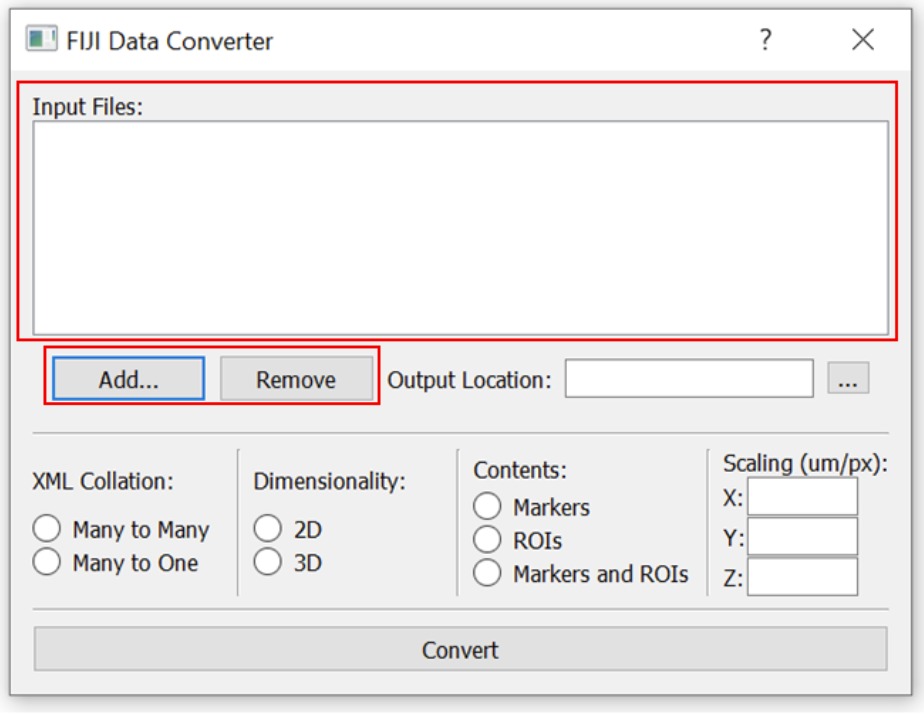
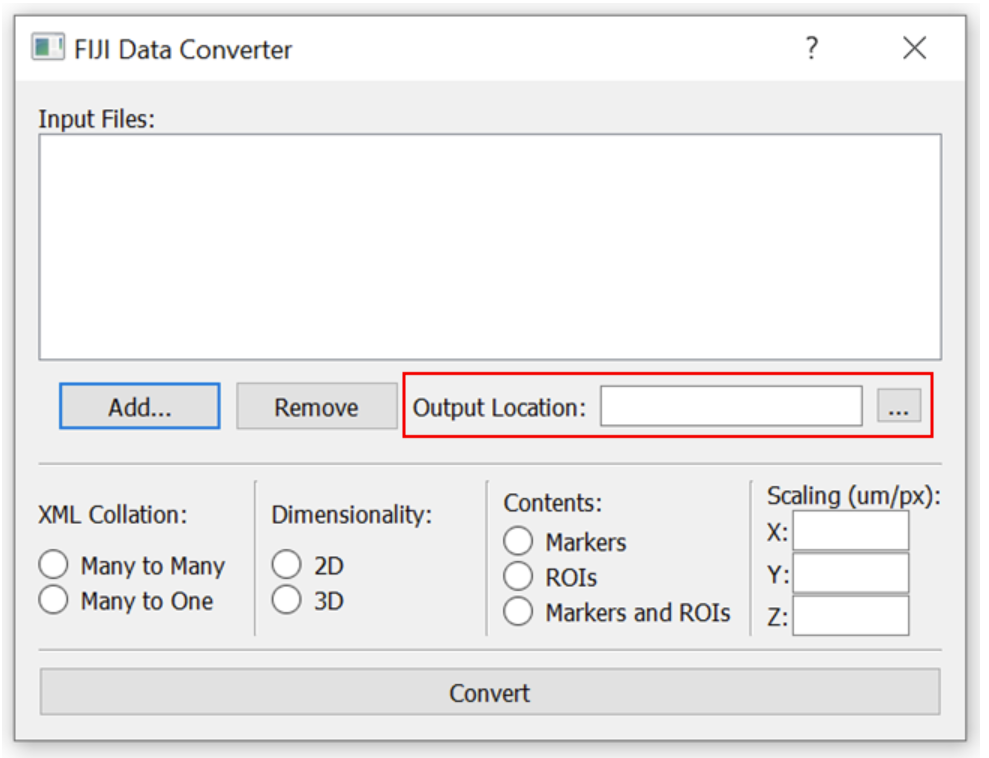
c. Select the output location.
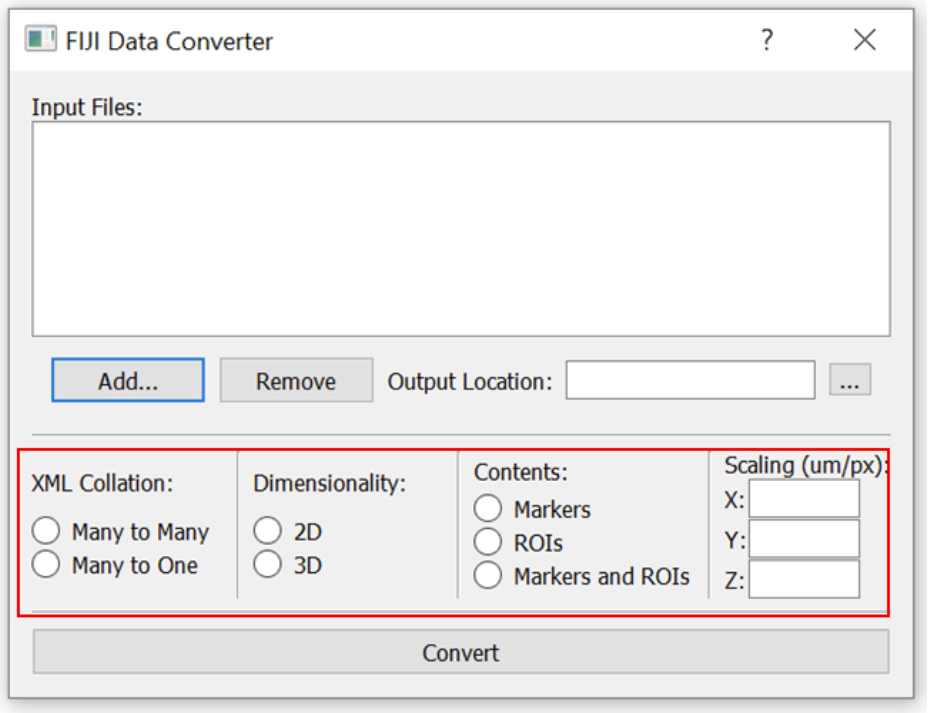
d. Specify the parameters of the output .xml file.
- Select whether all of the input files are being compiled into one output file (Many to One) or each input file will correspond to one output file (Many to Many).
- Select whether the output .xml will be 2D or 3D.
- Select what the input FIJI files contain (Markers, ROIs, or both).
- Lastly, enter the xy or xyz (when applicable) scaling in microns/pixel.
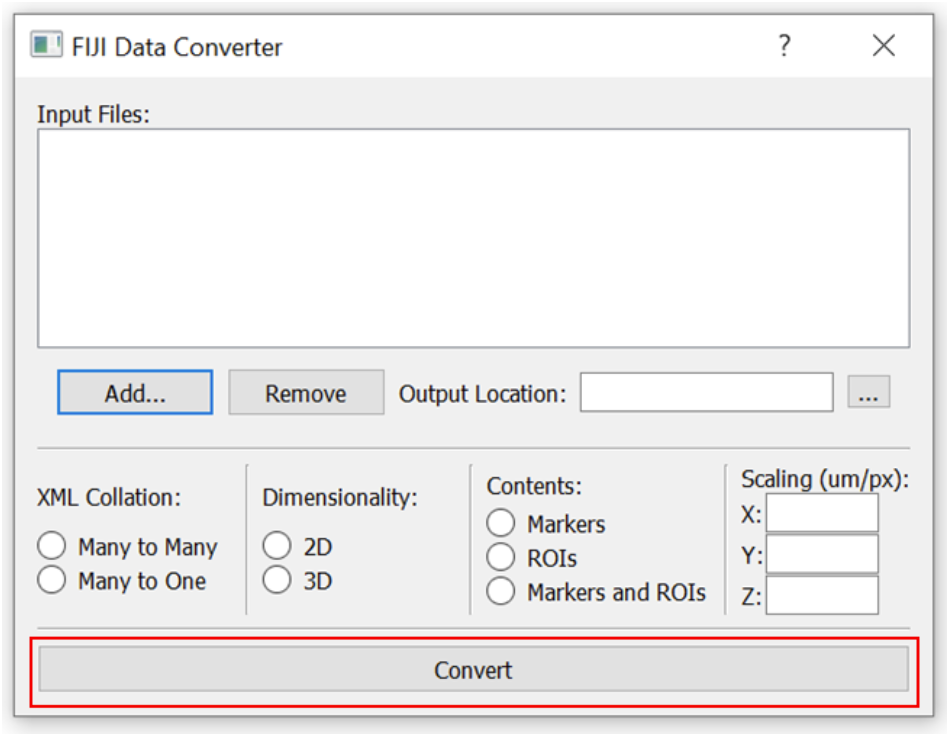
e. When your parameters are set, select “Convert”. The output .xml will be produced in the specified folder.
f. Check, add, and/or amend subject metadata using the Verify SPARC XML tool (instructions below).
Verify SPARC XML Tool
Step 1. Get Started
Reminder: To gain access to conversion tools, please email [email protected].
In the folder containing the Verify SPARC XML Tool, double click “install_requirements.bat” to install the widget. Next, identify locations of the file(s) in need of verification.
Step 2. Run
a. Launch the tool by double clicking “main.pyw”.
b. Select “Add files” and select all .xml files from your file directory that require subject metadata addition or verification.
c. Select “Add files” to input newly converted .XML files to the dialog window.
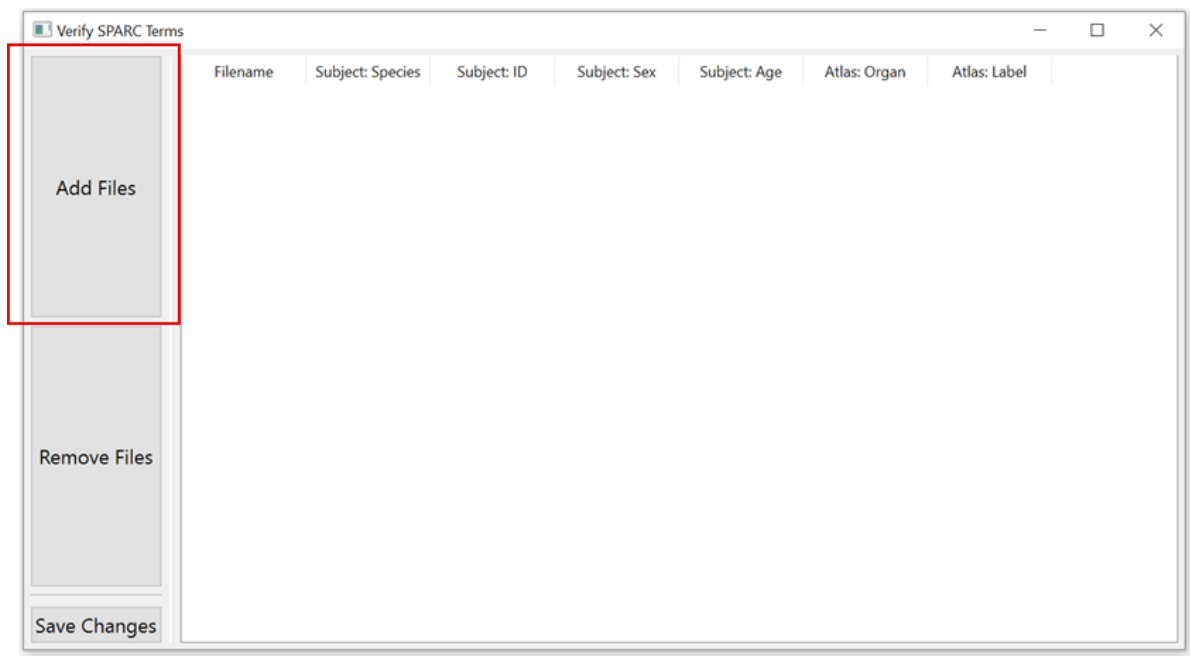
d. SPARC Subject metadata will populate in its respective column if it exists. If subject metadata does not exist, use this tool to add required SPARC subject metadata (Species, Organ, and Atlas) and optional subject metadata (Subject ID).
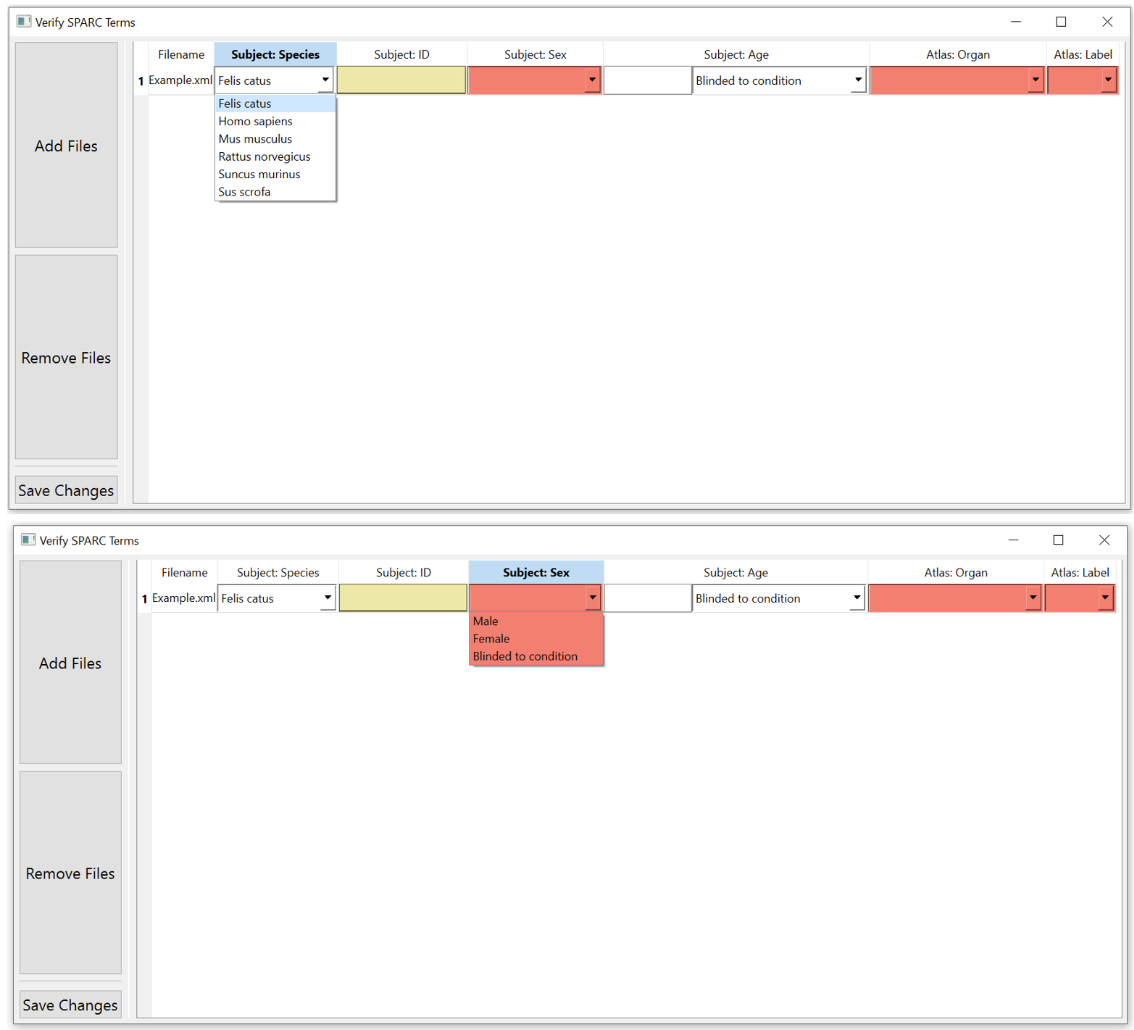
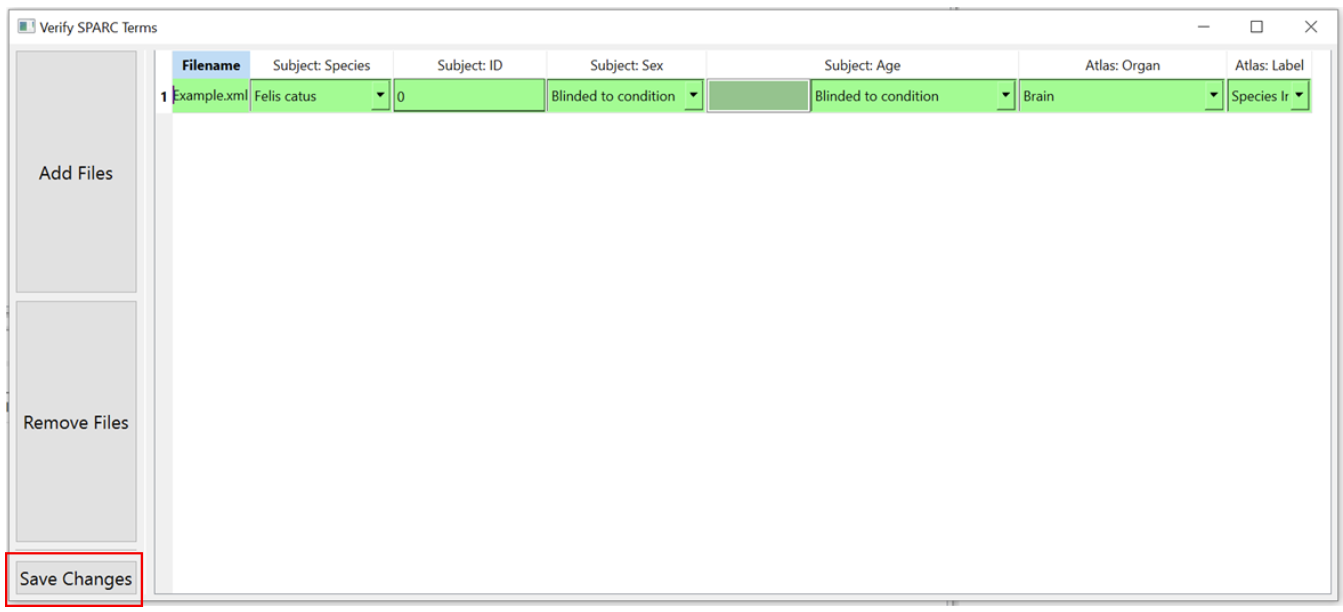
e. The required metadata columns will be red until they are filled in. Once each column is filled, the corresponding row will become green.
f. Once you are satisfied with your subject metadata, click “Save Changes”.
Updated 11 months ago