Organ Scaffold Reuse/Export
How to reuse a SPARC organ scaffold and export to a user defined output format
We are going to reuse a SPARC organ scaffold and export it to a user defined output with the mapping tools.
First we are going to search the SPARC portal for the dataset which contains the information on the organ scaffold we wish to reuse. Then we will create a workflow to retrieve the organ scaffold information and create our own visualisation of the organ scaffold. We will then change this workflow to incorporate a new step, which we will create and develop so that we can export the scaffold to a new format.
To follow this tutorial we will need the latest version of the mapping tools .
Setup
We are going to search the SPARC portal for an organ scaffold.
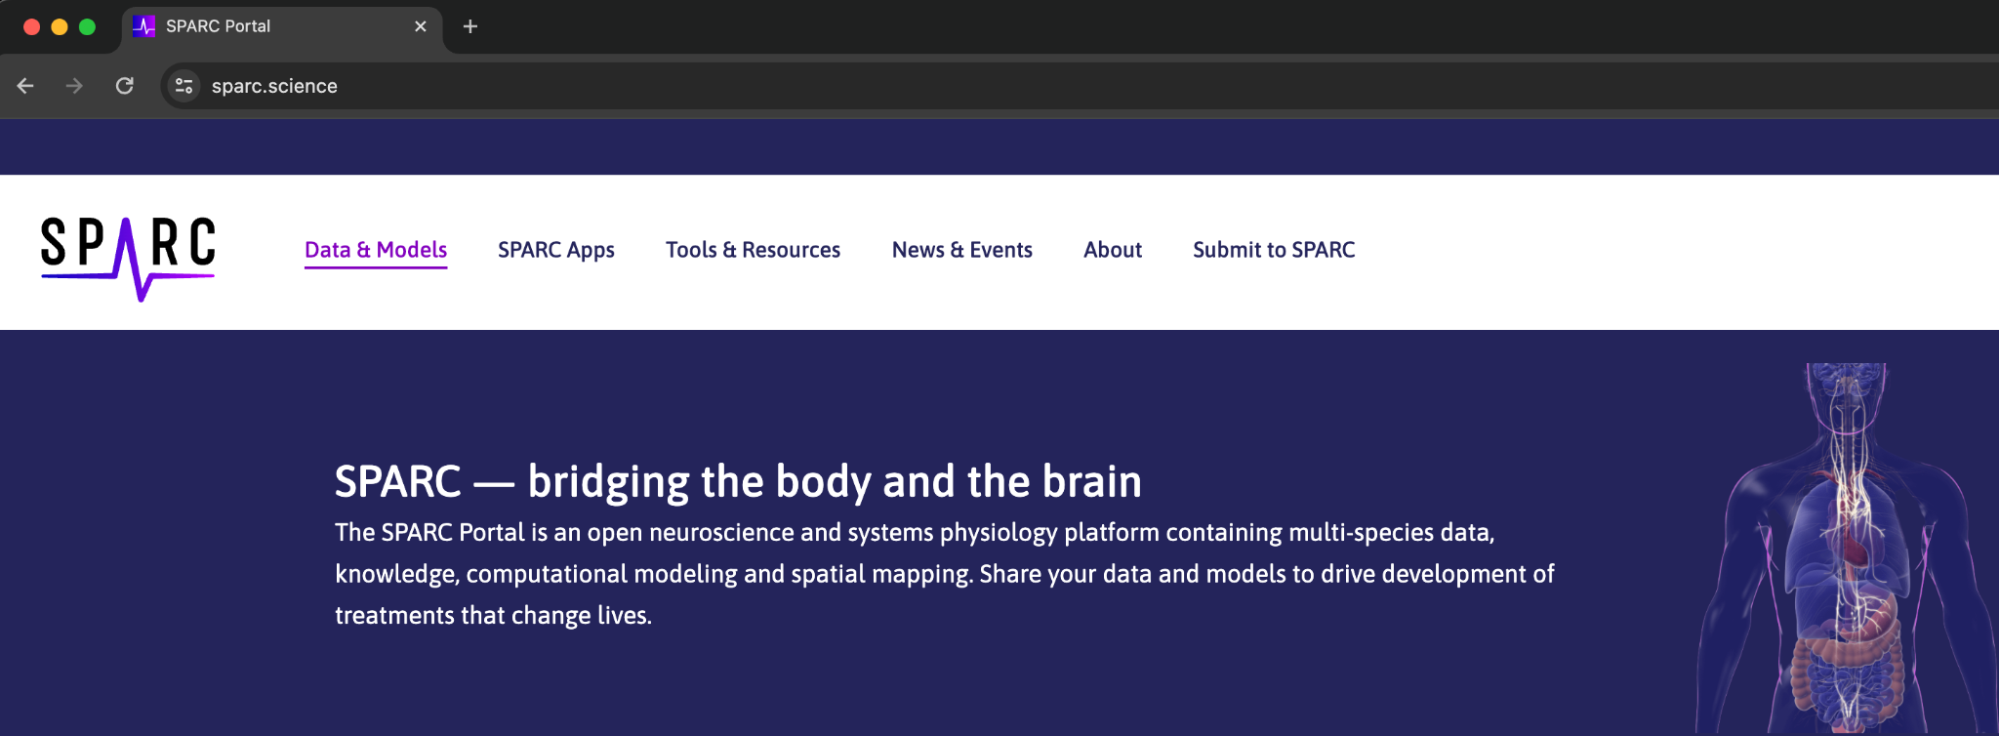
Click on the Data & Models header link to take us to the search page for data and model datasets.
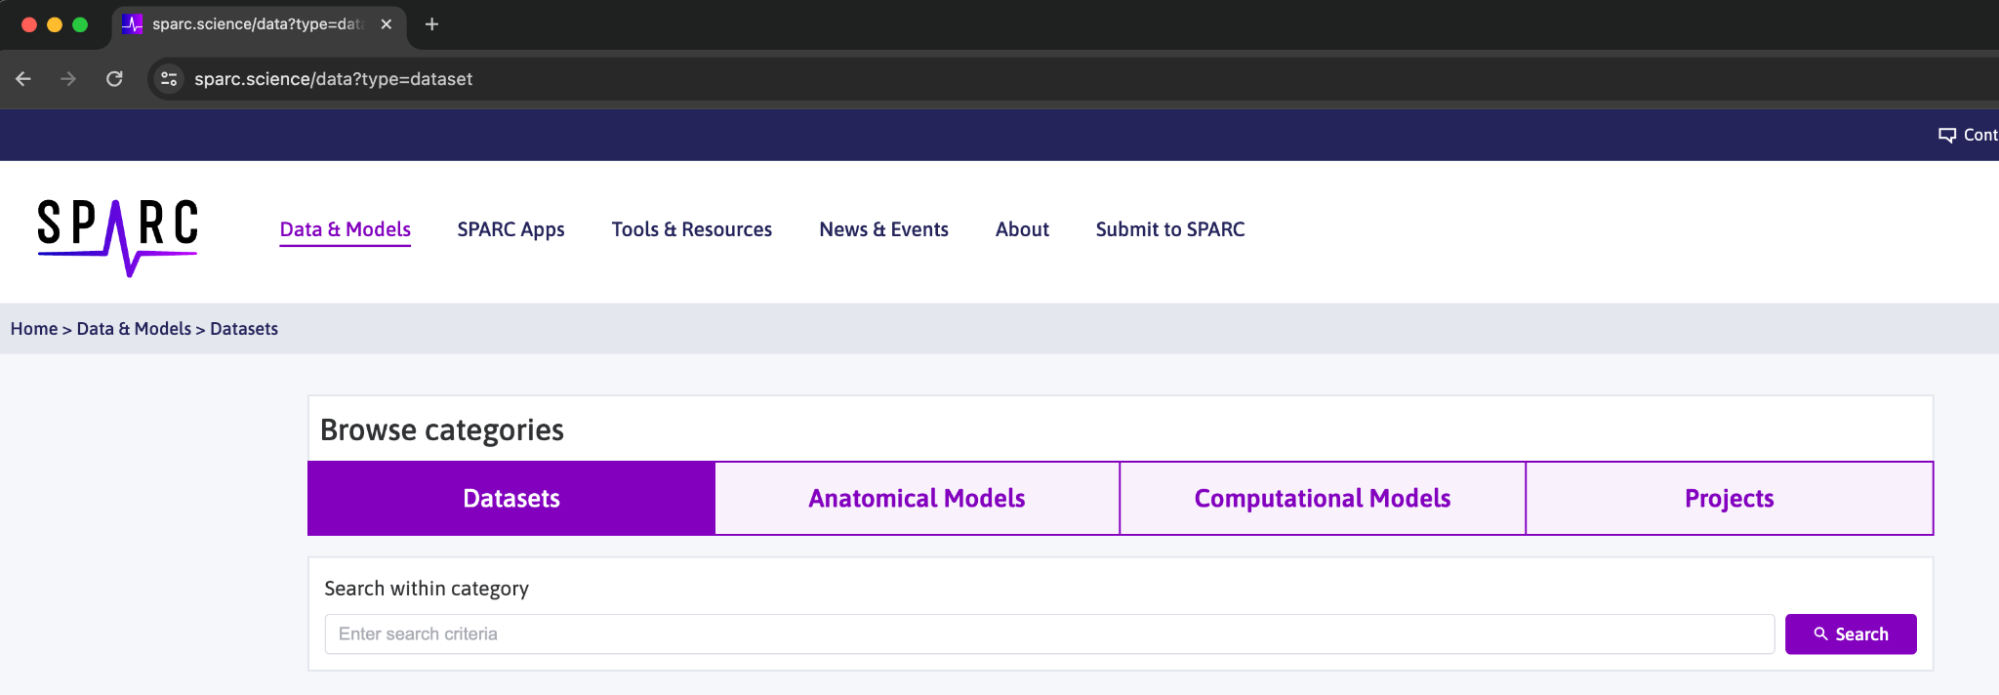
In the Data & Models page select the Anatomical Models subsection header link, this will restrict our search to just anatomical models and not all datasets, meaning we can make our search term simpler and it will return a smaller selection of results.
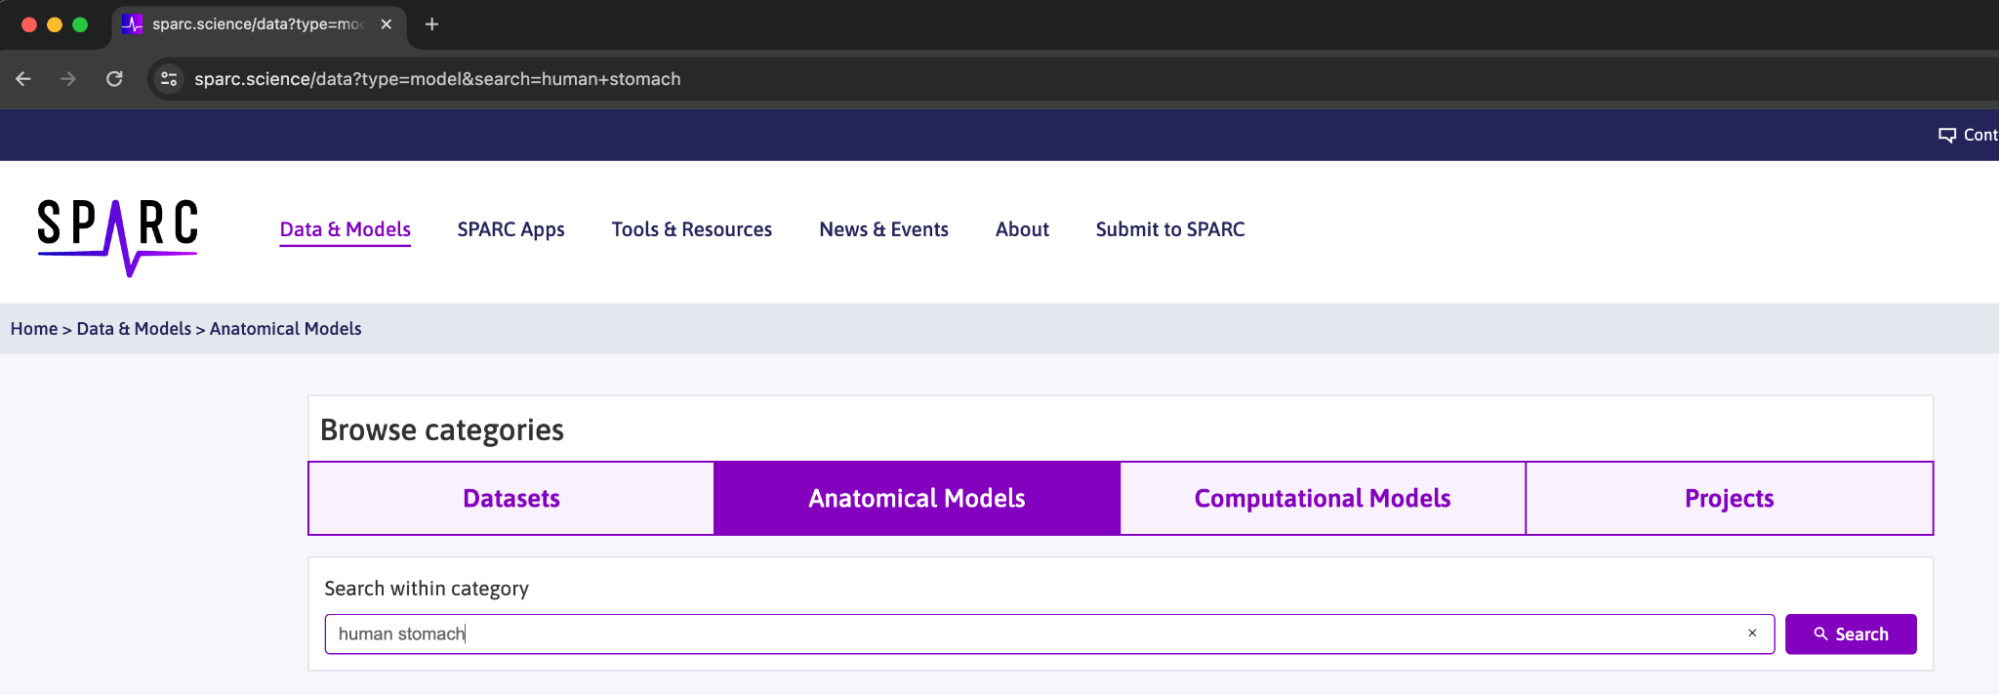
In the search box enter human stomach and click the Search button.
In the list of returned datasets scroll down to find the Generic human stomach scaffold and click on the heading to open this dataset.
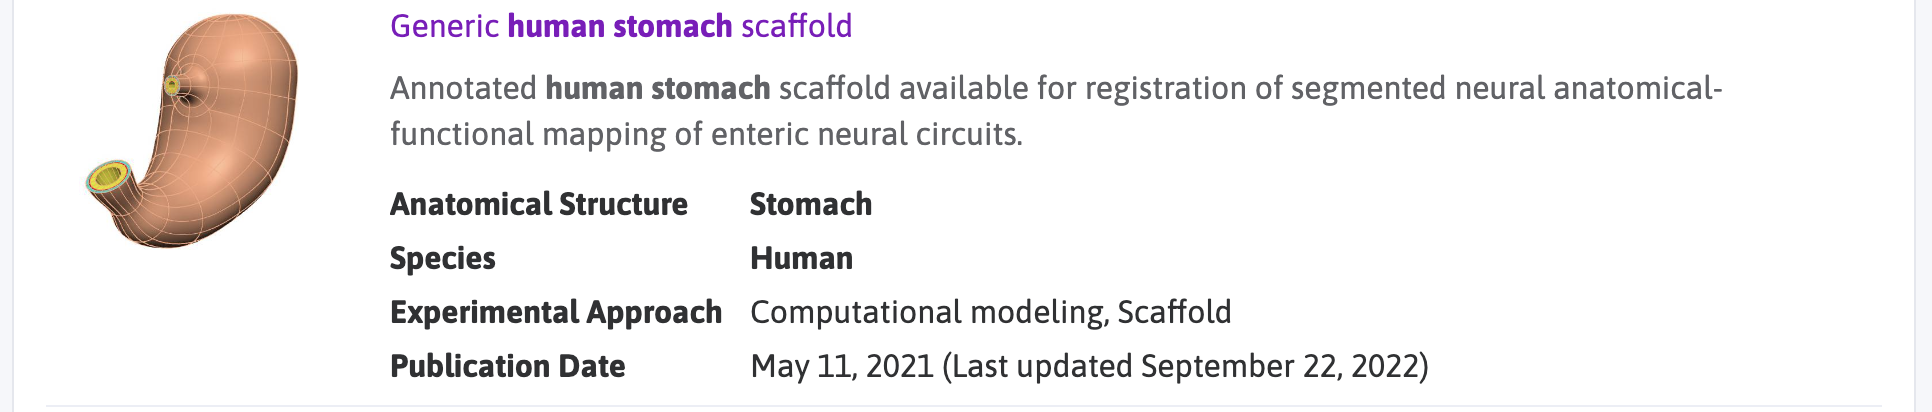
We will use this organ scaffold to create our own visualisation of the human stomach and then export it to our own format creating a new mapping tools workflow step.
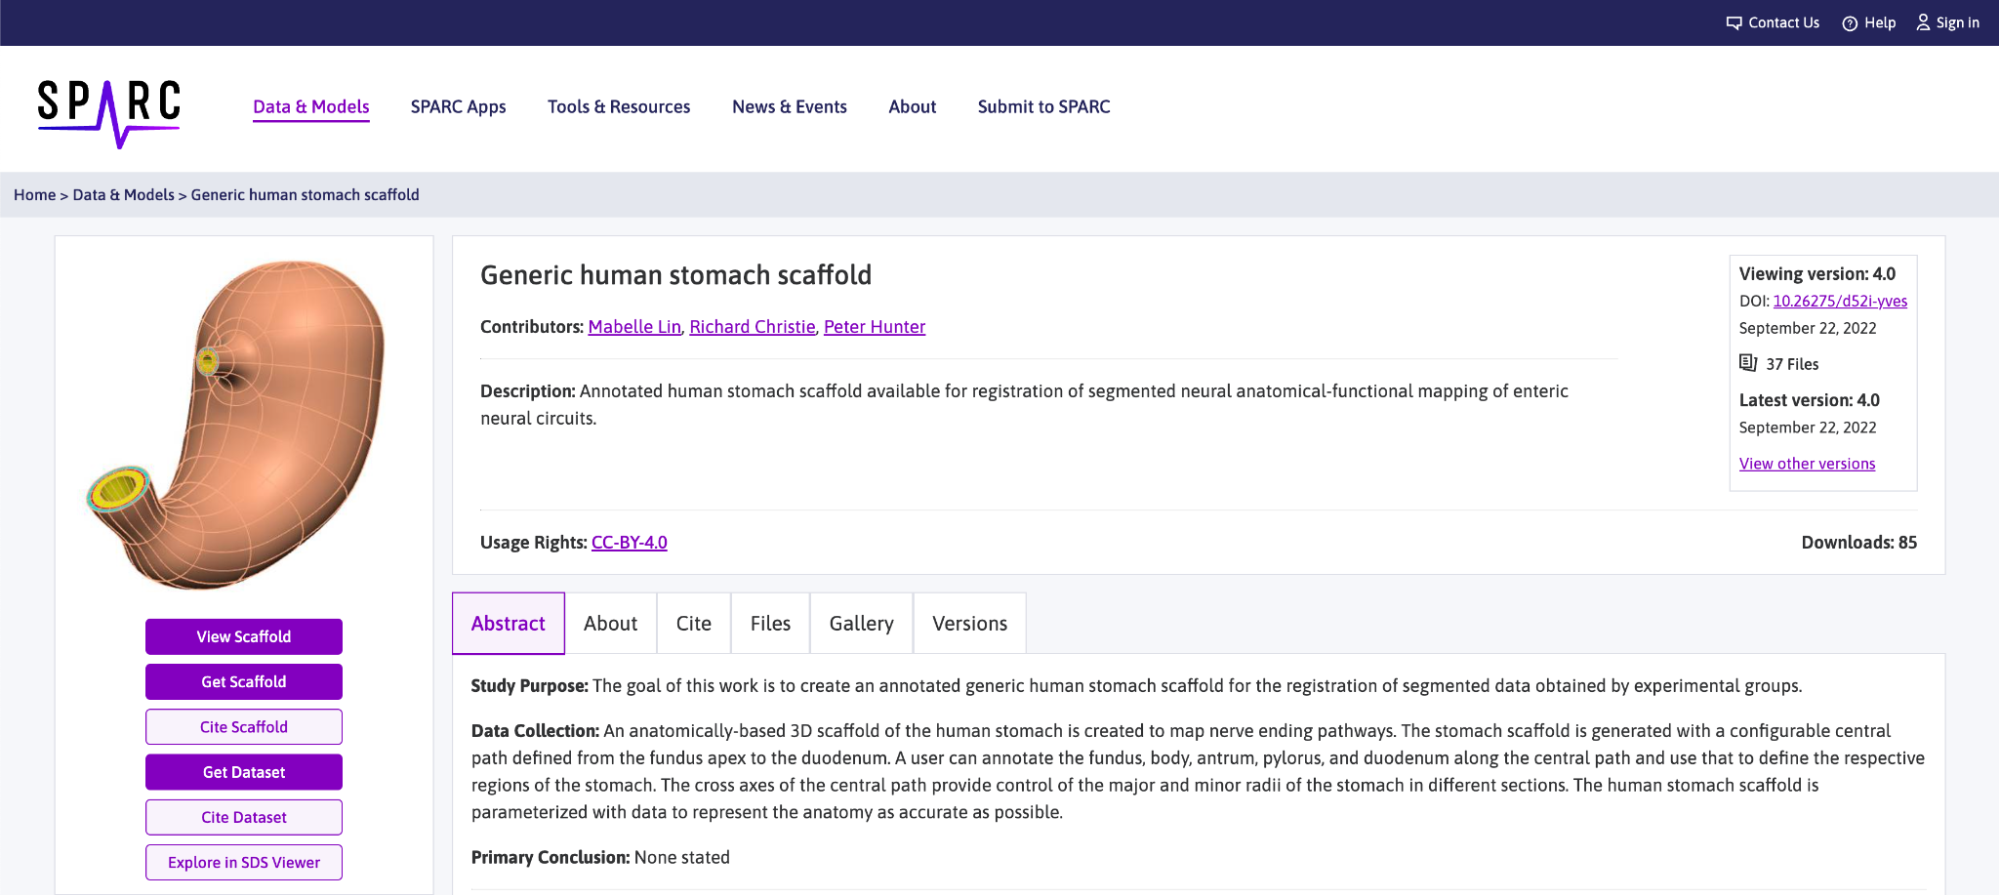
The information that we need for retrieving data from the portal through the mapping tools is the DOI found in the top right corner of the dataset page.
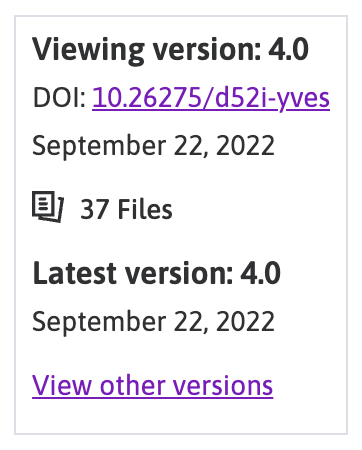
The precise information that we need is the 10.26275/d52i-yves DOI reference, we will keep this information and use it later when we are ready to retrieve the file we need from the SPARC portal.

Prepare Workflow
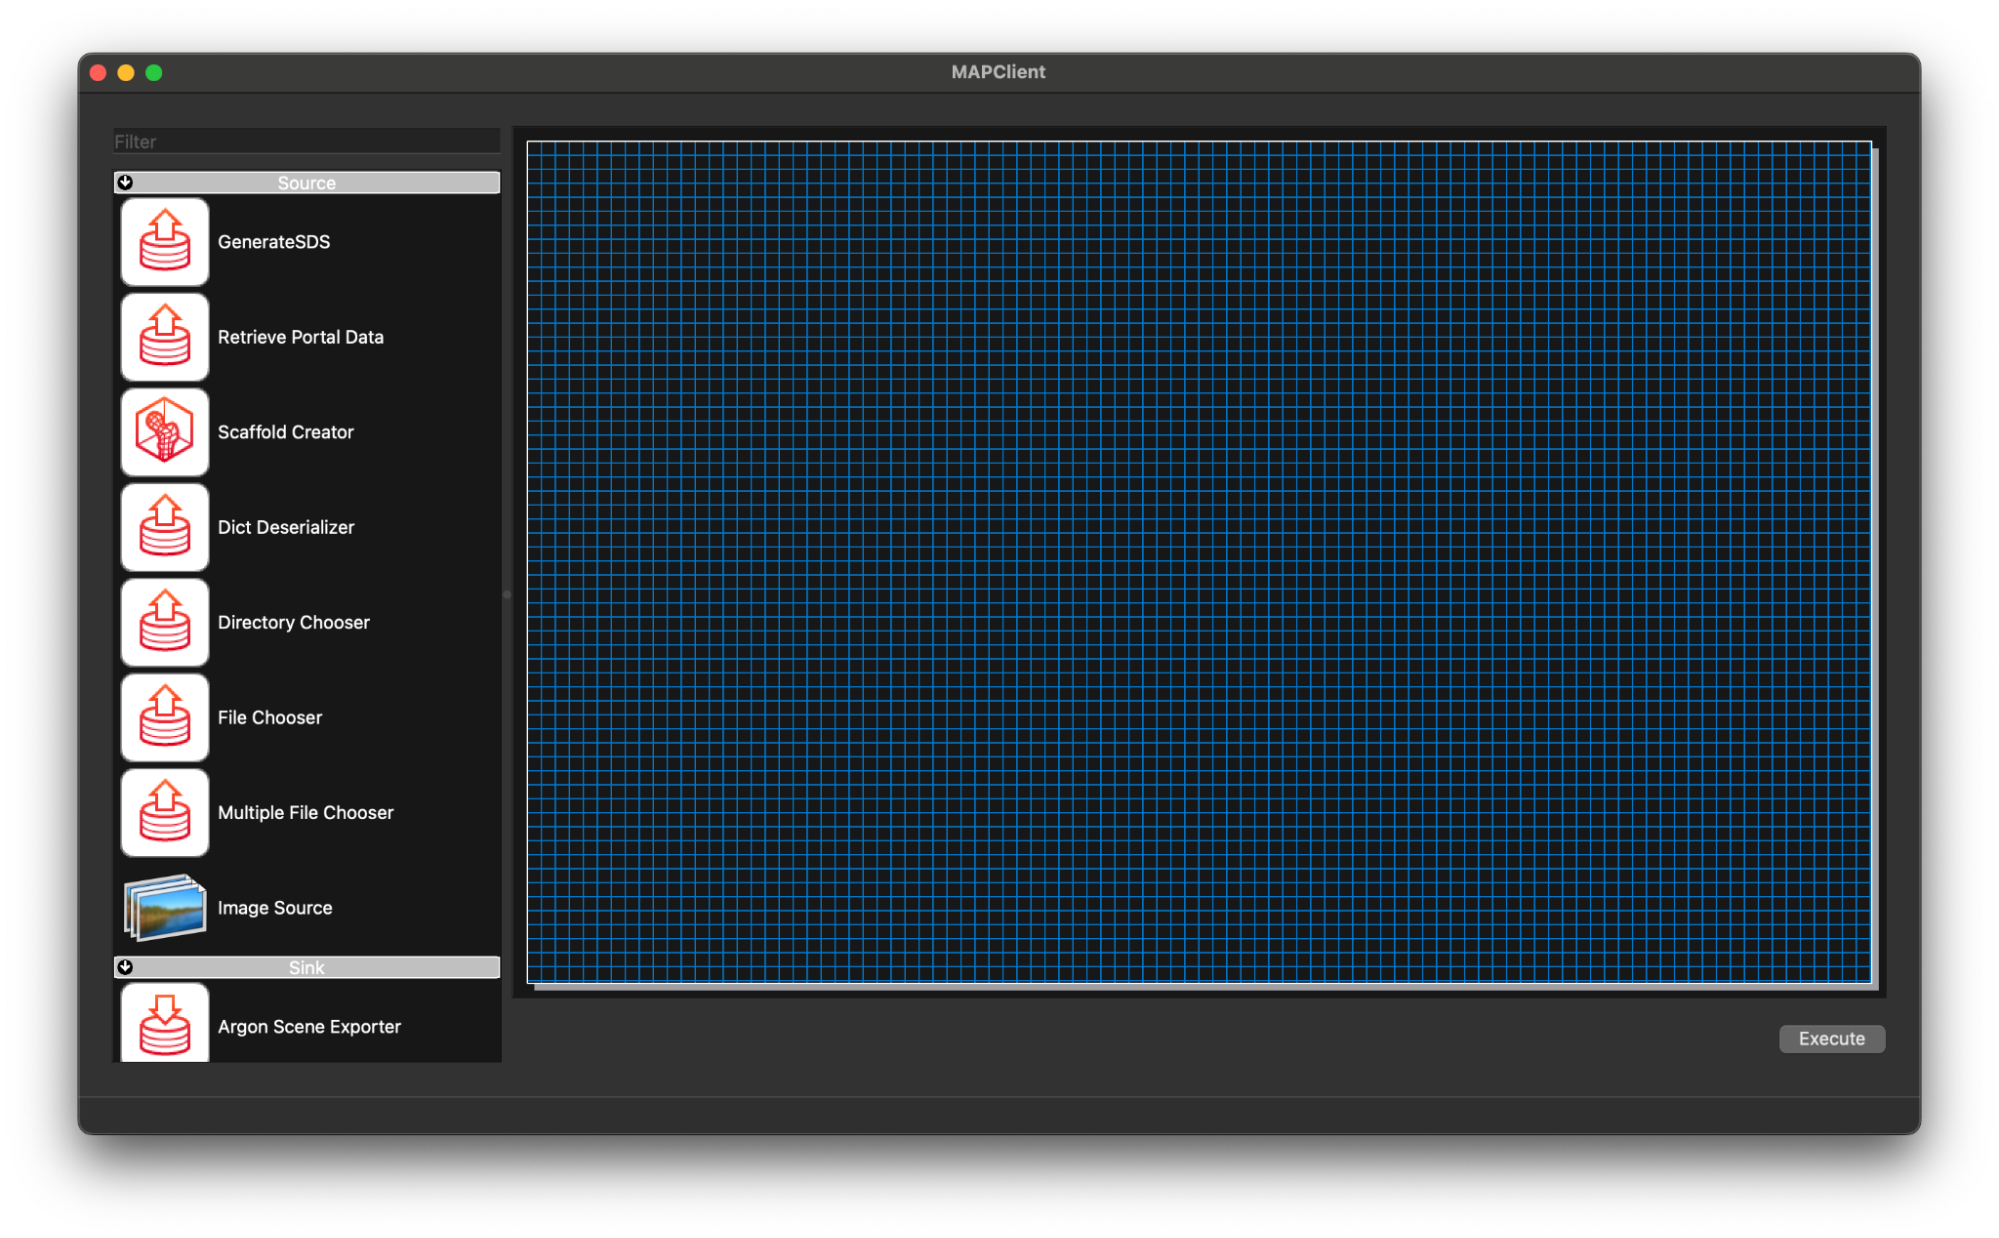
Open the mapping tools and create a new workflow CTRL-N (CMD+N, macOS).
As this is a new workflow let’s create in a workflows directory on the Desktop and call it export-organ-scaffold. Create both directories (workflows, export-organ-scaffold) if you don’t already have a workflows directory on your Desktop.

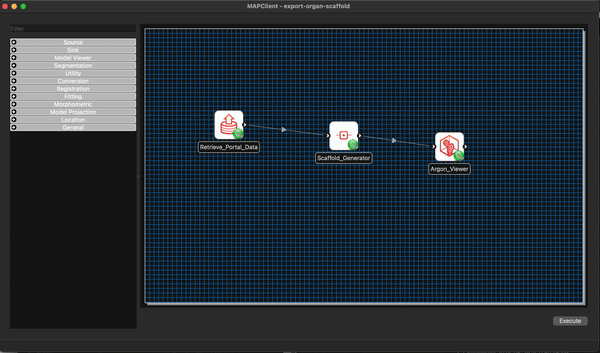
The first thing we are going to do is create a workflow that downloads the file(s) we want from the SPARC portal and creates a visualisation of our making for the human stomach organ scaffold.
Start by adding a Retrieve Portal Data step to the workflow. Use the filter at the top of the step list to filter out some of the steps. Typing re into the filter box should be enough to filter down the list of steps to make finding the step we want easier.

Drag and drop the Retrieve Portal Data step to the workflow canvas.
Next we will add the Scaffold Generator step to the workflow using the same process, except this time we will use the filter term sc.

Lastly we will add the Argon Viewer step to the workflow canvas. Again, we follow the same process as before but use the filter term ar.

Now we connect the workflow, in this case the job is particular simple the output of the Retrieve Portal Data step will go to the Scaffold Generator step, and the output of the Scaffold Generator step will go to the input of the Argon Viewer step. To make the connections click on the output port of the source step and drag it to the input port of the target step. We will also save the workflow at this point CTRL-S (CMD-S macOS).

We can see in the workflow that all the steps are correctly configured (the green gear icon in the bottom right corner of the step icon signifies a correctly configured step) with their default values, and we will keep these values as is. That being said, the workflow is ready to execute.
Execute the Workflow to Create Visualisation
Execute the workflow CTRL-X (CMD-X macOS).
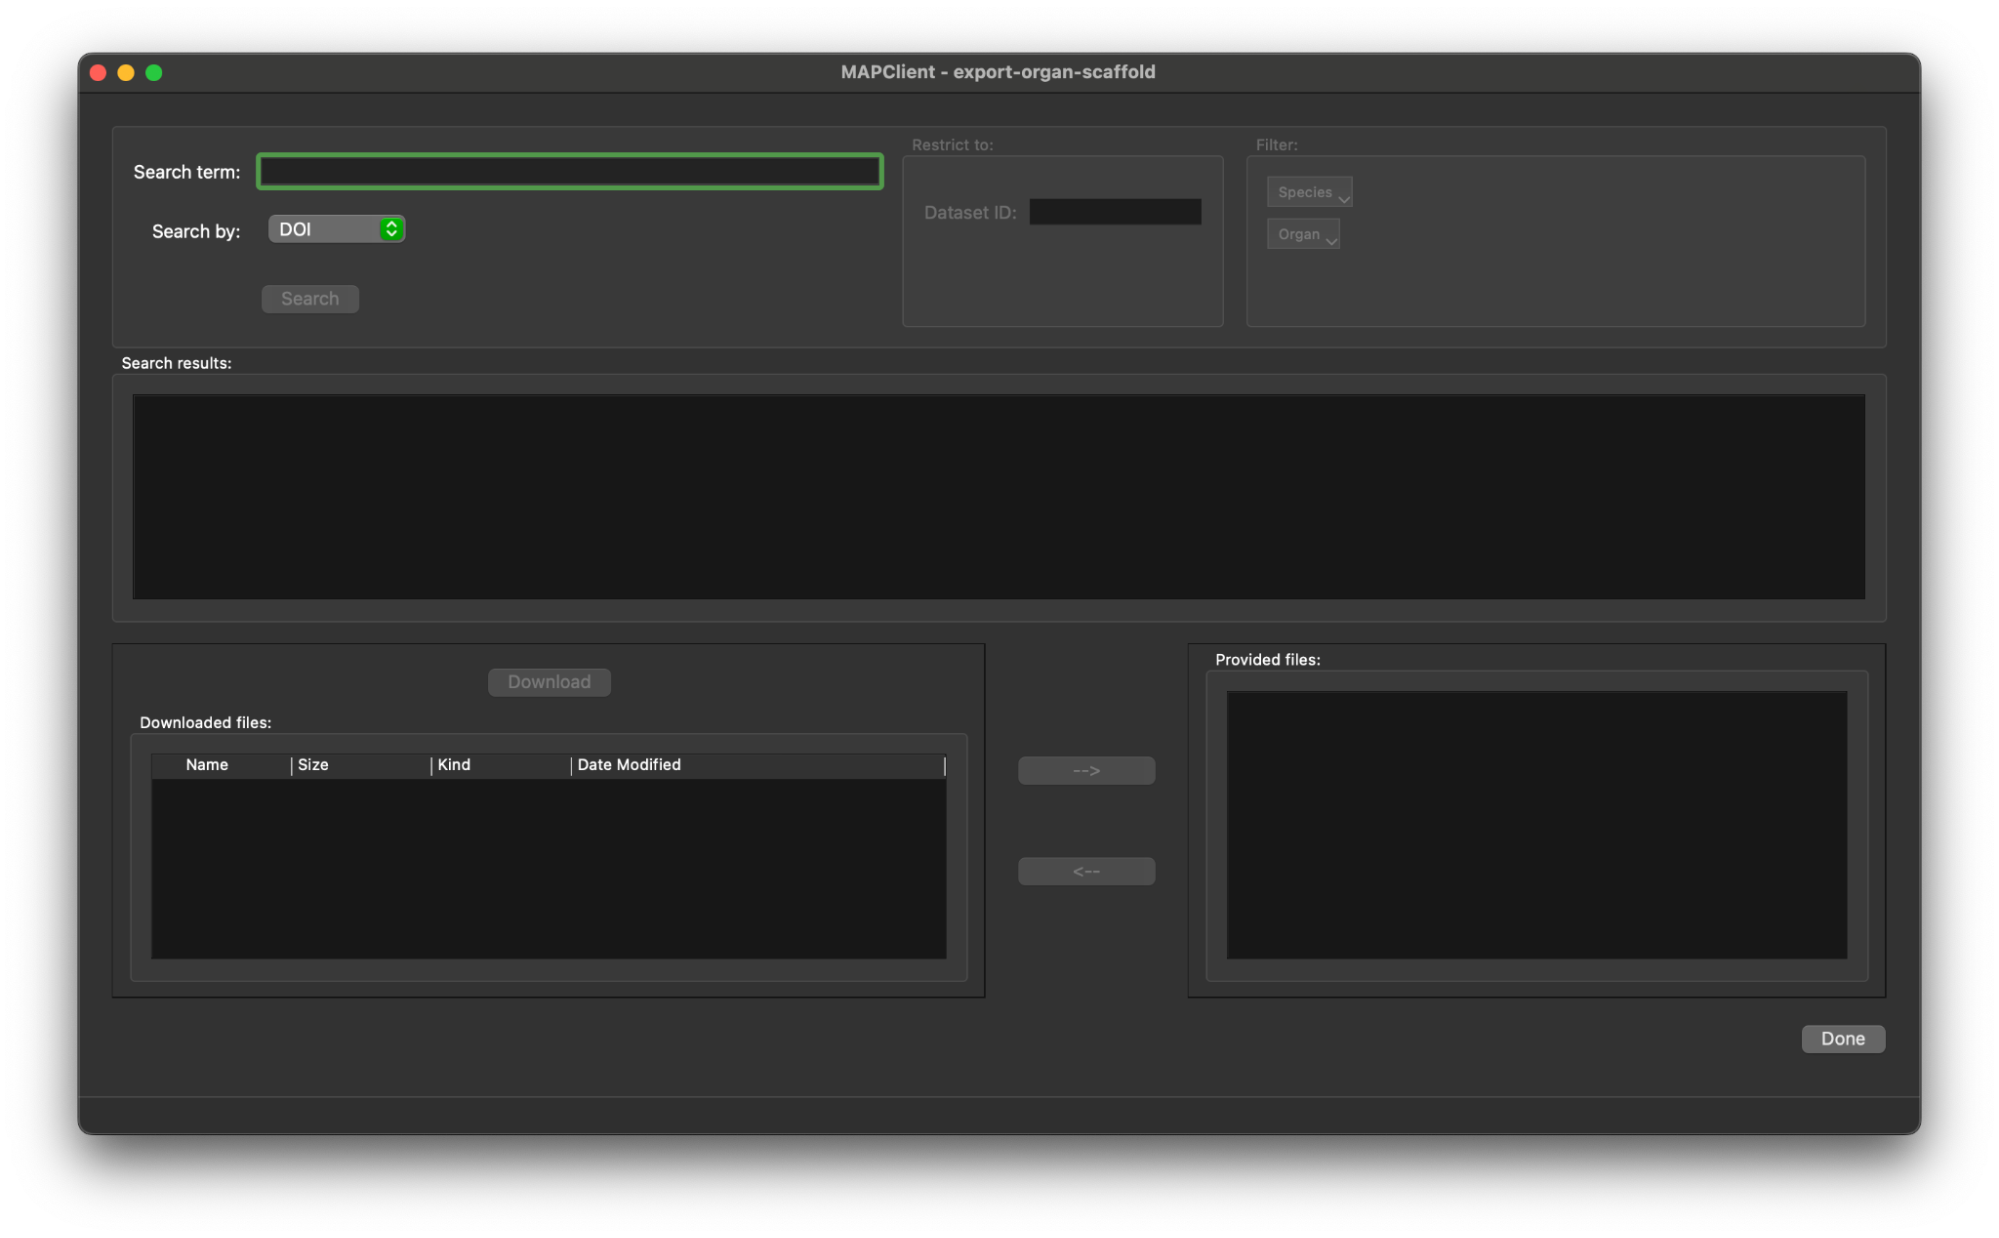
Retrieve Organ Scaffold Settings
When we execute the workflow we enter the Retrieve Portal Data step and we are presented with the initial state of the user interface.
Here we bring in our DOI that we found in the first section 10.26275/d52i-yves, we enter this value into the Search term editable box. When this is done the Search button will be enabled.
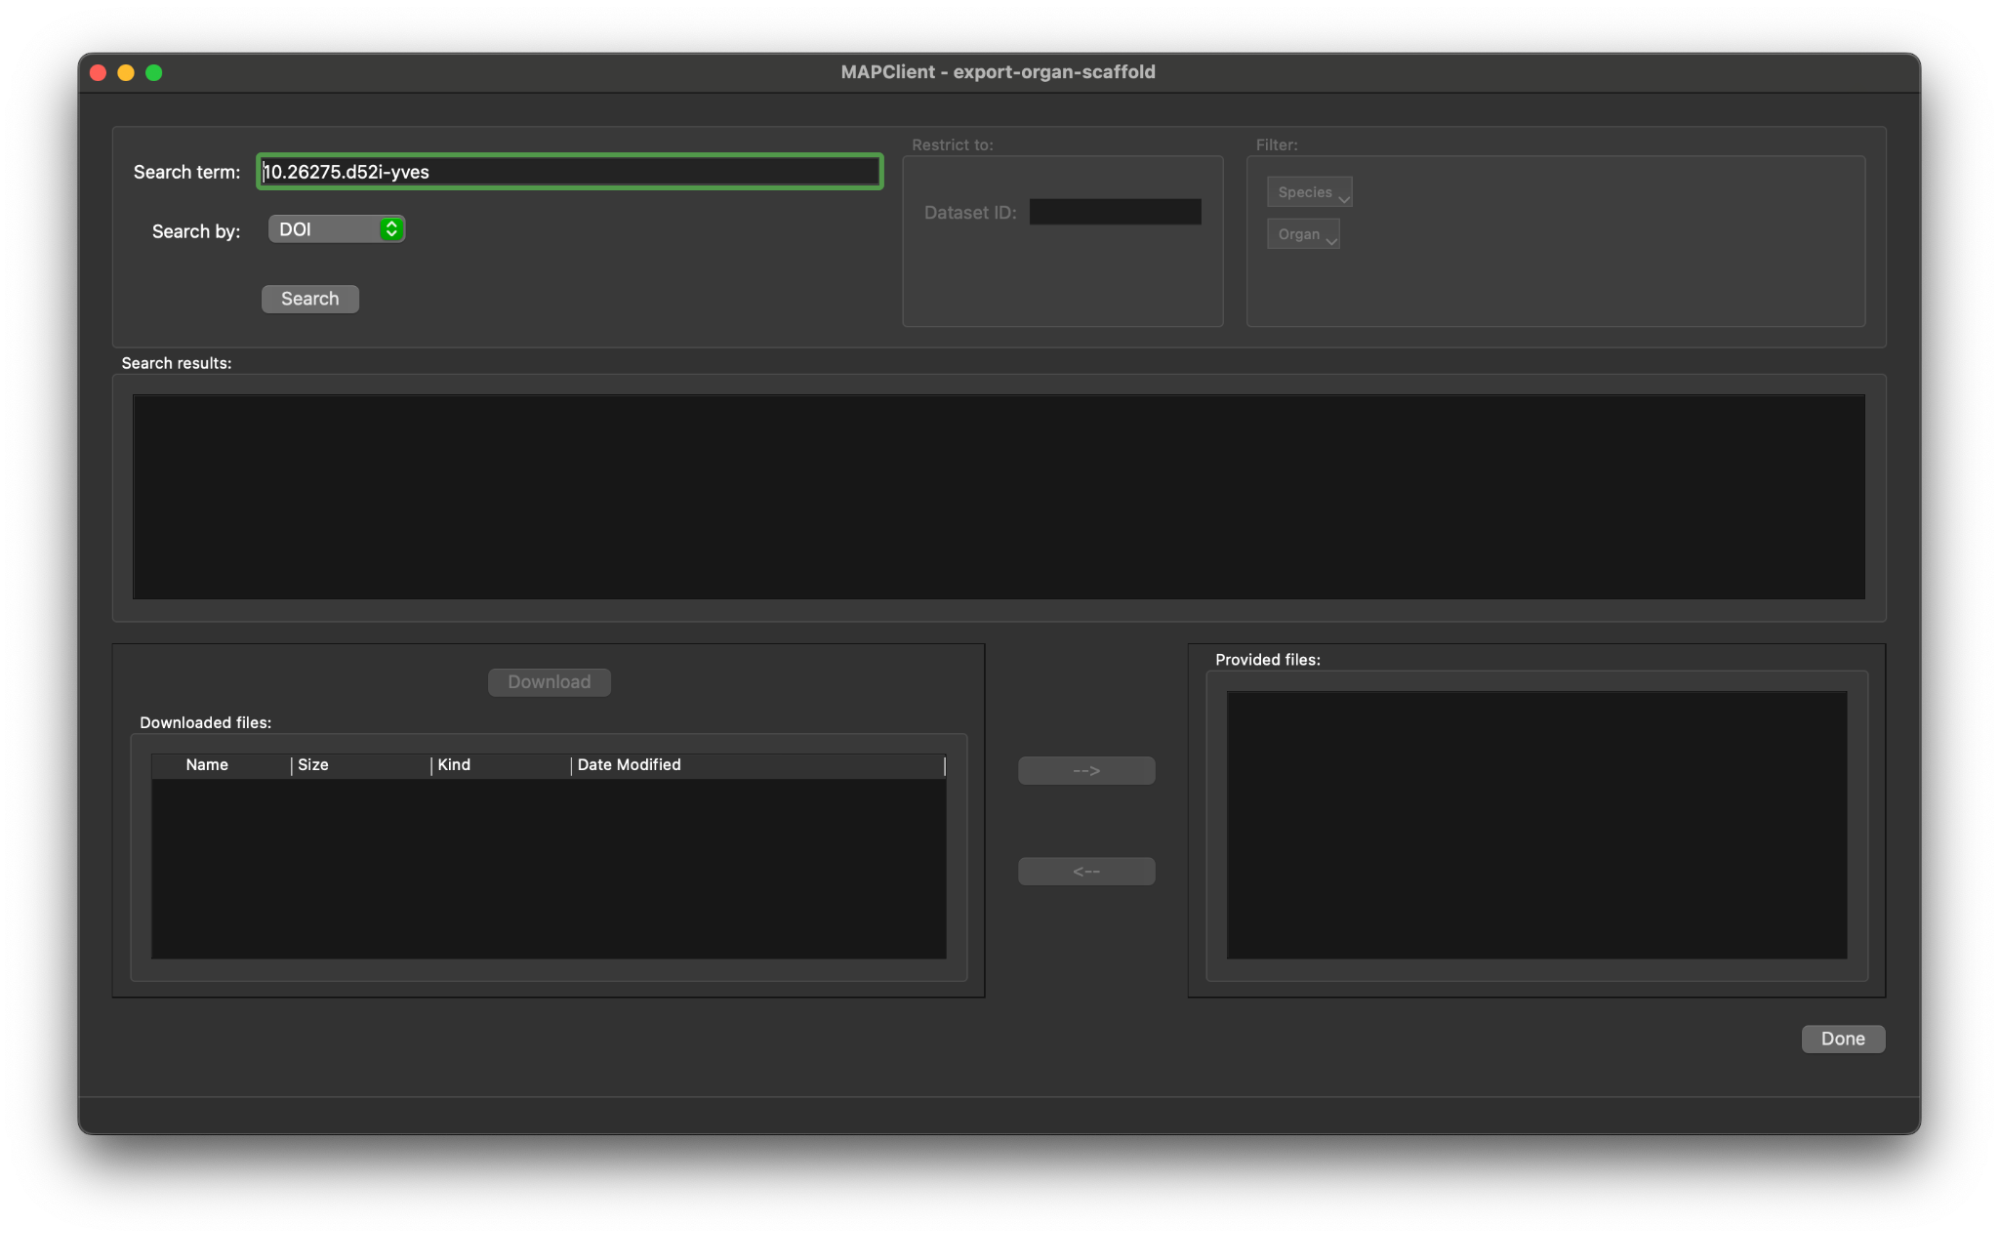
Click the Search button to retrieve the list of files in this dataset.
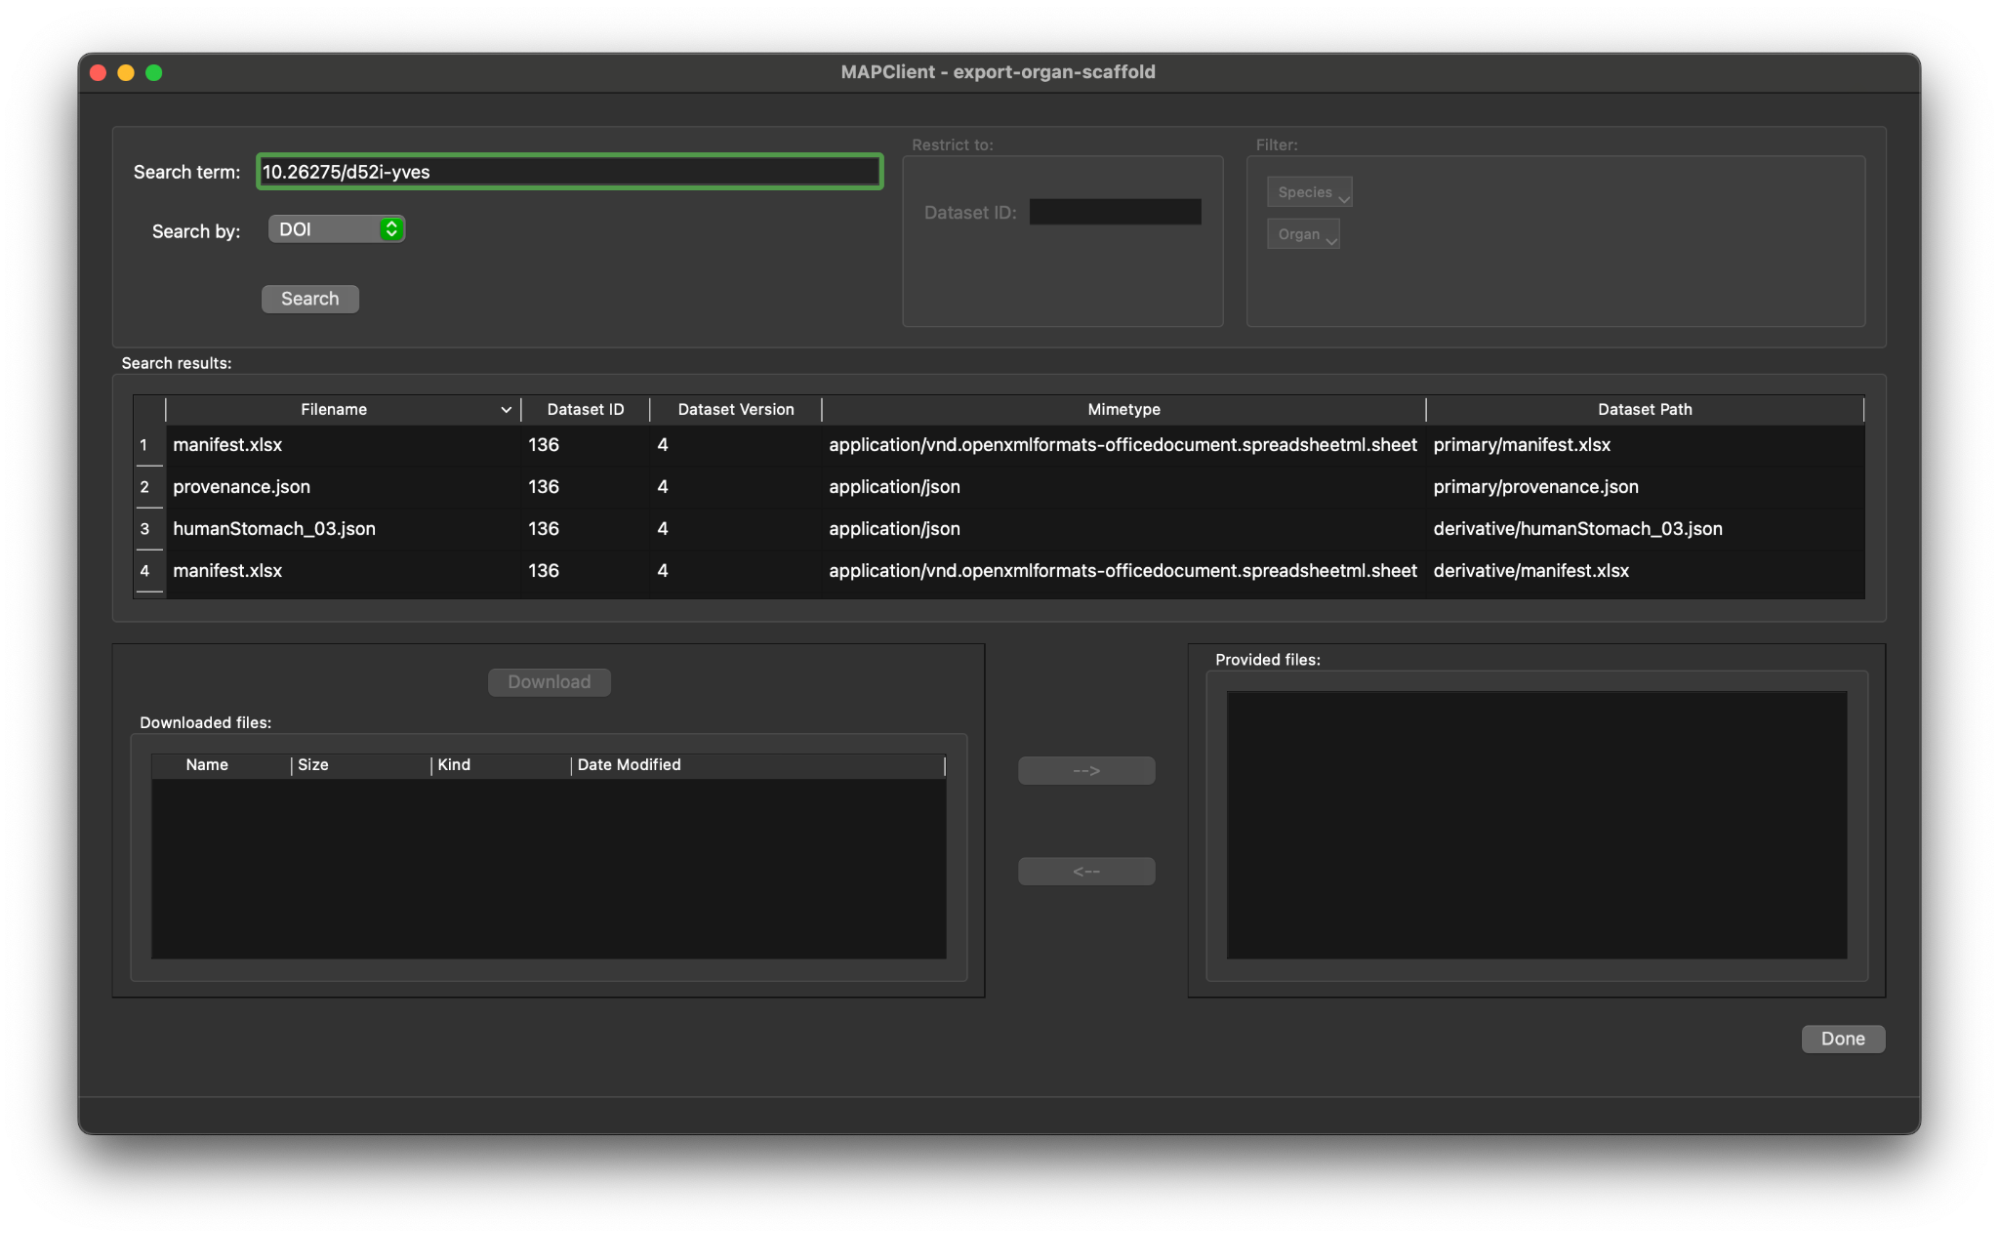
We only need the organ scaffold settings file from the dataset, we can find this by looking for the filename or sorting the list of files by mimetype and finding the file with mimetype application/x.vnd.abi.scaffold-settings+json. Click on the entry in the table for the scaffold settings file, the entry will be highlighted and the Download button will be enabled.
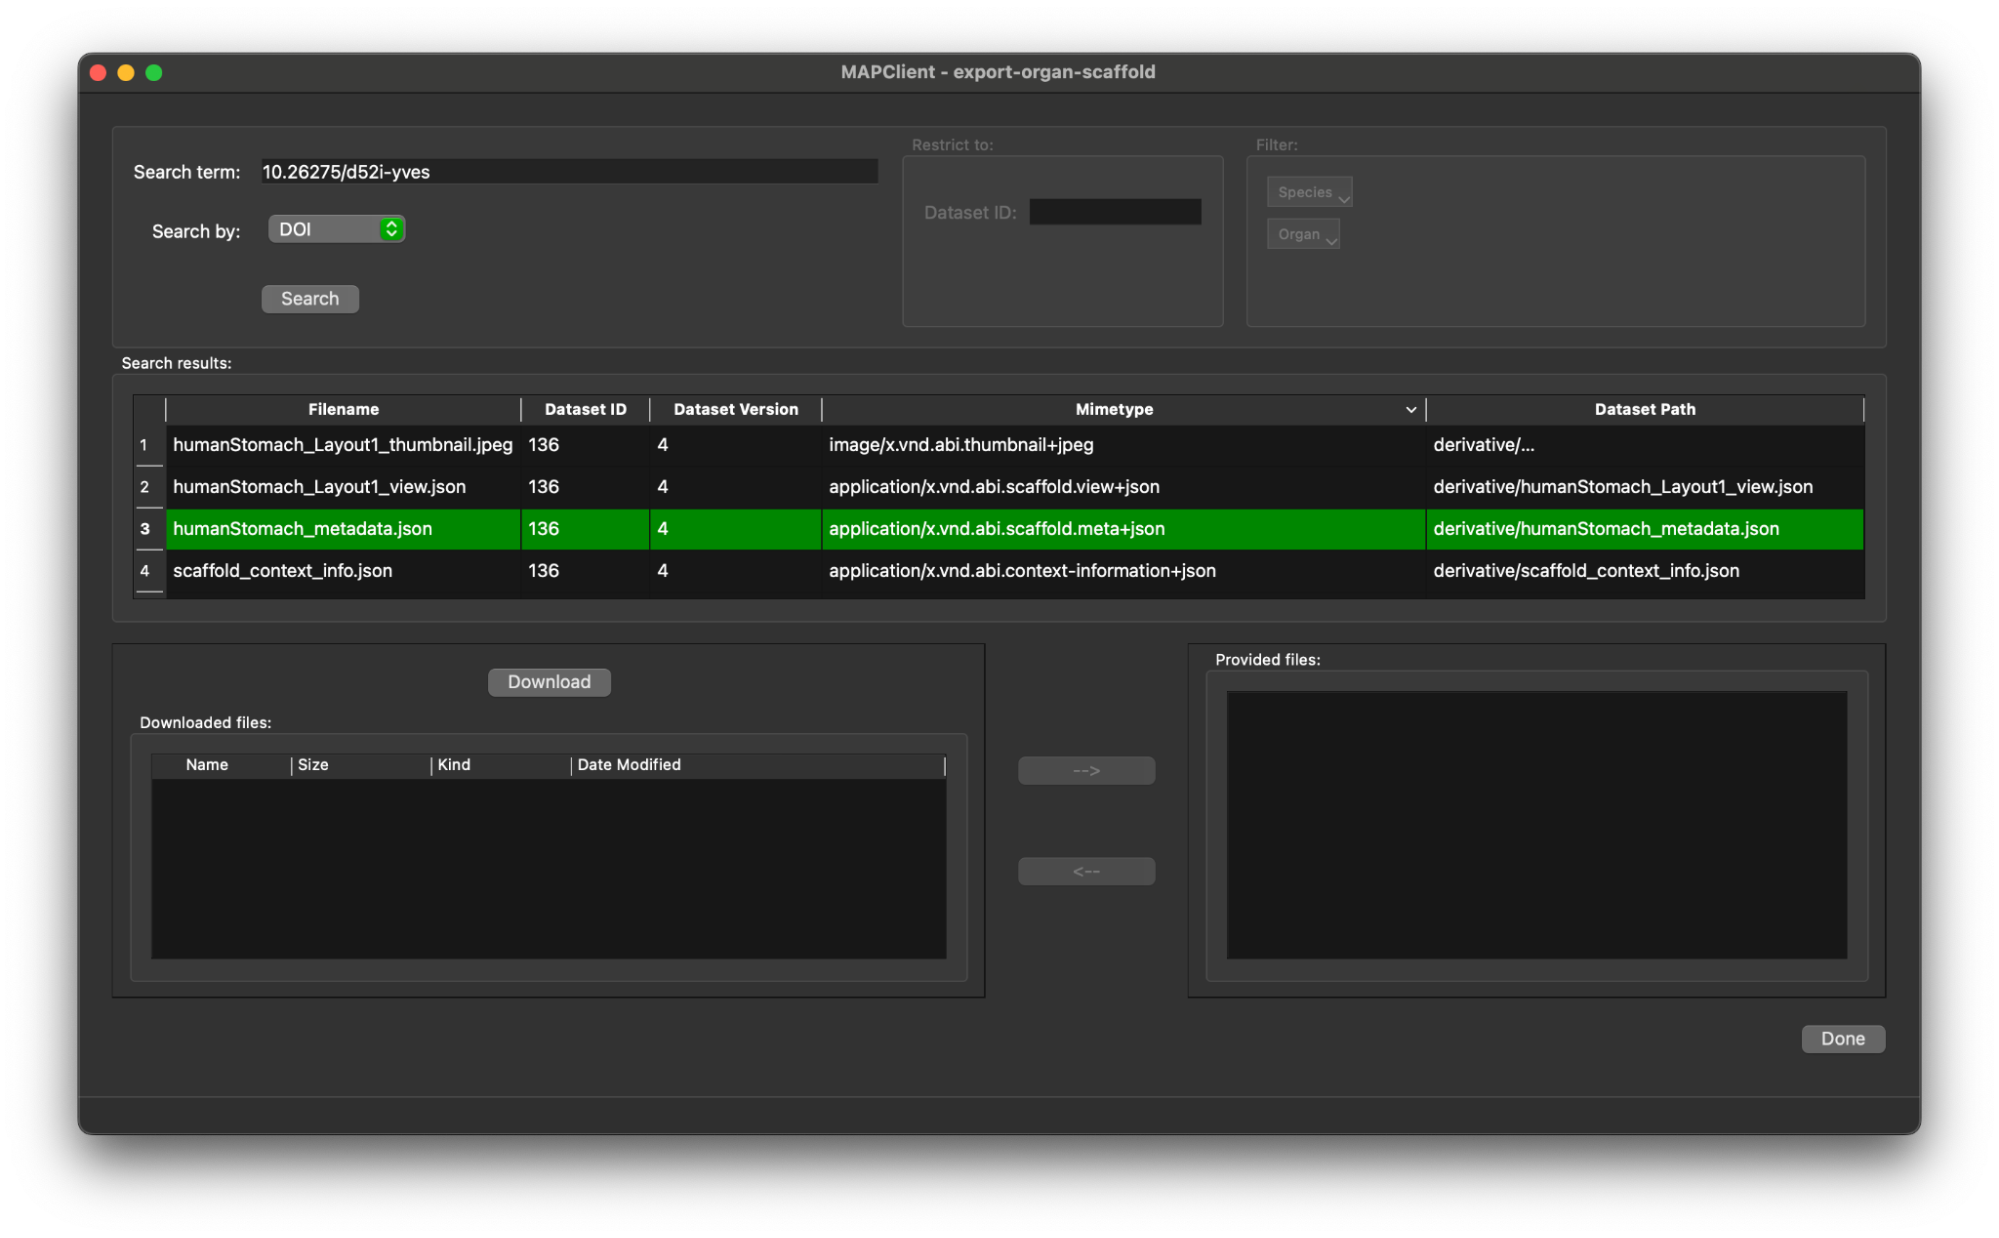
Click on the Download button to download the file and create a local copy of it.

Now we need to provide this file for the Scaffold Generator step. We do this by selecting the file in the Downloaded files file browser tree and clicking the --> button (the --> becomes enabled when we have selected a file in the file browser tree).
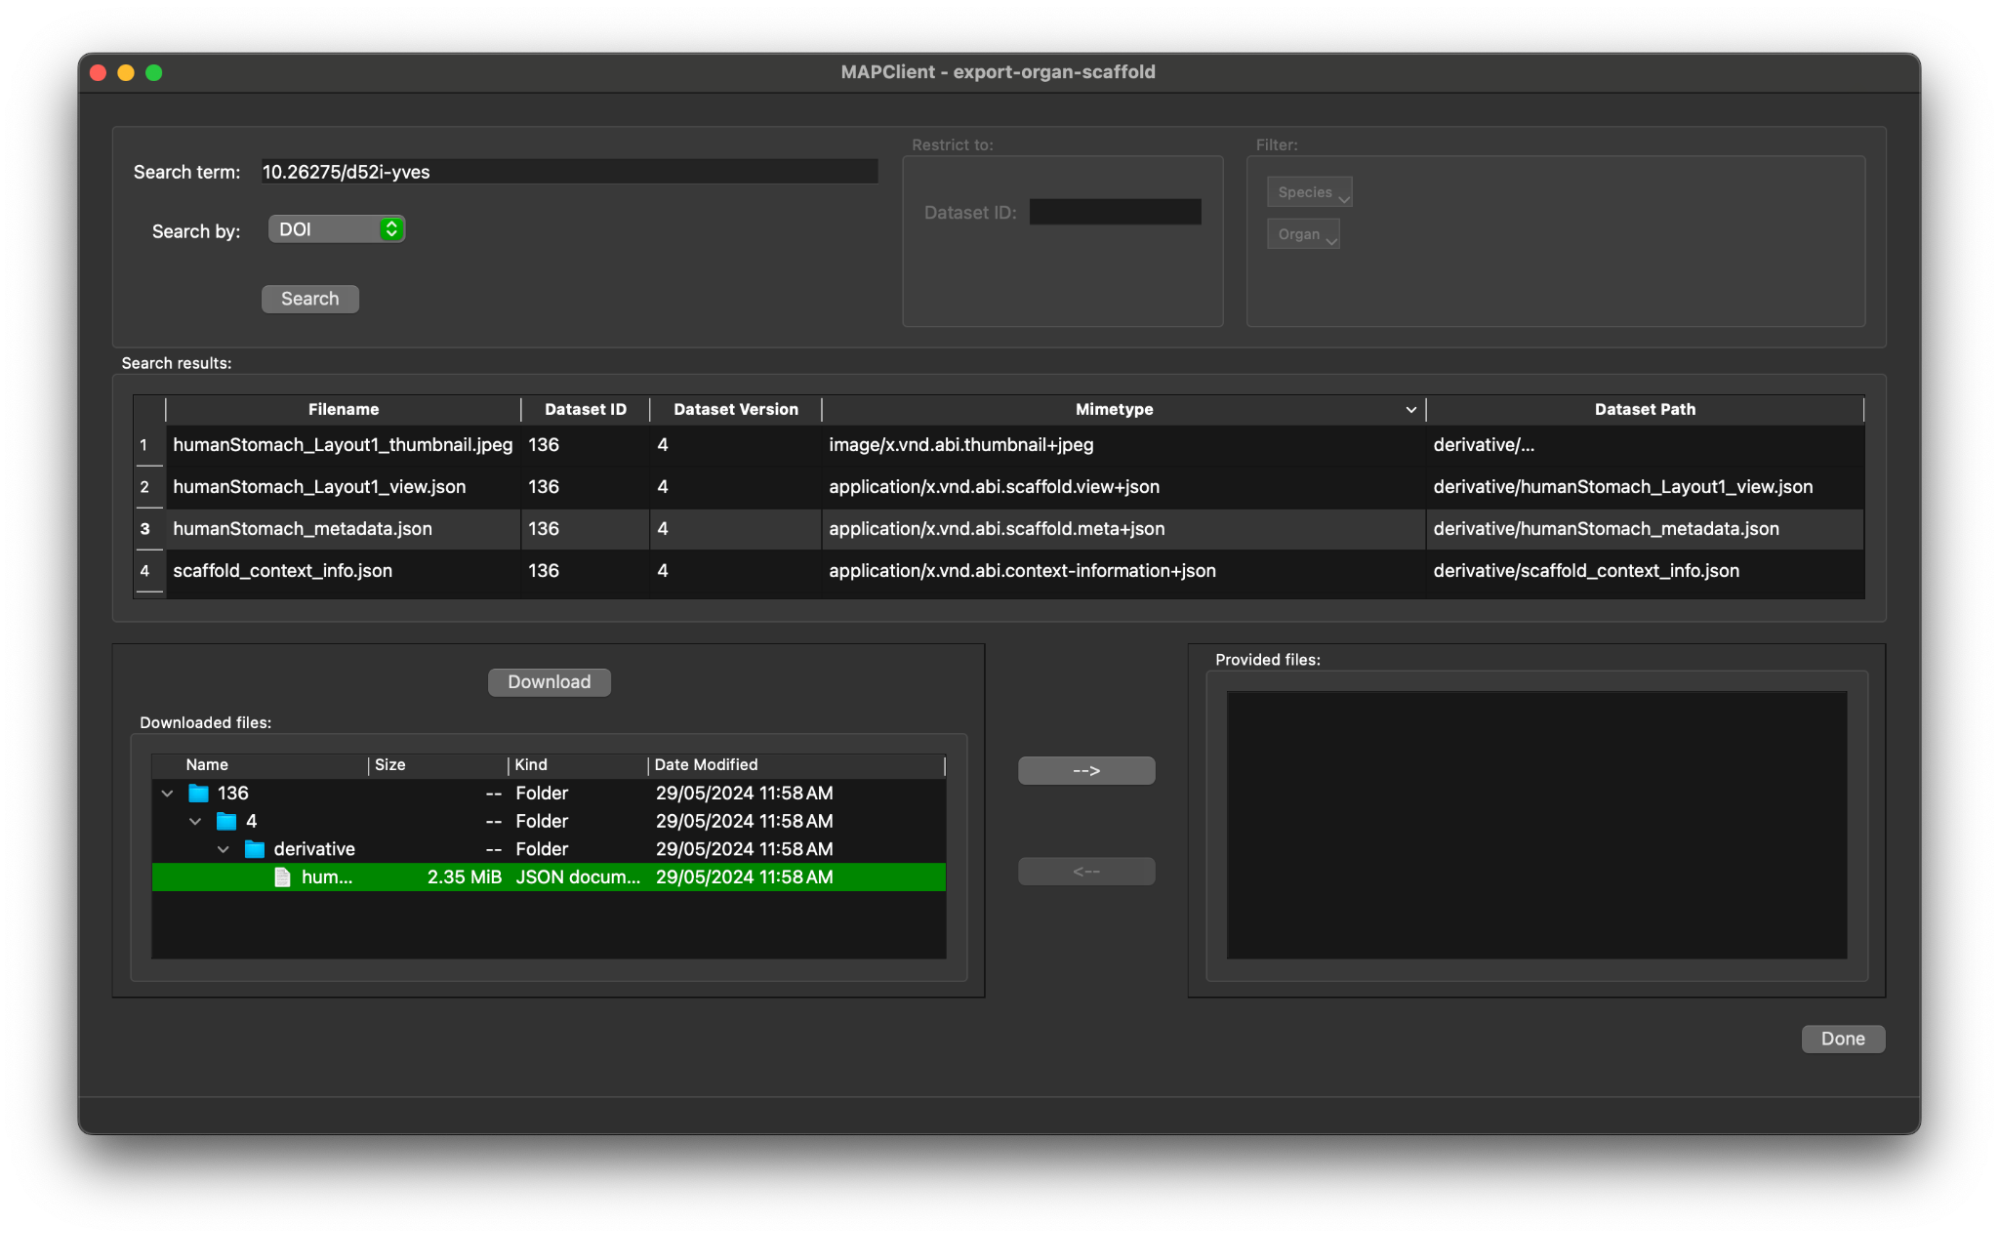

Now that we have selected the file and made it available for the next step, we have done all that we need to do.
Click the Done button to move onto the next step.
Generate Scaffold
The next step is the Scaffold Generator step which will simply generate a scaffold without presenting a user interface. The generated scaffold will be made available to the next step.
Simple Visualisation
The next step that we will actually see is the Argon Viewer step. Creating visualisations has been covered in other tutorials, we will race through a simple visualisation here. Please see the other tutorials for more instructions if you are interested in creating a more spectacular visualisation.
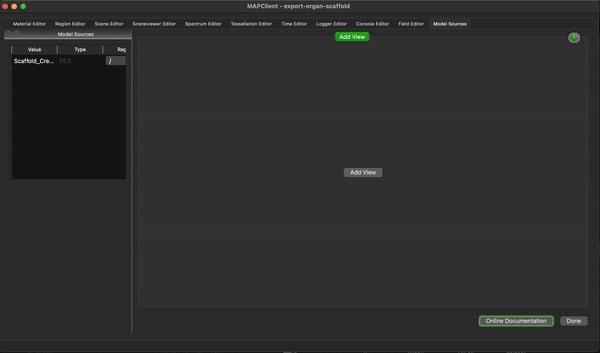
To create a simple visualisation add the generated organ scaffold description in the model sources editor to the root region (/), then add a new view to see the visualisation (because this is the first view click on the Add View button in the visualisation pane), next we add some surfaces using the scene editor (using the drop down menu with heading Add), so we can actually see something. We set the surfaces to use the tissue material to make it look something like a stomach.
To finish the workflow click the Done button.
That is all well and good, we have retrieved data from the SPARC portal and used it to create something novel. In the following sections we will take a look at exporting this dataset to a new format.
Develop Export Step
Now we want to export the scaffold to a new format that is not currently supported by the existing tools.
To do this we will create a new step and add the code for the functionality that we are after.
First we need to create a new step for us to add our code to.
Create New Step
We use the MAP Client Plugin Wizard to create the skeleton step code.
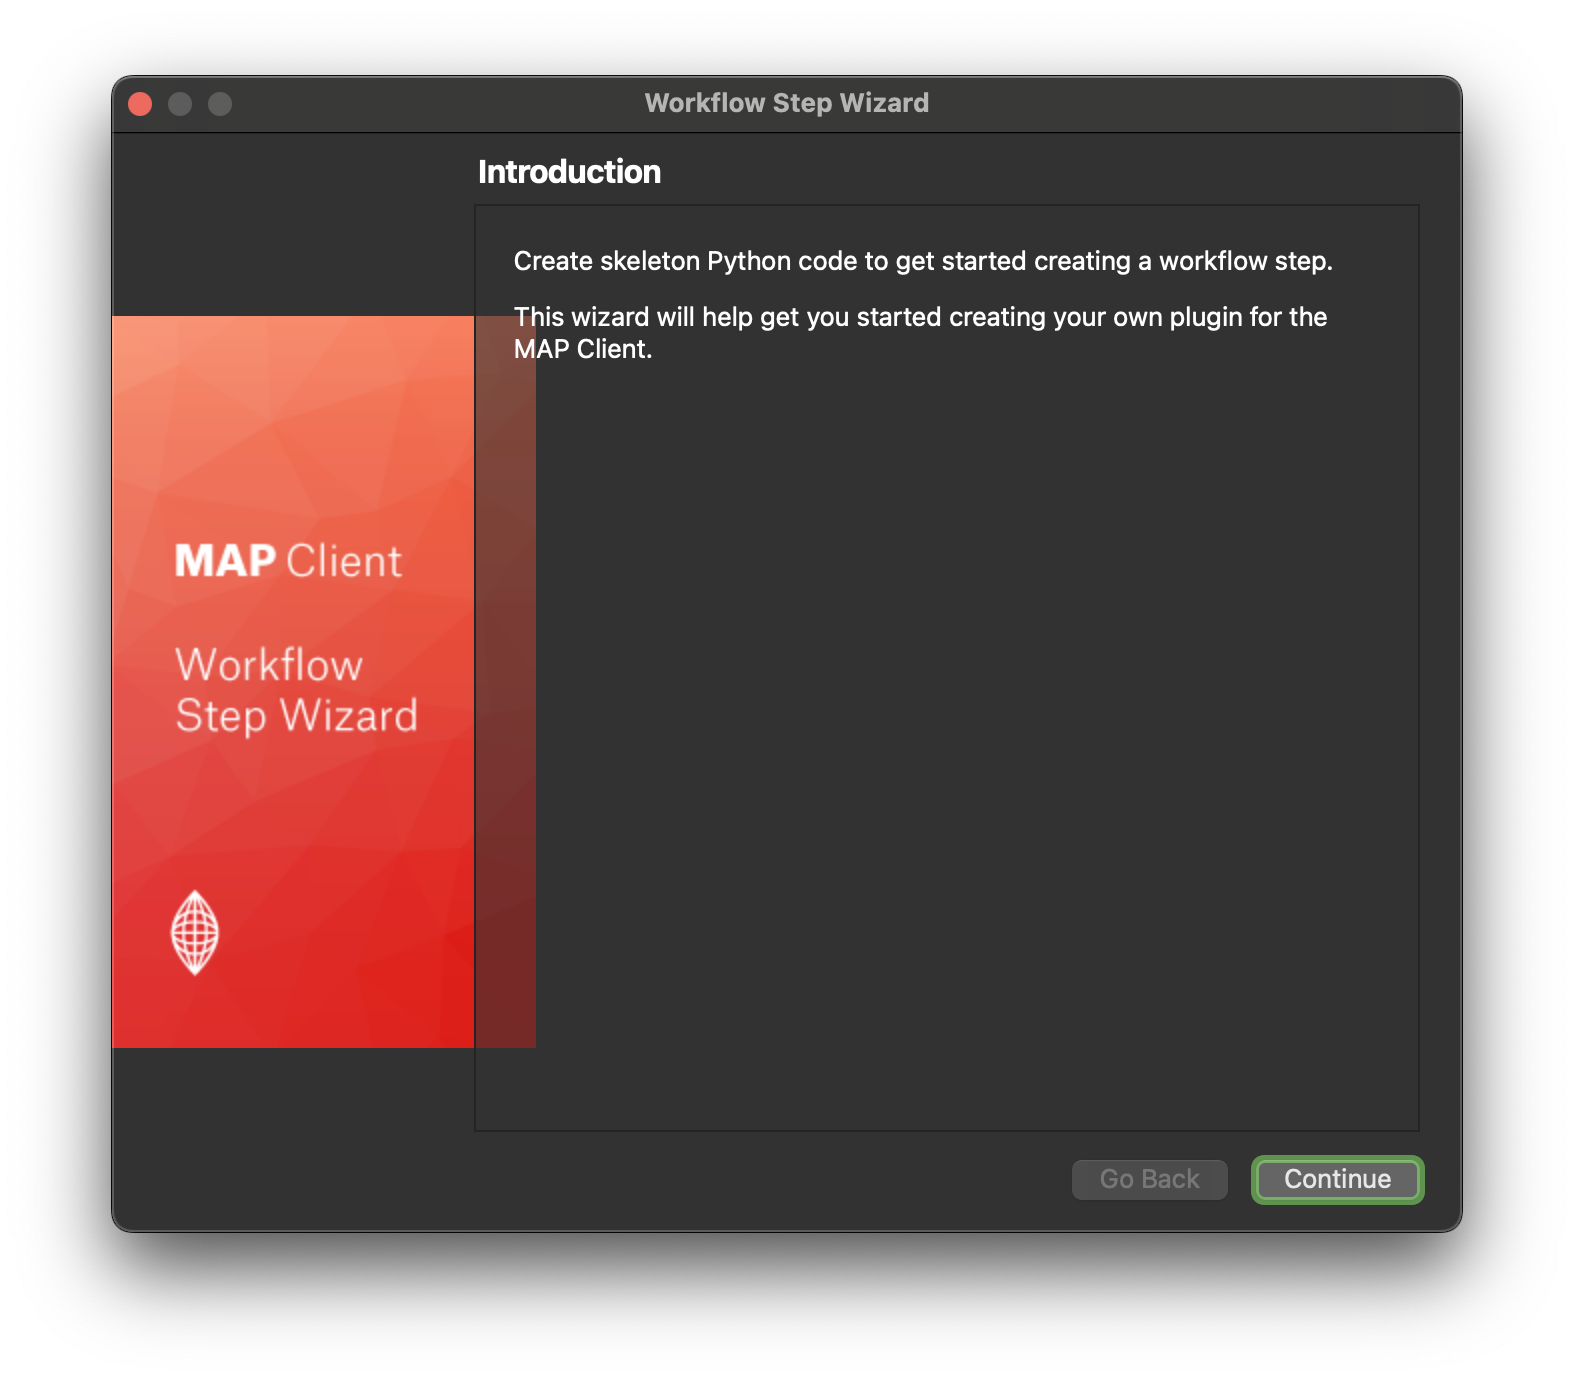
Plugin Wizard
From the Tools menu select Plugin Wizard. We will run through the creation process of a step using the plugin wizard to create the skeleton code quickly. The process of using the plugin wizard is straightforward and only requires us to make some simple decisions. To this end, we start with the welcome screen and click the Continue button.
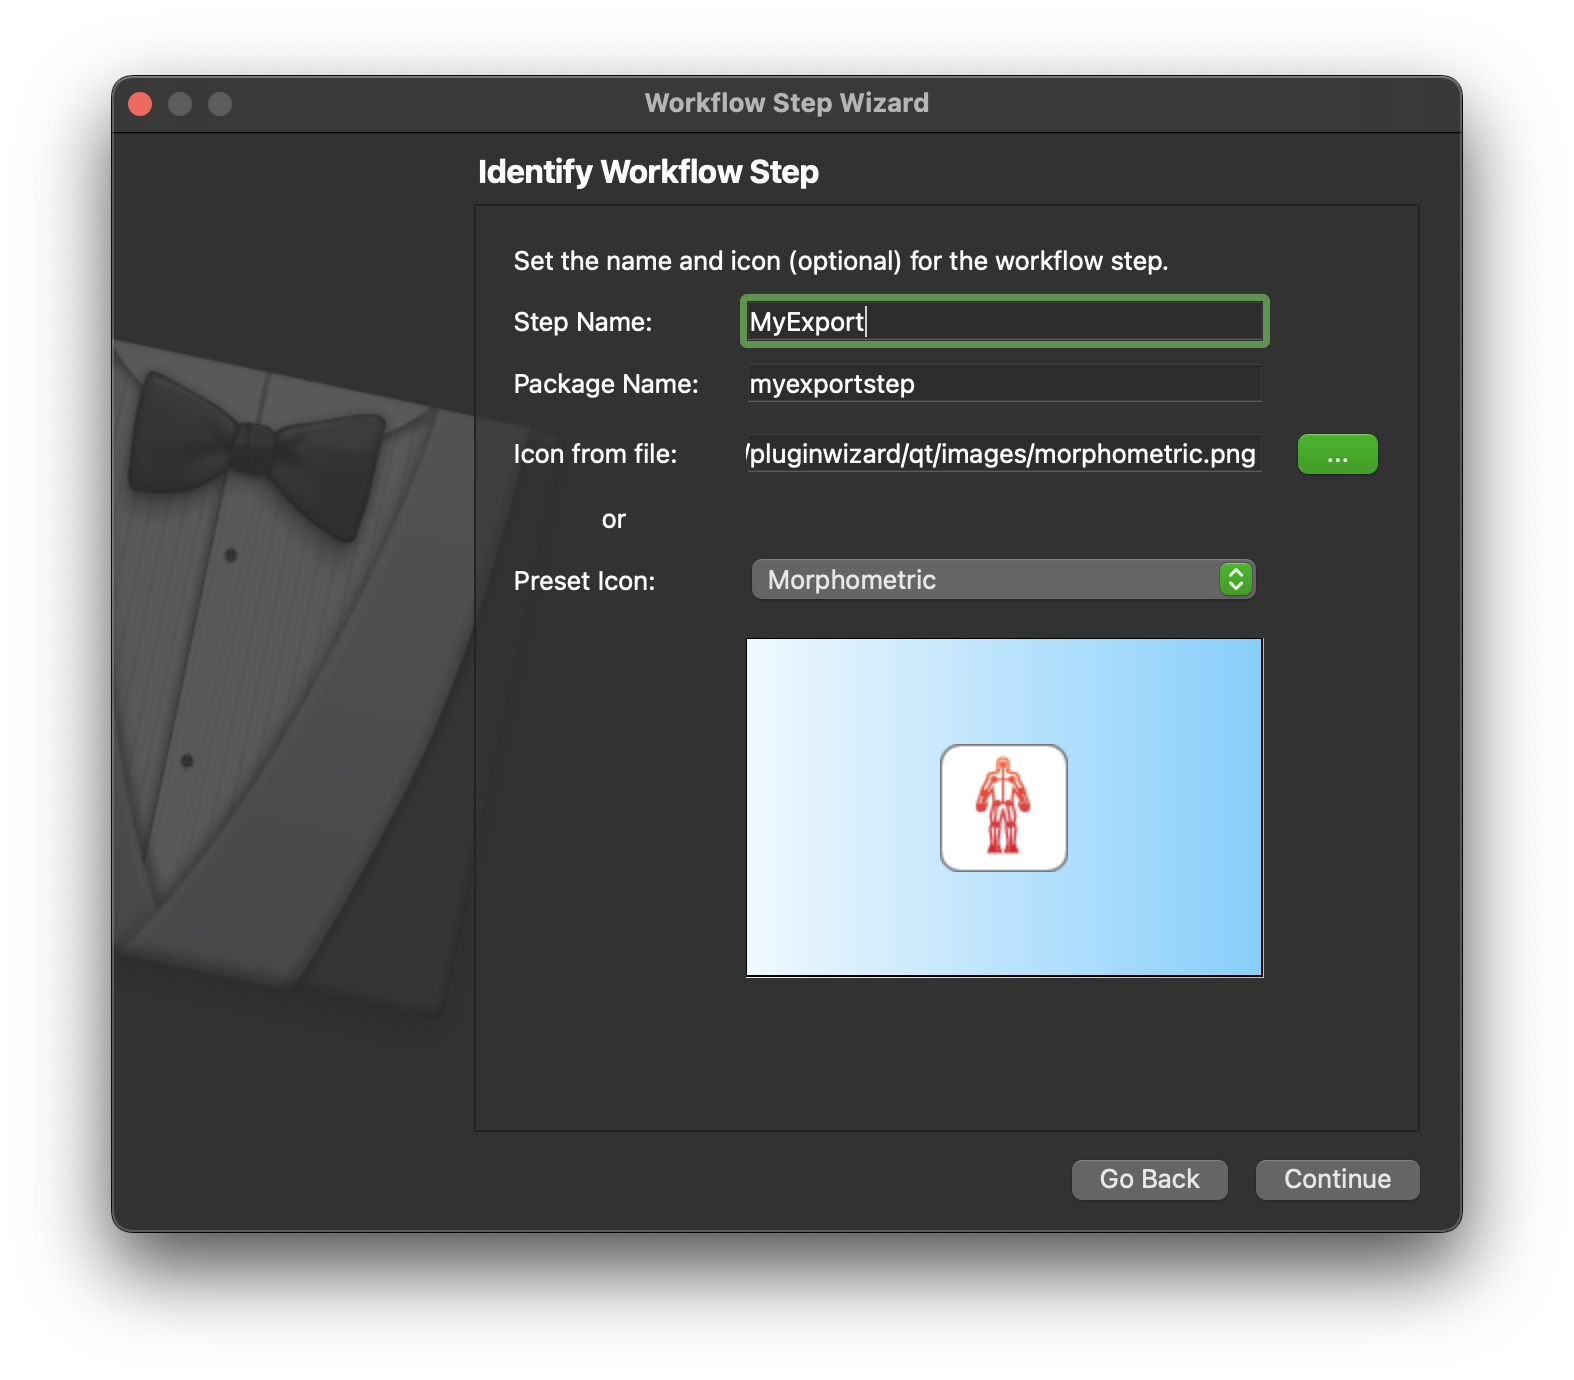
On the next screen we define the name and icon for the step. I have entered MyExport as the name for the step and chose the morphometric preset icon to represent the step.
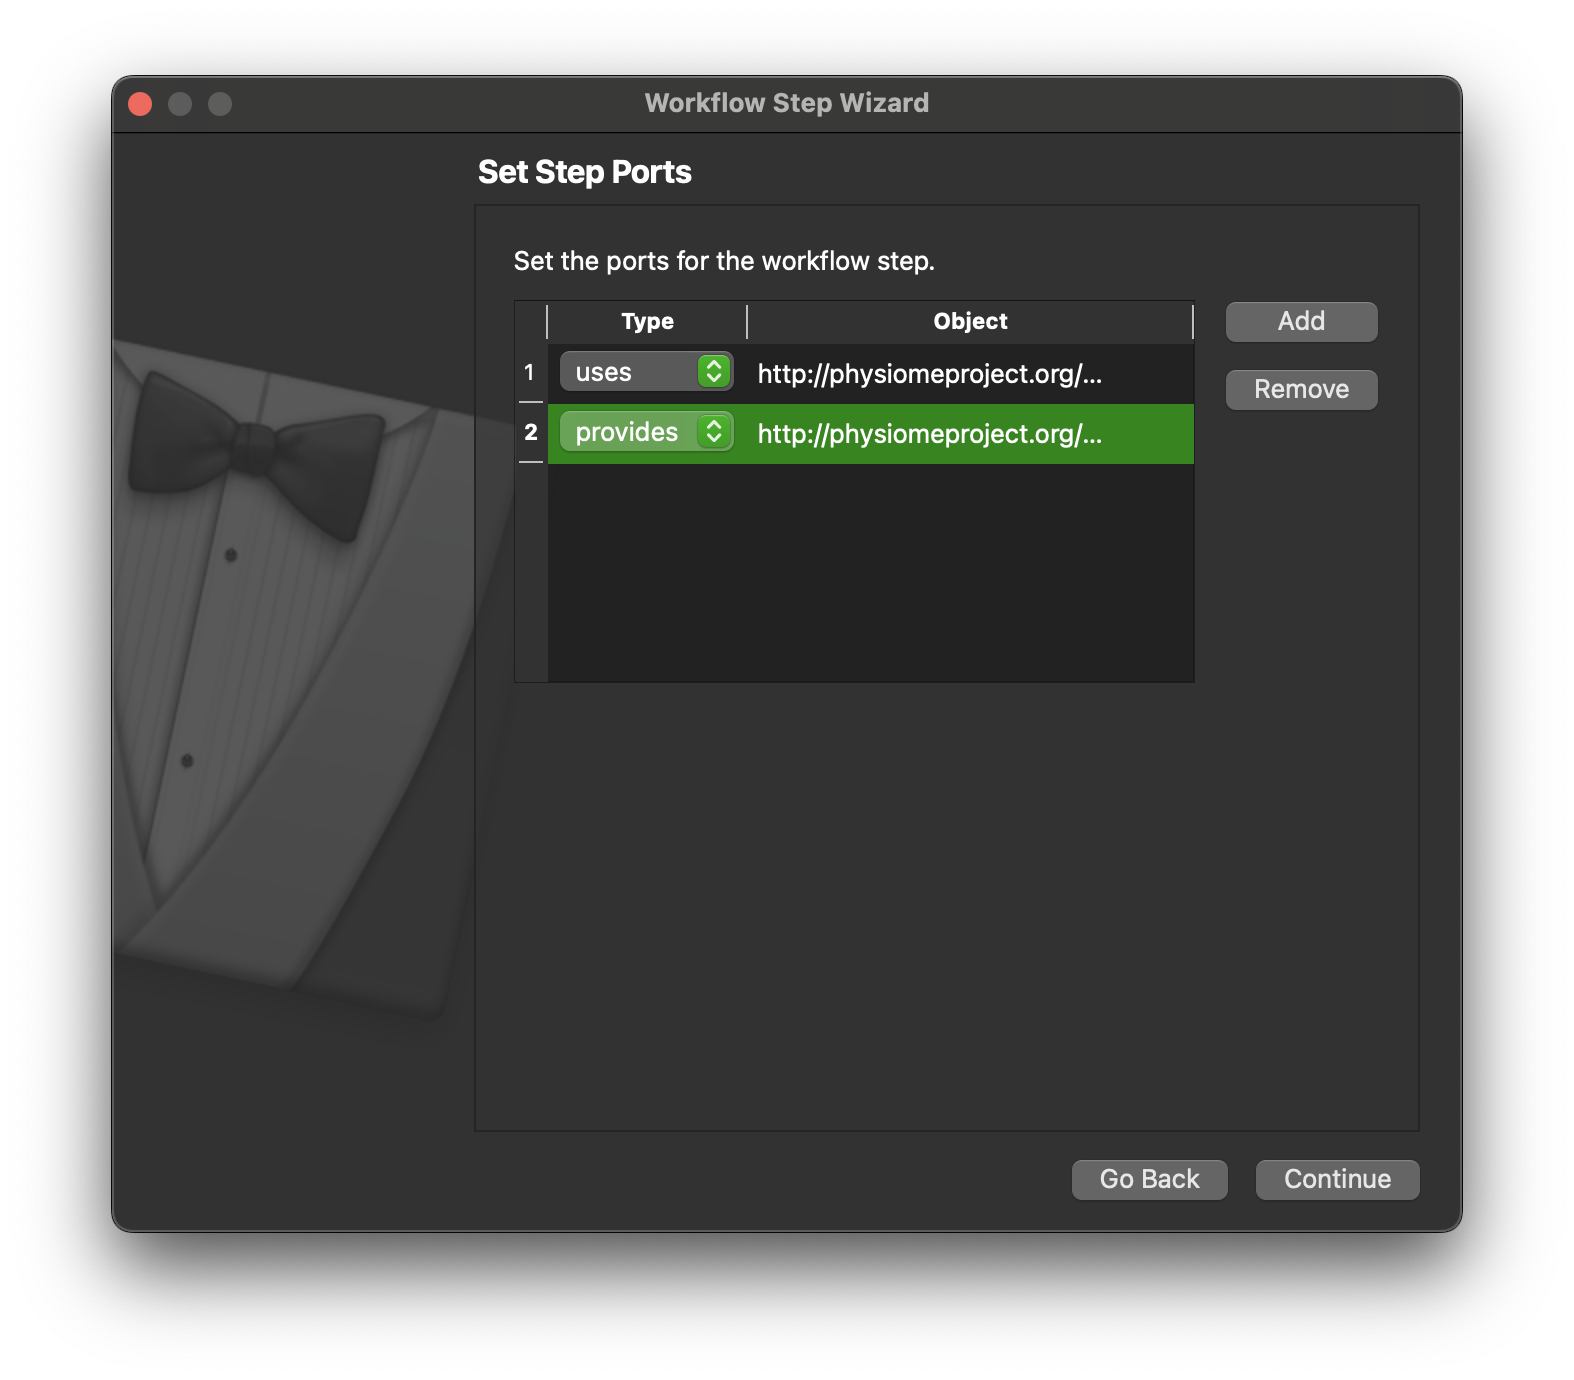
Click the Continue button to define the ports for the step. Here we define the ports for the step, we want to be able to pass a http://physiomeproject.org/workflow/1.0/rdf-schema#file_location or a list of file locations and output a http://physiomeproject.org/workflow/1.0/rdf-schema#file_location. We can’t set the “list of” here, we will do that later when we make changes to the generated code. So we define here that the step uses objects of file location type and provides objects of this type. These object types are not very specific but they will do for our purposes here. Click Continue.
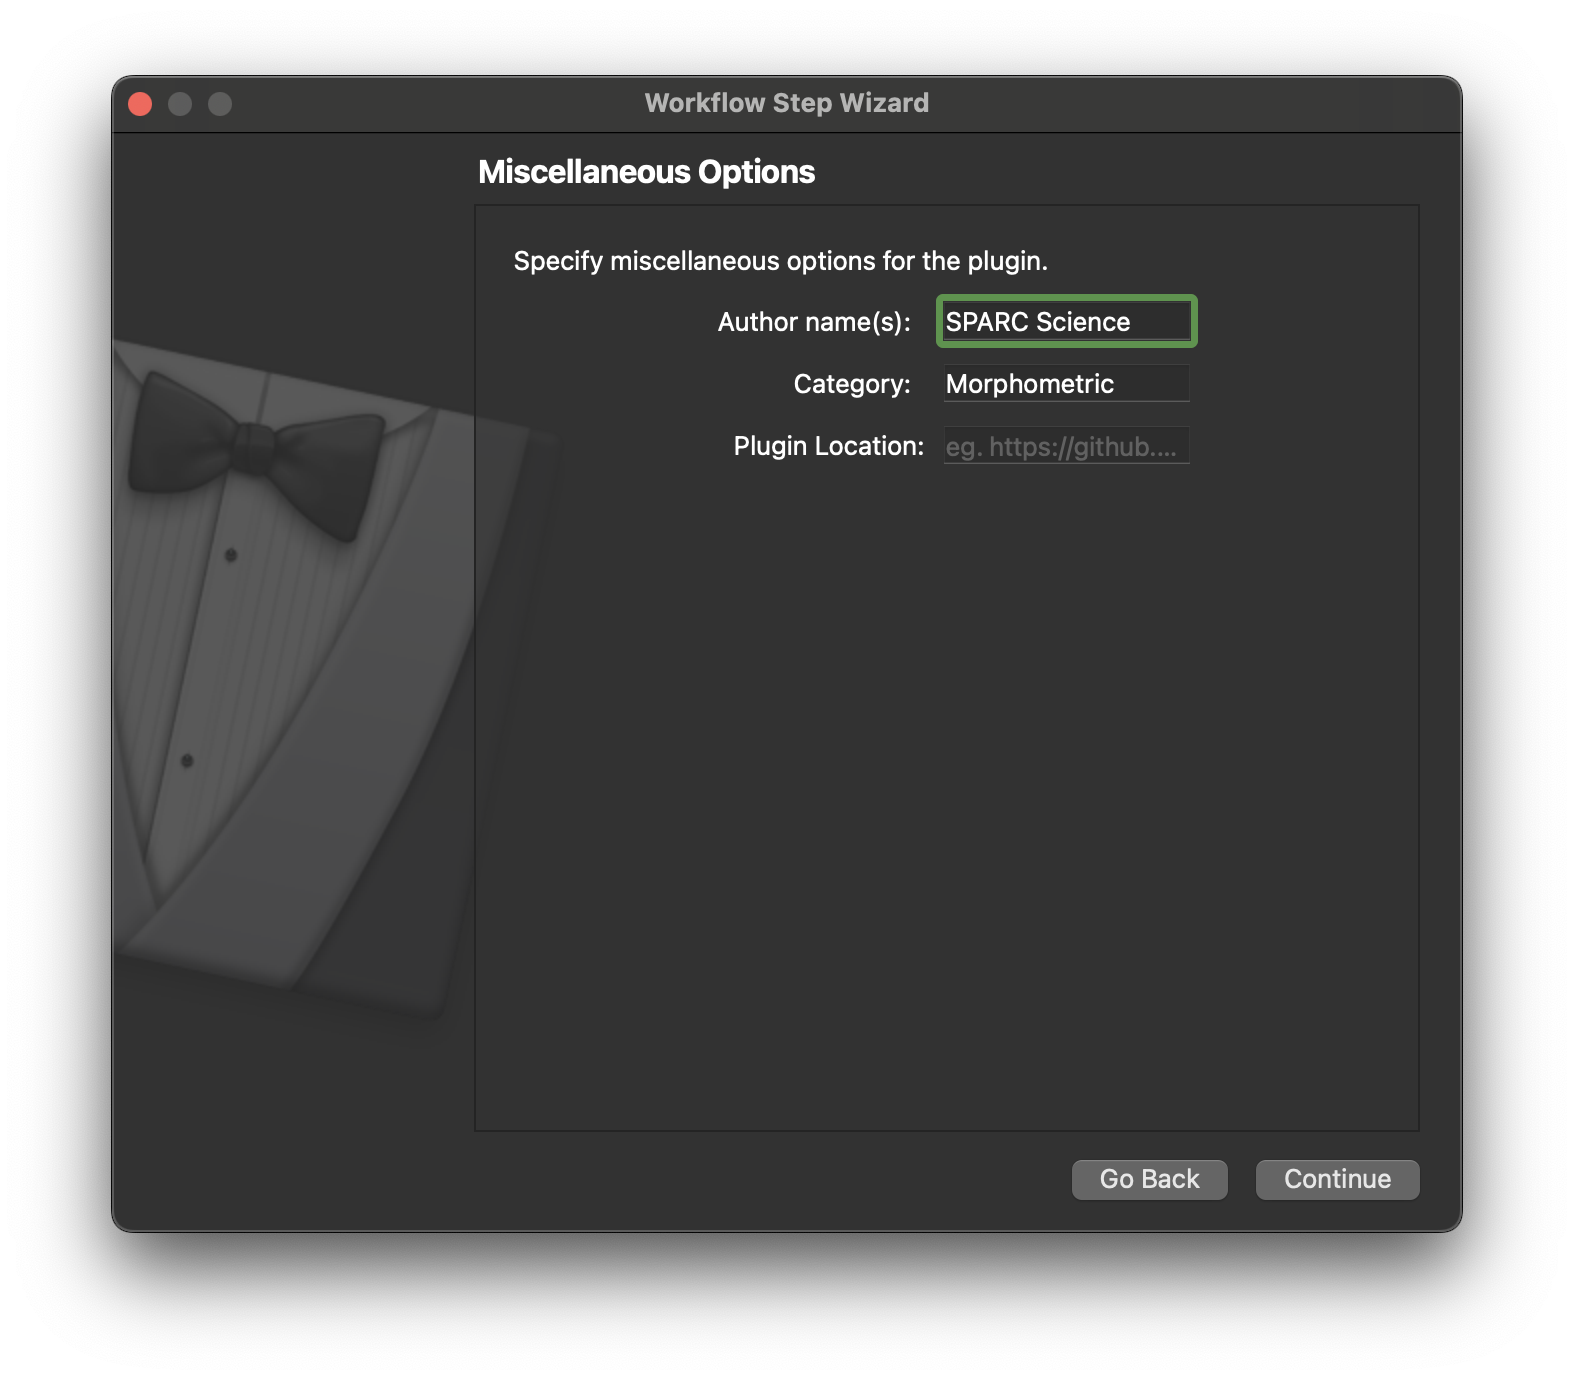
On this page we enter some miscellaneous information, we can just enter an author’s name if we wish. Click Continue to move on.
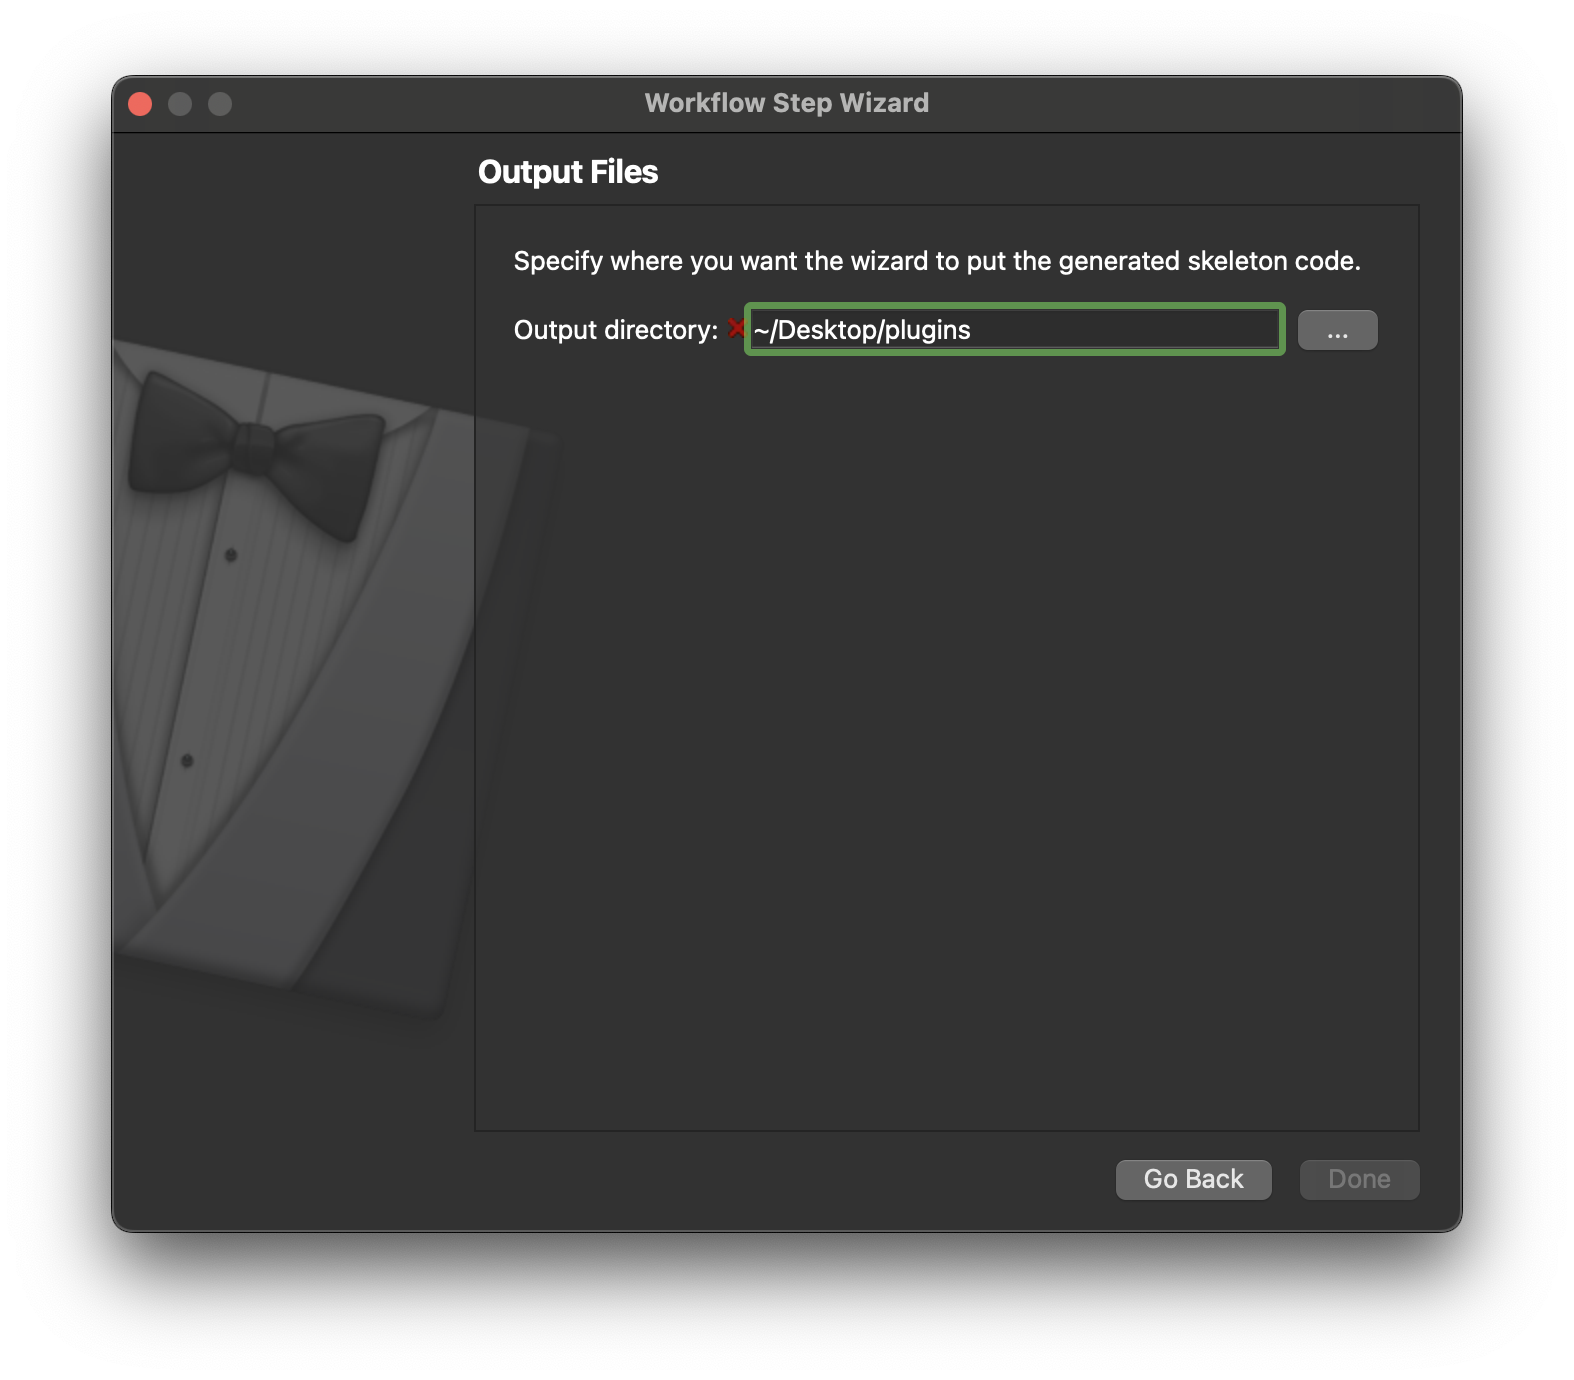
On this page we only need to define the output location, this is where our step will be generated. We will need to tell the mapping tools about this directory later so it can be loaded and made available to use in our workflow. Click Continue once the output directory has been selected.
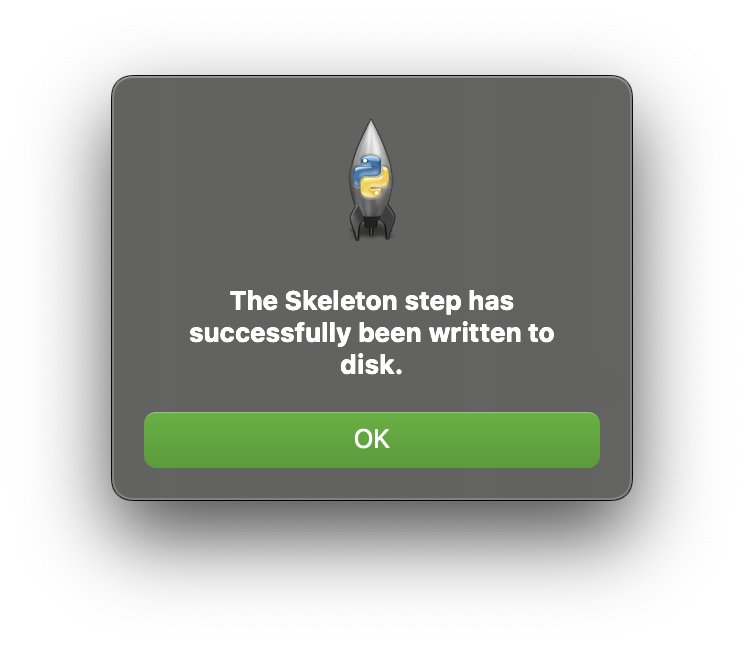
If our skeleton code was successfully generated then we should see a pop dialog that confirms this. Click OK on this dialog to dismiss it.
Plugin Manager
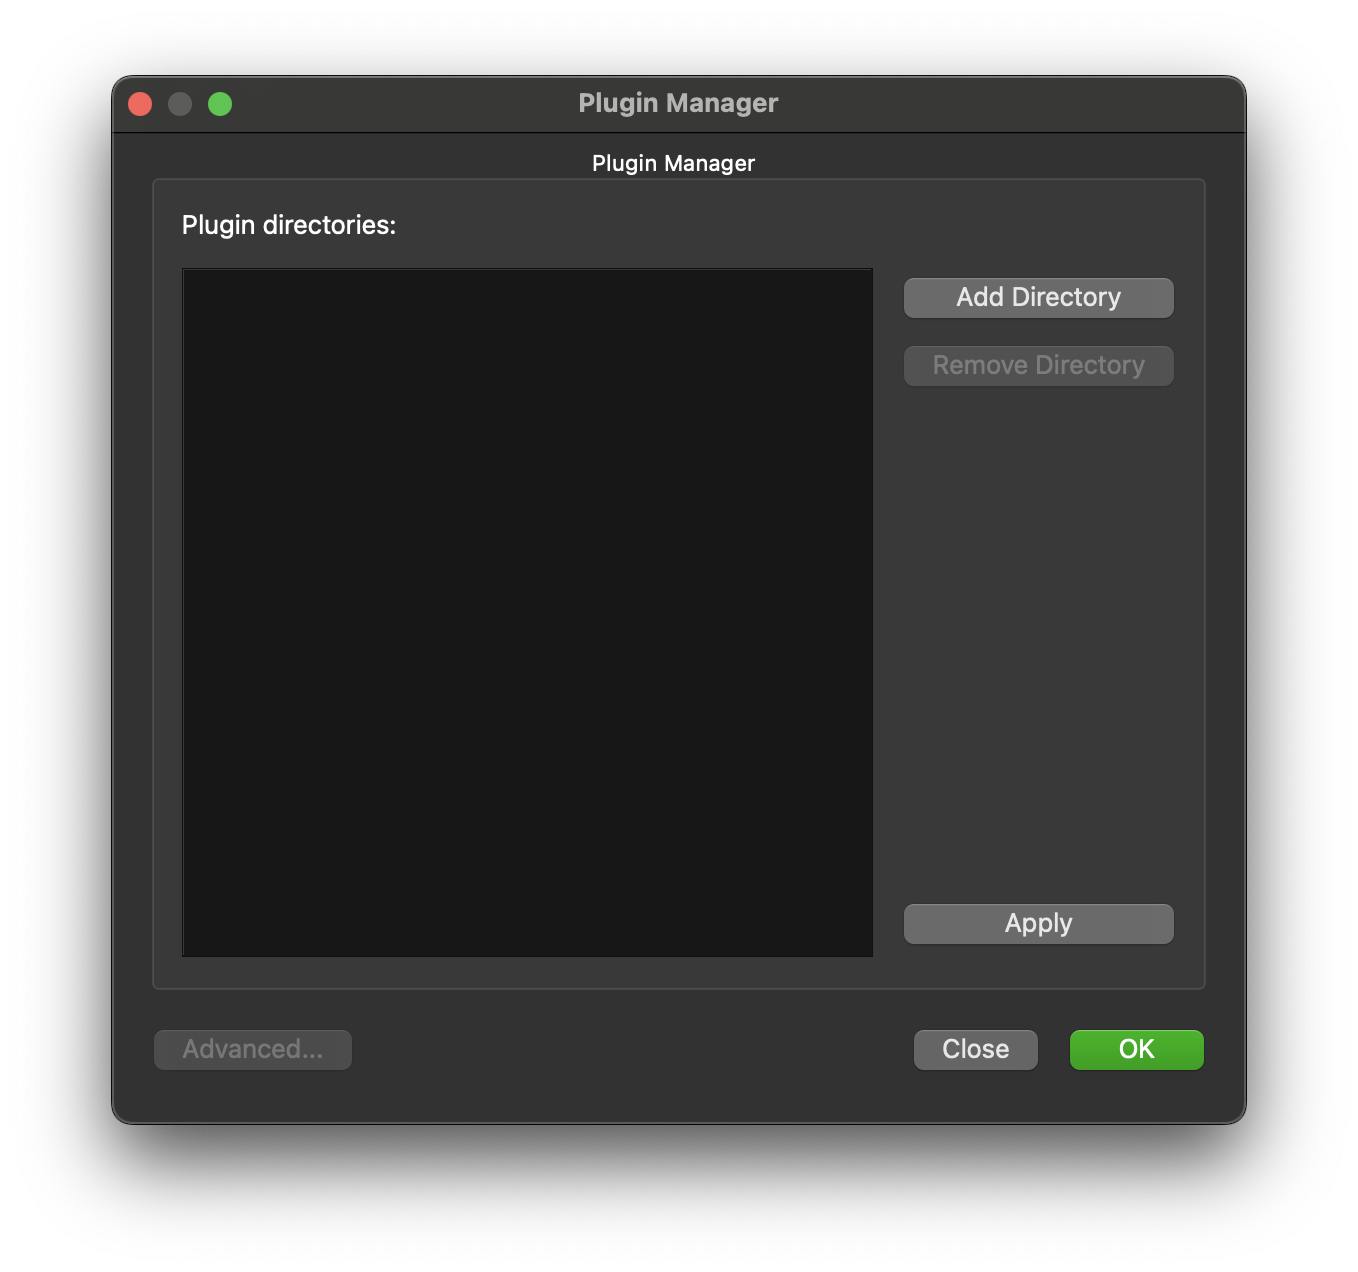
Now we need to let the mapping tools know about the new step we have just created. This step is a fully functional step that currently does nothing. To make it available launch the Plugin Manager from the Tools menu. It is probable that currently the Plugin Manager does list any plugin directories, this is because the mapping tools has internal plugins available to it. To add a directory to the plugin manager click on the Add Directory button.
Navigate the directory browser to the location where the skeleton step was generated to, in my case I generated the plugin in the /Users/Shared/Desktop/plugins directory so I chose this directory to be added.
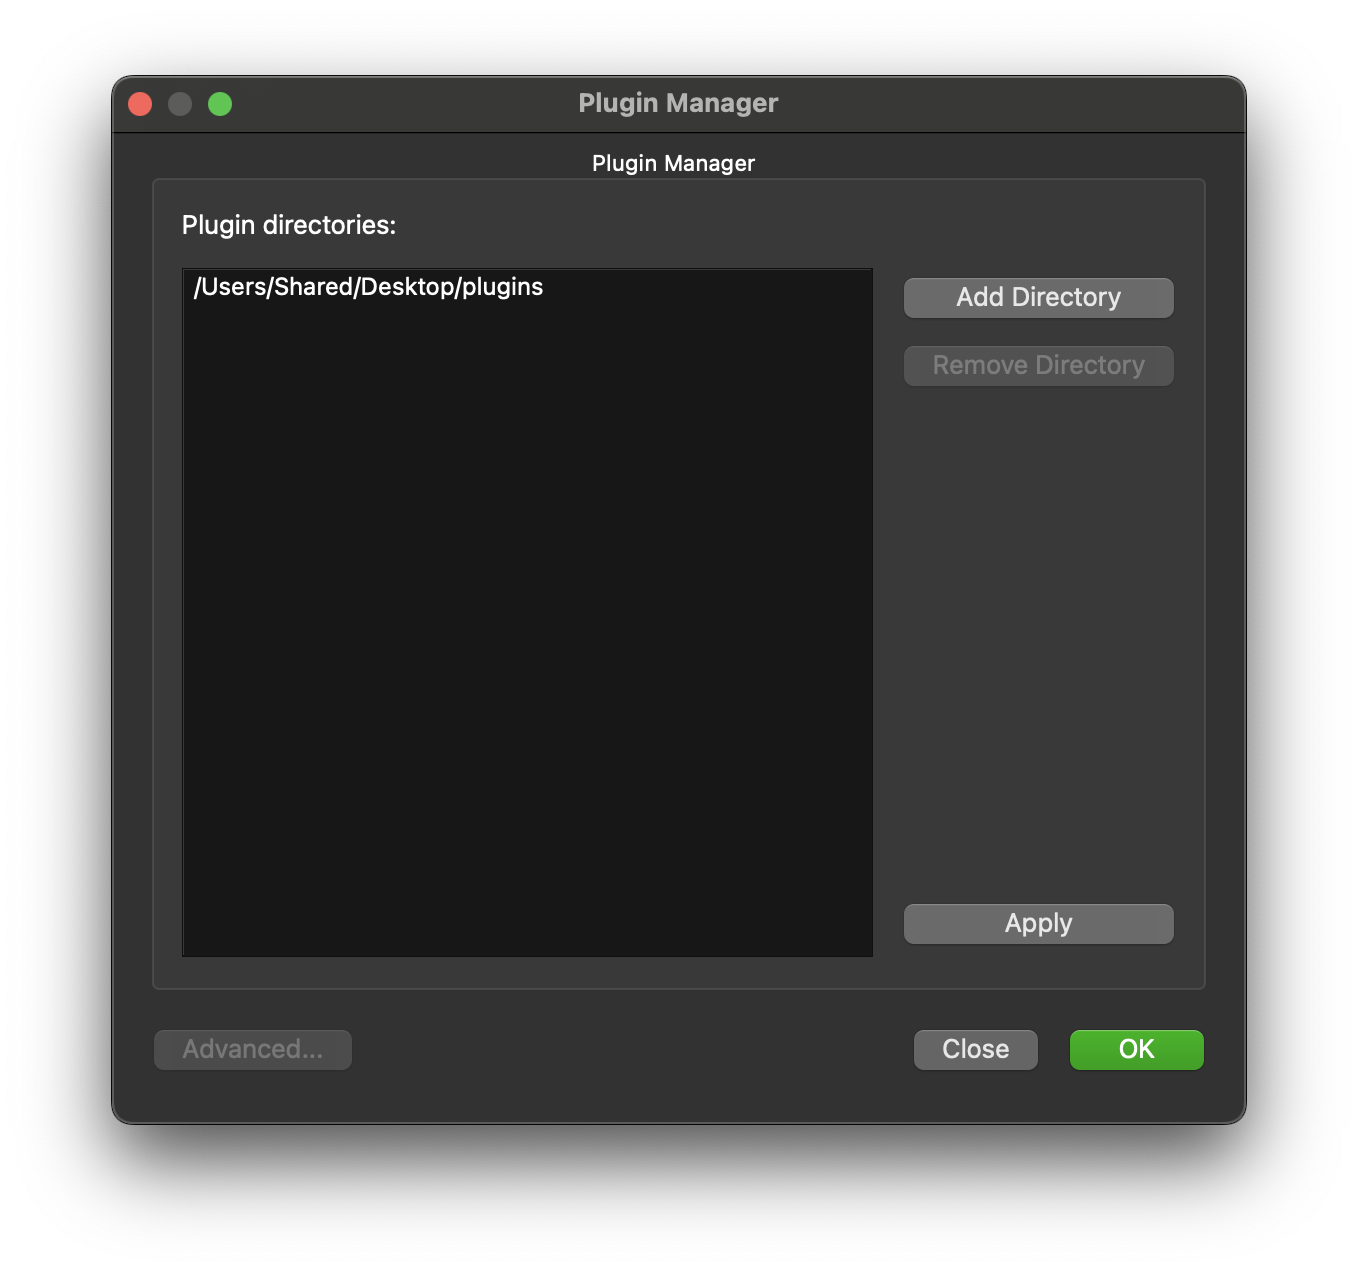
Click on OK to confirm this setup. The new plugin MyExport should now be available in the list of plugins under the Morphometric heading. We will add this to our workflow next.
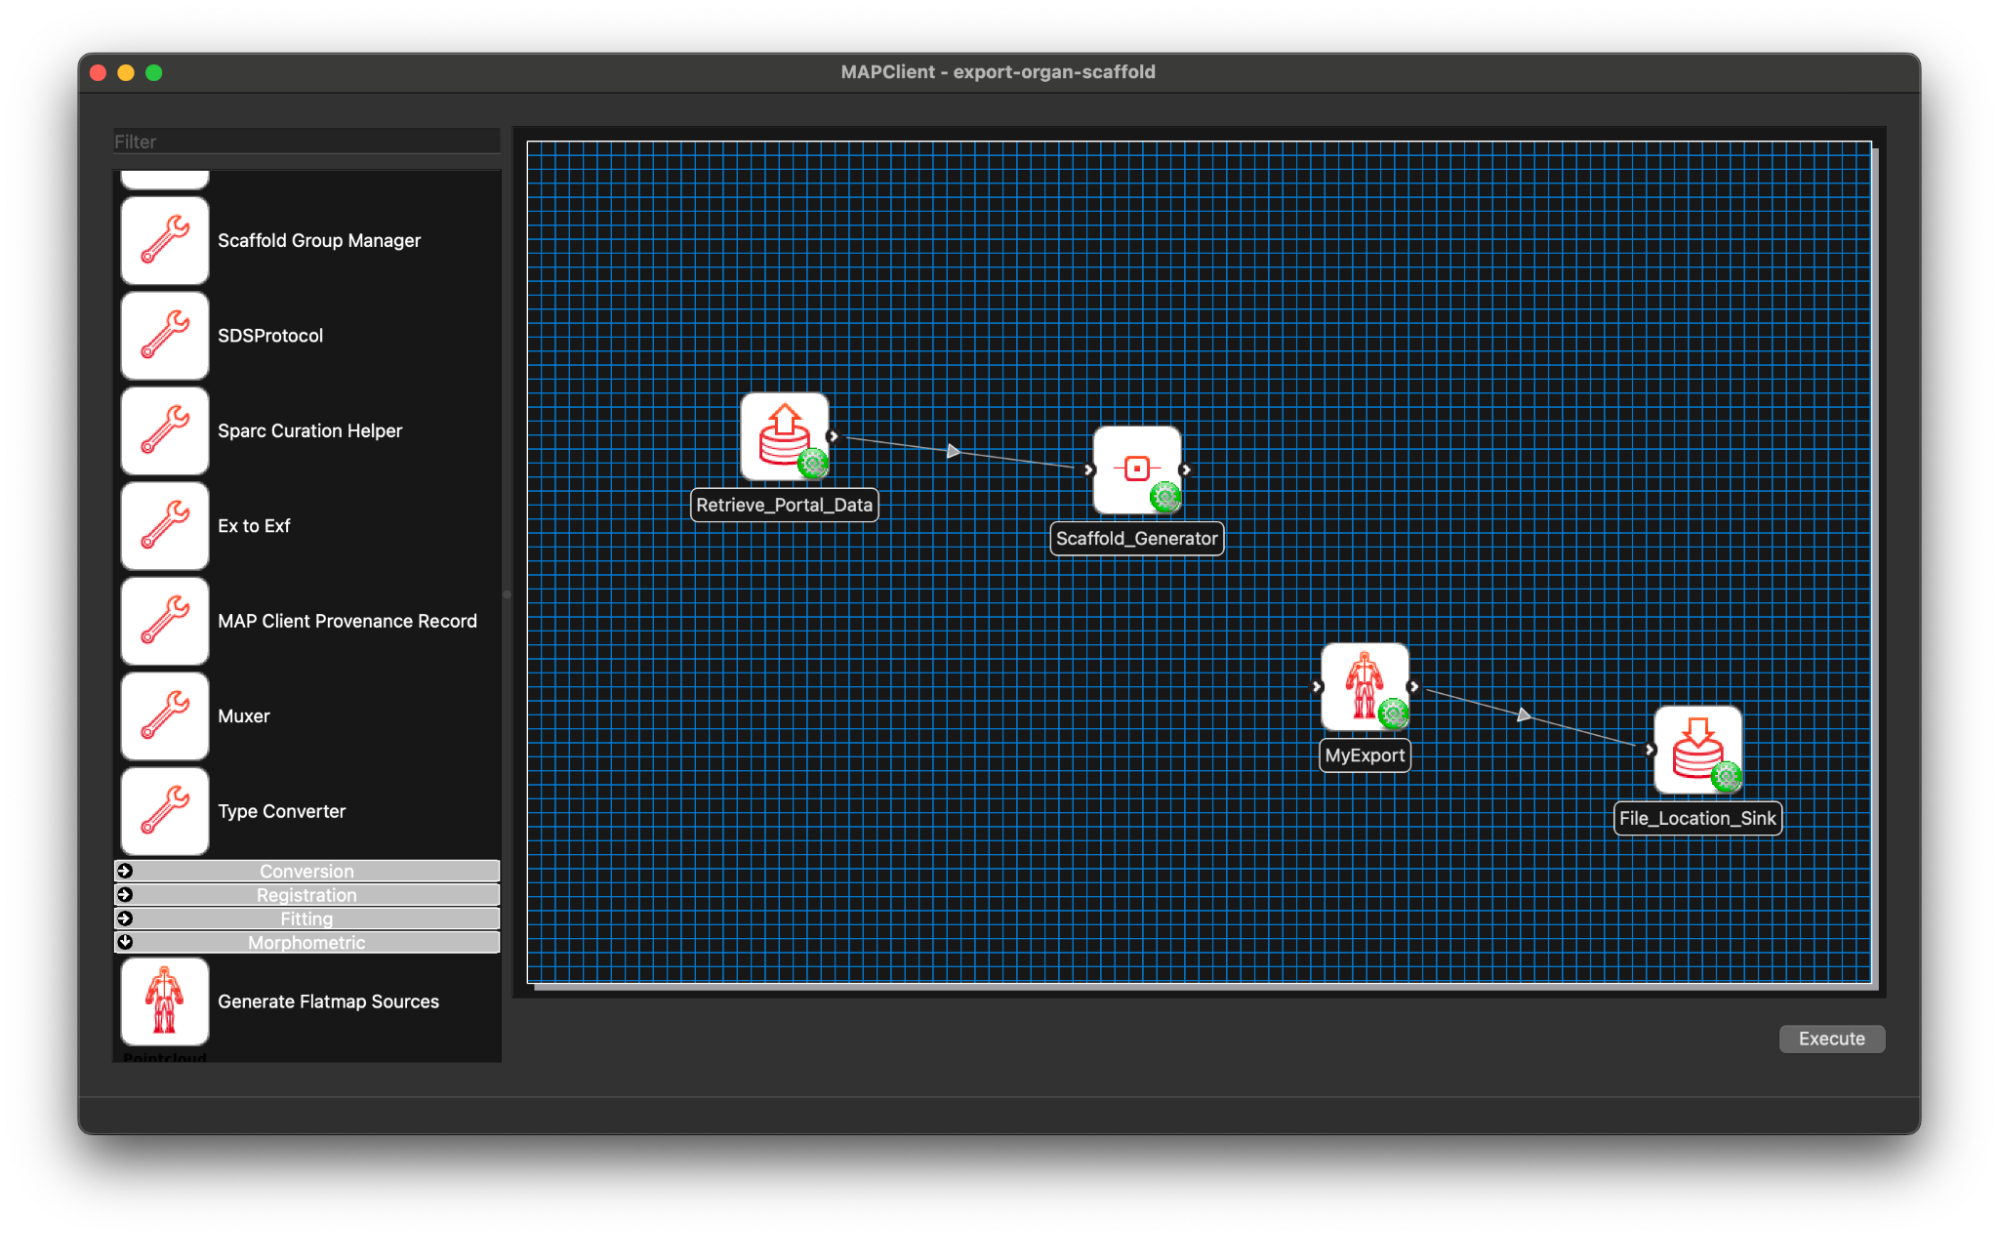
Add MyExport to Workflow
We now modify our existing workflow to include our new step MyExport. Much the same as we have done previously we filter the steps using the filter term my and from the morphometric section drag and drop the MyExport step to the workflow canvas.
We will also add a File Location Sink step to save our exported file to somewhere outside of the workflow directory itself.

We can remove the Argon Viewer step at this time as well, as it is no longer necessary. Next we will connect up what we can and configure the File Location Sink step. The File Location Sink step requires us to configure an output directory for this step to be successfully configured. Open the step configuration dialog and use the directory chooser to select a directory, the Desktop will work just fine for us but any directory you choose will be fine.
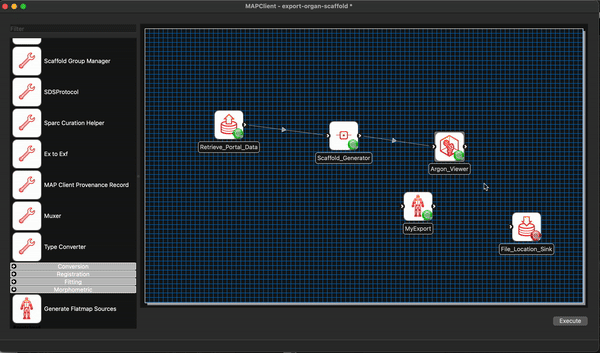
At this point we are not able to connect up the Scaffold Generator to the MyExport step as the Scaffold Generator step provides a list of file locations and the MyExport step only uses a single file location. We will fix up this small issue when we start editing the code of our MyExport step.
We are able to connect the file location provided by the MyExport step to the uses port for the File Location Sink step. Do this, and save the workflow in its current state CTRL-S (CMD-S macOS).
At this point we should have a partially connected workflow with all the steps configured.
Coding MyExport
In this section we will add some python code to the generated skeleton code for our step. We will be assuming the reader has some knowledge of python and programming languages for the following discussion.
The first thing we need to do is fix up the uses port situation. We need our step to accept either a single file location or a list of file locations. We can make this change easily enough by changing the code in the **init** method of the MyExportStep class in the file mapclientplugins/myexportstep/step.py.
What we currently have is:
    # Ports:
    self.addPort(('http://physiomeproject.org/workflow/1.0/rdf-schema#port',
                  'http://physiomeproject.org/workflow/1.0/rdf-schema#uses',
                  'http://physiomeproject.org/workflow/1.0/rdf-schema#file_location'))
    self.addPort(('http://physiomeproject.org/workflow/1.0/rdf-schema#port',
                  'http://physiomeproject.org/workflow/1.0/rdf-schema#provides',
                  'http://physiomeproject.org/workflow/1.0/rdf-schema#file_location'))
Here we see that a port is defined by a subject-predicate-object tuple. We need to add a second option for the first port. We do this by passing in a list of tuples to the addPort method instead of a single tuple. The object and subject of the tuple stay the same, we only change the predicate to be 'http://physiomeproject.org/workflow/1.0/rdf-schema#uses-list-of'.
Making this change we should end up with the following:
    # Ports:
    self.addPort([('http://physiomeproject.org/workflow/1.0/rdf-schema#port',
                   'http://physiomeproject.org/workflow/1.0/rdf-schema#uses',
                   'http://physiomeproject.org/workflow/1.0/rdf-schema#file_location'),
                  ('http://physiomeproject.org/workflow/1.0/rdf-schema#port',
                   'http://physiomeproject.org/workflow/1.0/rdf-schema#uses-list-of',
                   'http://physiomeproject.org/workflow/1.0/rdf-schema#file_location'),
                  ])
    self.addPort(('http://physiomeproject.org/workflow/1.0/rdf-schema#port',
                  'http://physiomeproject.org/workflow/1.0/rdf-schema#provides',
                  'http://physiomeproject.org/workflow/1.0/rdf-schema#file_location'))
Next we will make some minor changes to the execute method in the same file. This will make the step fully functional, but not yet very useful. The execute method starts off as:
   def execute(self):
        """
        Add your code here that will kick off the execution of the step.
        Make sure you call the _doneExecution() method when finished.  This method
        may be connected up to a button in a widget for example.
        """
        # Put your execute step code here before calling the '_doneExecution' method.
        self._doneExecution()
The skeleton execute method simply calls _doneExecution() immediately. Our first change is to deal with the input, for now we will simply pass out the input file that we were given, later we will change this to the actual exported data that we write to a file.
def execute(self):
    """
    Add your code here that will kick off the execution of the step.
    Make sure you call the _doneExecution() method when finished.  This method
    may be connected up to a button in a widget for example.
    """
    # Put your execute step code here before calling the '_doneExecution' method.
    input_file = self._portData0
    if isinstance(self._portData0, list):
        input_file = self._portData0[0]
    self._portData1 = input_file
    self._doneExecution()
The only thing of note here is that we check if the input is a list or not, if it is a list then we simply take the first item in it and use that for our input file. Clearly, there is not a lot of error checking going on here but it will suffice for our purposes.
Now we actually need to export the data we want from the scaffold information file we are given. We can do this by creating a function that will generate the data that we want and saving that data to file.
def export_organ_scaffold(input_file):
    c = Context("export")
    root_region = c.getDefaultRegion()
    root_region.readFile(input_file)
    field_module = root_region.getFieldmodule()
    field_cache = field_module.createFieldcache()
    coordinate_field = field_module.findFieldByName("coordinates")
    nodes = field_module.findNodesetByFieldDomainType(Field.DOMAIN_TYPE_NODES)
    node_iter = nodes.createNodeiterator()
    node = node_iter.next()
    data = []
    while node.isValid():
        field_cache.setNode(node)
        result, coordinate = coordinate_field.evaluateReal(field_cache, 3)
        if result == ZINC_OK:
            data.append([node.getIdentifier(), *coordinate])
        node = node_iter.next()
    return data
The export_organ_scaffold function here creates a cmlibs.zinc.context.Context object and reads the input file into the root region. From there coordinate field is found, fortuitously called coordinates and we iterate over all the nodes in the root region and extract their location. We save the node number and the coordinates for the node in a list. We return the node number and coordinates from our function as our data to write to file. Add this function to the mapclientplugins/myexportstep/step.py file somewhere, either above or below the MyExport class definition.
We will of course need to import some classes from other libraries, place the following import statements at the top of the file:
from cmlibs.zinc.context import Context
from cmlibs.zinc.field import Field
from cmlibs.zinc.status import OK as ZINC_OK
Now all that remains is for us to write out the data to the format of our choice. Here we write out the data in csv format, but feel free to go your own way on this. Again in the execute method, change what is currently there to:
def execute(self):
    """
    Add your code here that will kick off the execution of the step.
    Make sure you call the _doneExecution() method when finished.  This method
    may be connected up to a button in a widget for example.
    """
    # Put your execute step code here before calling the '_doneExecution' method.
    input_file = self._portData0
    if isinstance(self._portData0, list):
        input_file = self._portData0[0]
    data = export_organ_scaffold(input_file)

    output_file = os.path.join(self._location, f"{self._config['identifier']}-export.csv")
    with open(output_file, "w") as fh:
        for item in data:
            fh.write(",".join([f"{c}" for c in item]) + "\n")

    self._portData1 = output_file
    self._doneExecution()
We have simply made a call to our export_organ_scaffold and passed it our input file, we take the returned data and write this to a file in csv format. We then pass the location of this file to any step that requests it. In our case this is the File Location Sink step which will copy this file to the directory we configured earlier.
We need to add one last import to complete the code. At the top of the file import the os package which we use for defining the output location of our export data.
import osFinishing the Workflow
We will have to restart the mapping tools to pick up these changes, once this is done make the final connection between the Scaffold Generator step and our MyExport step. With the connection made save the workflow CTR-S (CMD-S macOS).

We are now ready to execute the workflow. From the Workflow menu select the Execute option. The workflow will execute the first plugin again, which will already be populated with the file that we want and all we need to do is click the Done button. The rest of the workflow will run without any intervention required on our part.
Finally
The last thing we will do is look at the csv file. Open the file MyExport-export.csv with an application that can understand csv files, Excel or Google Sheets for example. The data should be four columns wide consisting of a node number and the coordinates for the node. We could choose to create some plots of the data projected onto two-dimensional planes, the choice is yours.

Updated 8 months ago