Microfile+
Convert Microscopy Image Data and Metadata to SPARC Standard Formats
Background
Microscopy imaging data is a common experimental modality, and is inherently diverse. Variability in the experimental sample preparation as well as microscopy settings, methods and equipment all contribute to the complexity. The SPARC Optical Microscopy Imaging Data and Metadata Standard was designed and implemented to ensure a consistent set of microscopy imaging-specific metadata for primary and derivative imaging data across the SPARC ecosystem is included in experimental datasets. SPARC established a metadata standard so that microscopy data displayed on the SPARC Portal will have relevant context, and imaging metadata standards. Read the full SPARC Optical Microscopy Imaging Data and Metadata Standard here.
A freely available file converter, MicroFile+, has been created to generate widely supported image formats with the necessary metadata included within the file header. By providing a form of the proprietary source file as two open formats inclusive of the essential metadata, OME-TIFF and JPEG2000, we reduce the barrier for re-use.
Overview
The following series of steps will guide you through the process of converting experimental microscopy data within your dataset to a) meet standards and b) enable display of the microscopy data in integrated web viewers on the Portal.
What is Microfile+?
Microfile+ is an image-file converter that enables conversion of microscopy image data into two standard formats: JPEG2000 and OME-TIFF.
To download the free Microfile+ application, click here. Please note that Microfile+ is only compatible with Windows OS. If you do not have access to a Windows system, please contact the MBF-MAP Curation team at [email protected].
How do you use Microfile+?
- Choose the appropriate file-conversion function for your data:
- Convert image(s)
- Convert one image/stack to one image/stack.
- Combine 2D images into a 3D stack
- Compile individual 2D images into 3D stack.
- Combine images into a multichannel image or stack
- Convert 2D or 3D single color-channel images to multichannel images and image stacks.
- Convert image(s)
- Select the Save Format to BOTH.
- Choose JPEG 2000 Compression: file conversion to this format can be compressed (lossy) or uncompressed (lossless). If you choose LOSSY compression, indicate the compression ratio desired.
- Require metadata entry before saving [this option is selected by default].
- Click NEXT to select file(s) for conversion and indicate the output destination.
Note: More than one image can be converted according to the selected settings. - Select the image(s) to convert by either method below:
- Drag and drop images into the MicroFile+ window.
- Click the LOAD FILES... button, navigate to the location of the file(s) you want to convert, click to select, and press OPEN. The file(s) will appear in the MicroFile+ window.
- To remove a file from the conversion window, select the file and press REMOVE SELECTED.
- Select destination for image file(s) after conversion:
Note: By default, converted image file(s) are saved to the same location as the original(s).- To select a different location for all files in the window, click the SELECT OUTPUT... button, navigate to the destination folder, and click SELECT FOLDER.
- To select a different location for individual files in the window, click the SAVE button next to the file name, navigate to the destination folder, click OPEN, and click SAVE.
Note:At this step, please consider that the converted file(s) will ultimately be deposited into the derivative folder of your SPARC dataset in sub-folders that match the structure of the primary folders. See the next section for more details.
- Click SHOW METADATA to view/edit metadata.
- Click to select files in the conversion window and view the metadata for that file in the Metadata Generation panel on the right.
- The status of metadata completion is indicated next to each file:
- Green check mark indicates that critical SPARC metadata is sufficient.
- Red X indicates that critical SPARC metadata is missing.
- For images with a red X, click the file name and the critical metadata fields are highlighted in yellow. Pink boxes indicate fields that lack information. Double-click to enter metadata.
Note:Often times, the “Target Label” value is automatically populated in the metadata (e.g., “Ch3-T2” in example below), but does not reflect the true target label of the specific channel (e.g., “Smooth Muscle Actin”). Double-click the value field to update the metadata.

WHAT METADATA IS REQUIRED FOR SPARC? See Page 4 of the SPARC Optical Microscopy Imaging Data and Imaging Metadata Standard here. Metadata is formatted according to the OME metadata schema.
- Click CONVERT to begin the conversion process.
Uploading standardized data to Pennsieve
We recommend using SODA to prepare and upload your dataset submission. For more details, please follow the instructions here.
Note:When preparing your data, include the converted microscopy files (both OME-TIFF and JPEG2000) in the derivative folder. The subject and sample subfolders should match the primary folders.
Here is an example:
|
+--derivative
|    `--sub-1
|        `--sam-1
|            |--vagusnerve1.jp2
|            +--vagusnerve1.tif
+--primary
    `--sub-1
   			`--sam-1
            `--vagusnerve1.czi
Formatting derivative manifest files for your standardized microscopy image data
Manifest files provide information about specific files contained in a folder. For example, a folder may contain a file named mov_colon_stim.mp4. To make sure that your data are understandable, provide a brief description of the contents of this file along with other key metadata. File-level manifest files are required in all main folders. SODA creates a list of files for a manifest automatically during the upload, so you can easily fill in the associated metadata. Users uploading datasets directly to Pennsieve are required to create this file manually for each submitted top-level folder.
When including standardized microscopy data in your datasets, please see the following guidelines for the manifest file of the folder in which they are contained (/derivative):
- Indicate provenance of converted file in the description column
- E.g., “Image derived from vagusnerve1.czi.”
- Indicate compression level in the description column for JPEG2000
- E.g., “Converted to .jp2 with 20:1 compression using MicroFile+ (RRID:SCR_018724) from MBF Bioscience.”
- To enable metadata querying, add the following string to the “Additional types” column:
- For JPEG2000 (.jpx or .jp2 extensions): image/vnd.ome.xml+jp2
- For OMETIFF: image/vnd.ome.xml+tiff
Here is an example:
| filename | timestamp | description | file type | Additional types |
|---|---|---|---|---|
| sub-1/sam-1/vagusnerve1.jpx | 2020-07-30T17:28:07,512796-05:00 | Image derived from vagusnerve1.czi. Converted to .jp2 with 20:1 compression using MicroFile+ (RRID:SCR_018724) from MBF Bioscience. Microscopy metadata included in the file header. | .jp2 | image/vnd.ome.xml+jp2 |
| sub-1/sam-1/vagusnerve1.tif | 2020-07-30T17:28:07,512796-05:00 | Image derived from vagusnerve1.czi. Converted to .jp2 with 20:1 compression using MicroFile+ (RRID:SCR_018724) from MBF Bioscience. Microscopy metadata included in the file header. | .tif | image/vnd.ome.xml+tiff |
Note:Dataset manifest files will be checked by the SPARC Curation Team prior to the dataset becoming public. If you have any questions or concerns, please contact [email protected] or visit the curation office hours.
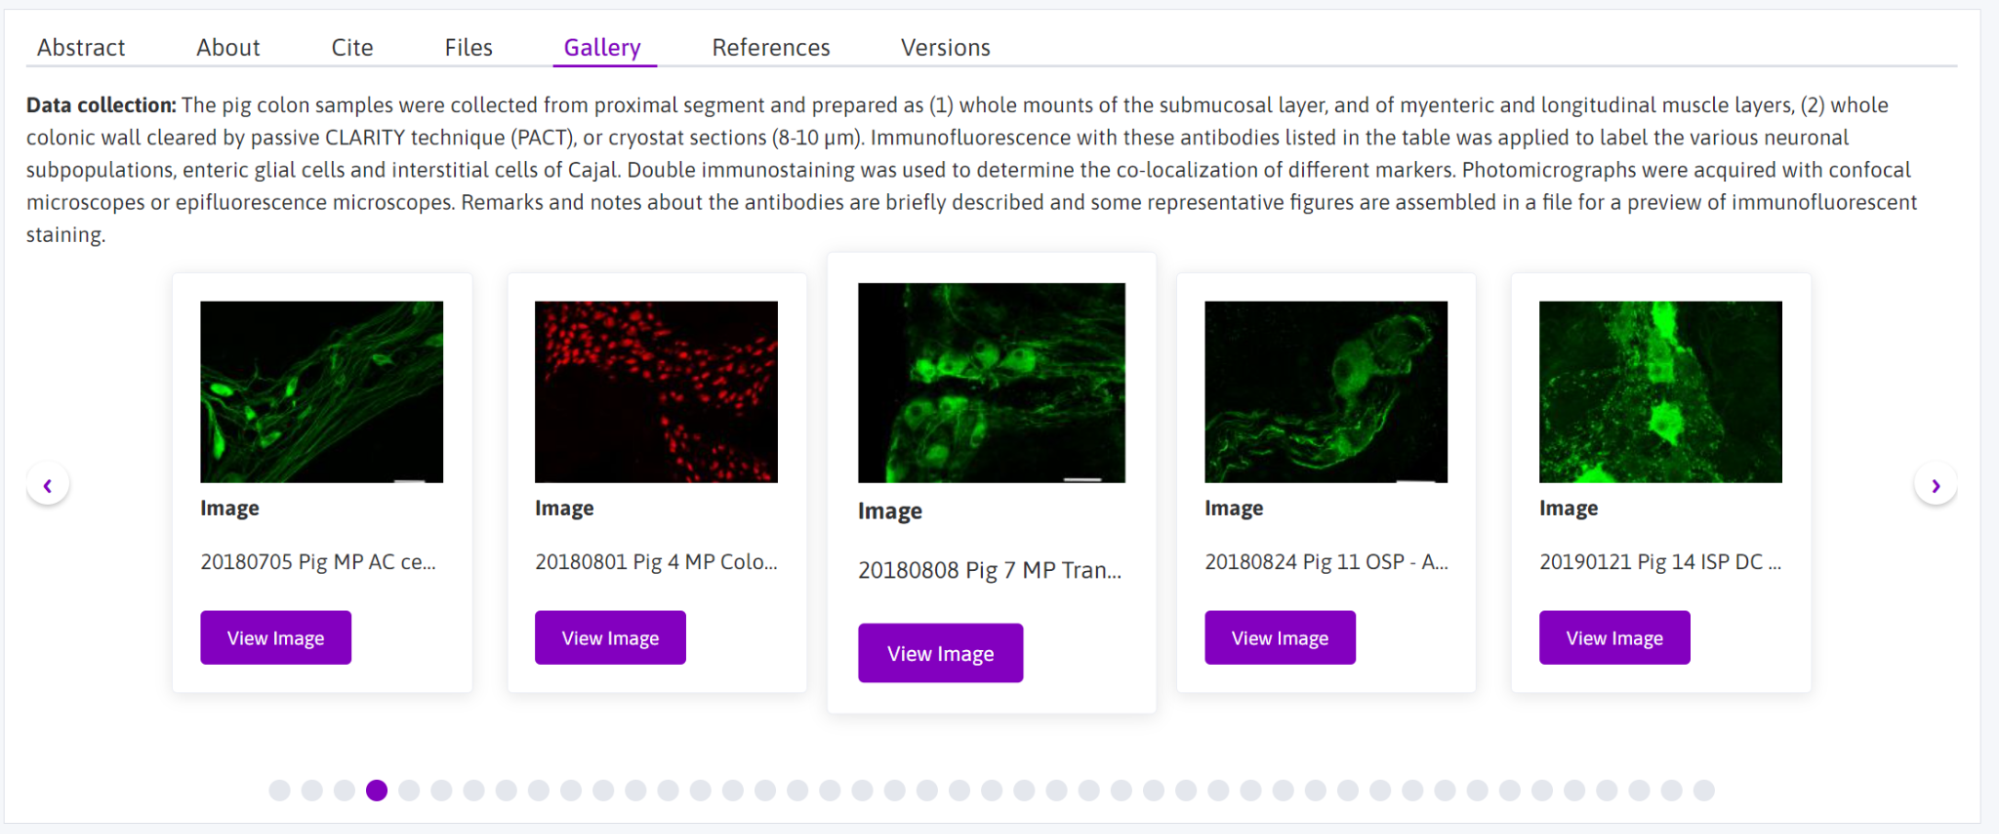
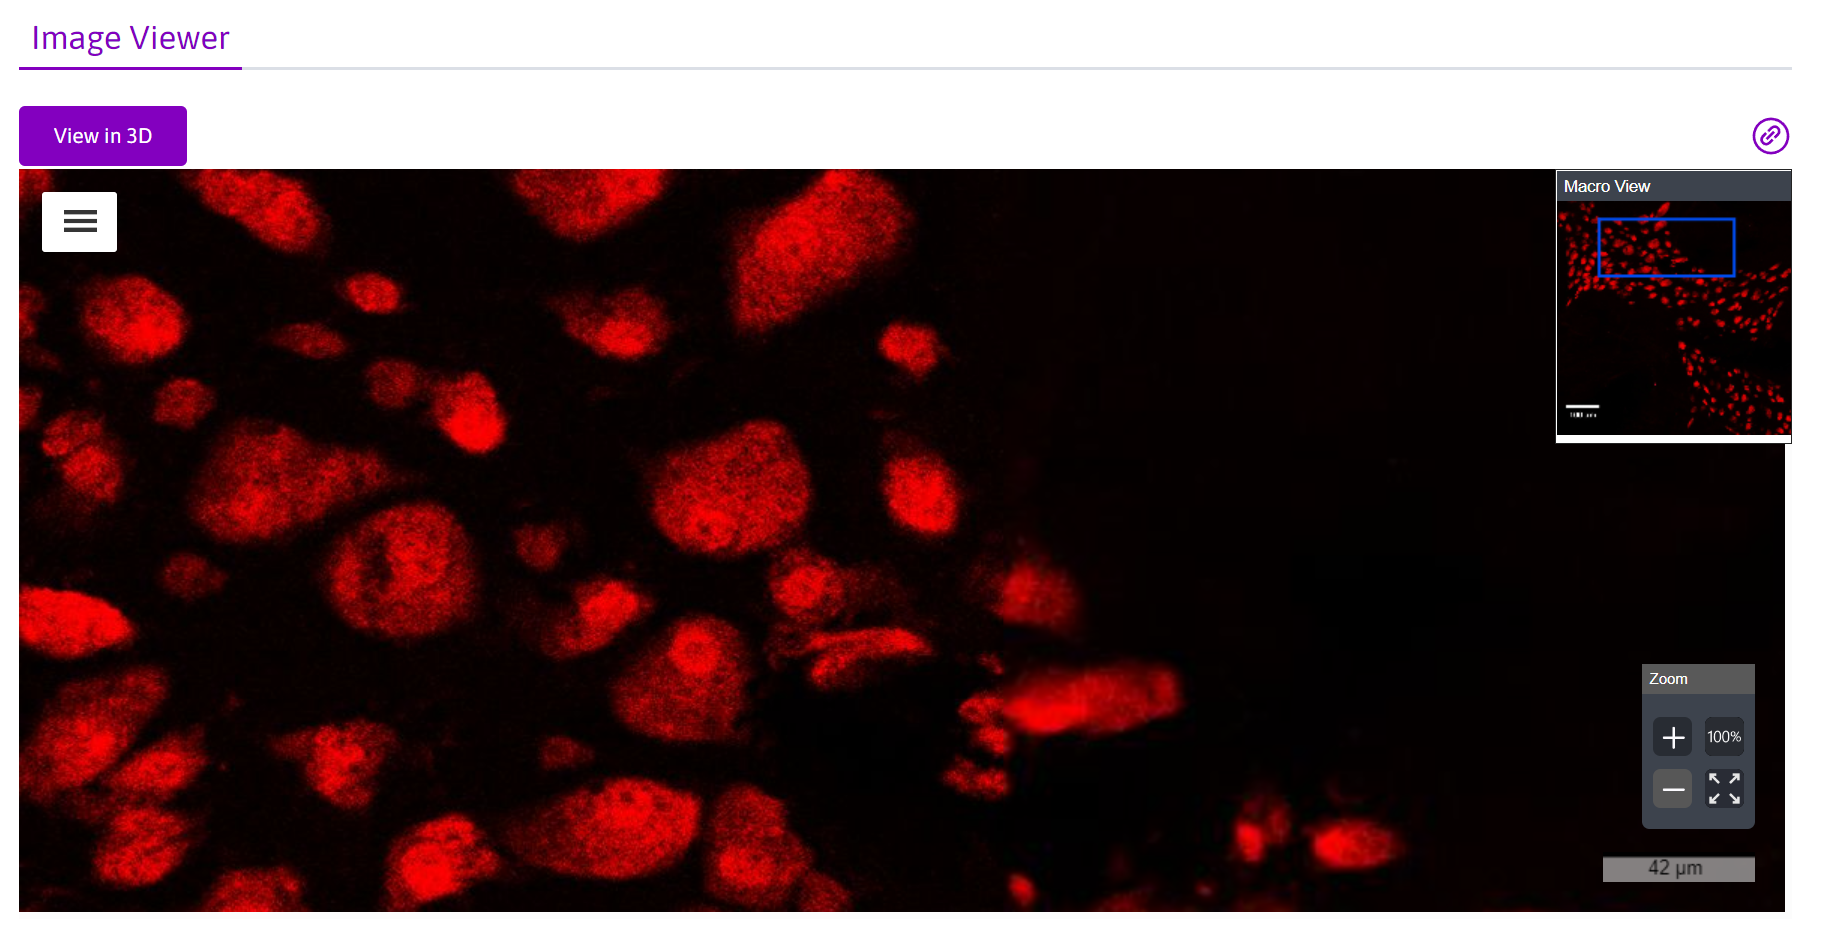
Selecting image data for display on the Portal gallery
Images that have been converted to JPEG2000 can be selected for public display on the Portal in integrated data viewers. For an example,
- After converting the images you’d like to display to JPEG2000 (.jp2/.jpx) using Microfile+, open Microfile+ and run the Biolucida Uploader (“BL Upload”).
Note:In order to upload your image data for display, you will need a username and password for Biolucida. Please contact [email protected] for assistance.
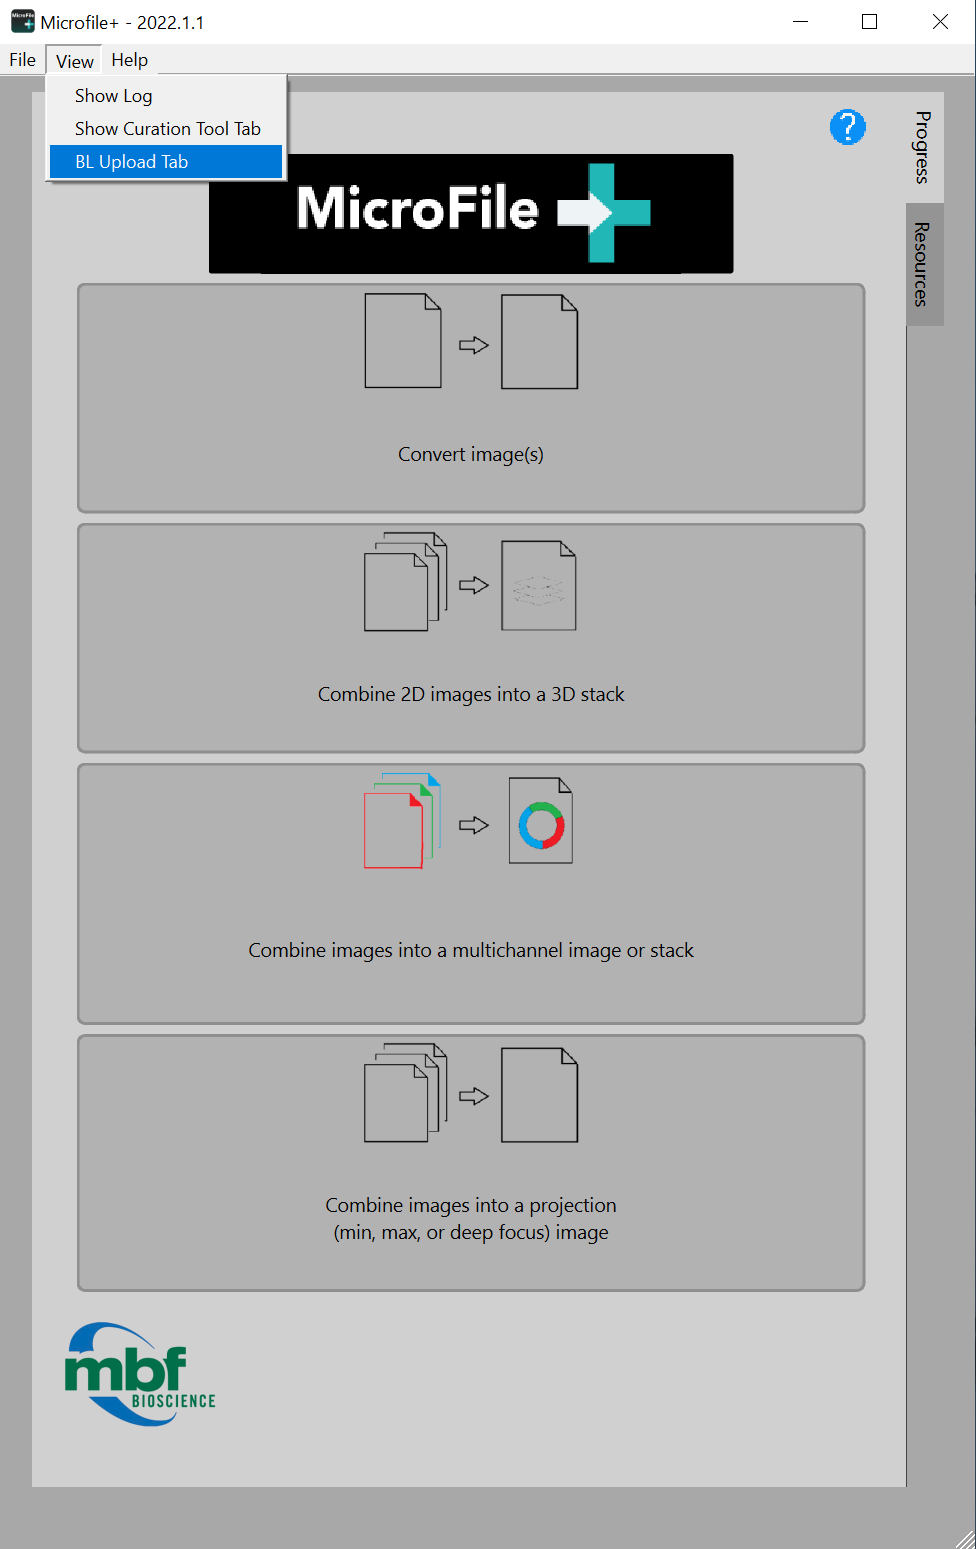
- Open MicroFile+ and select to view the BL Upload Tab from the View menu.
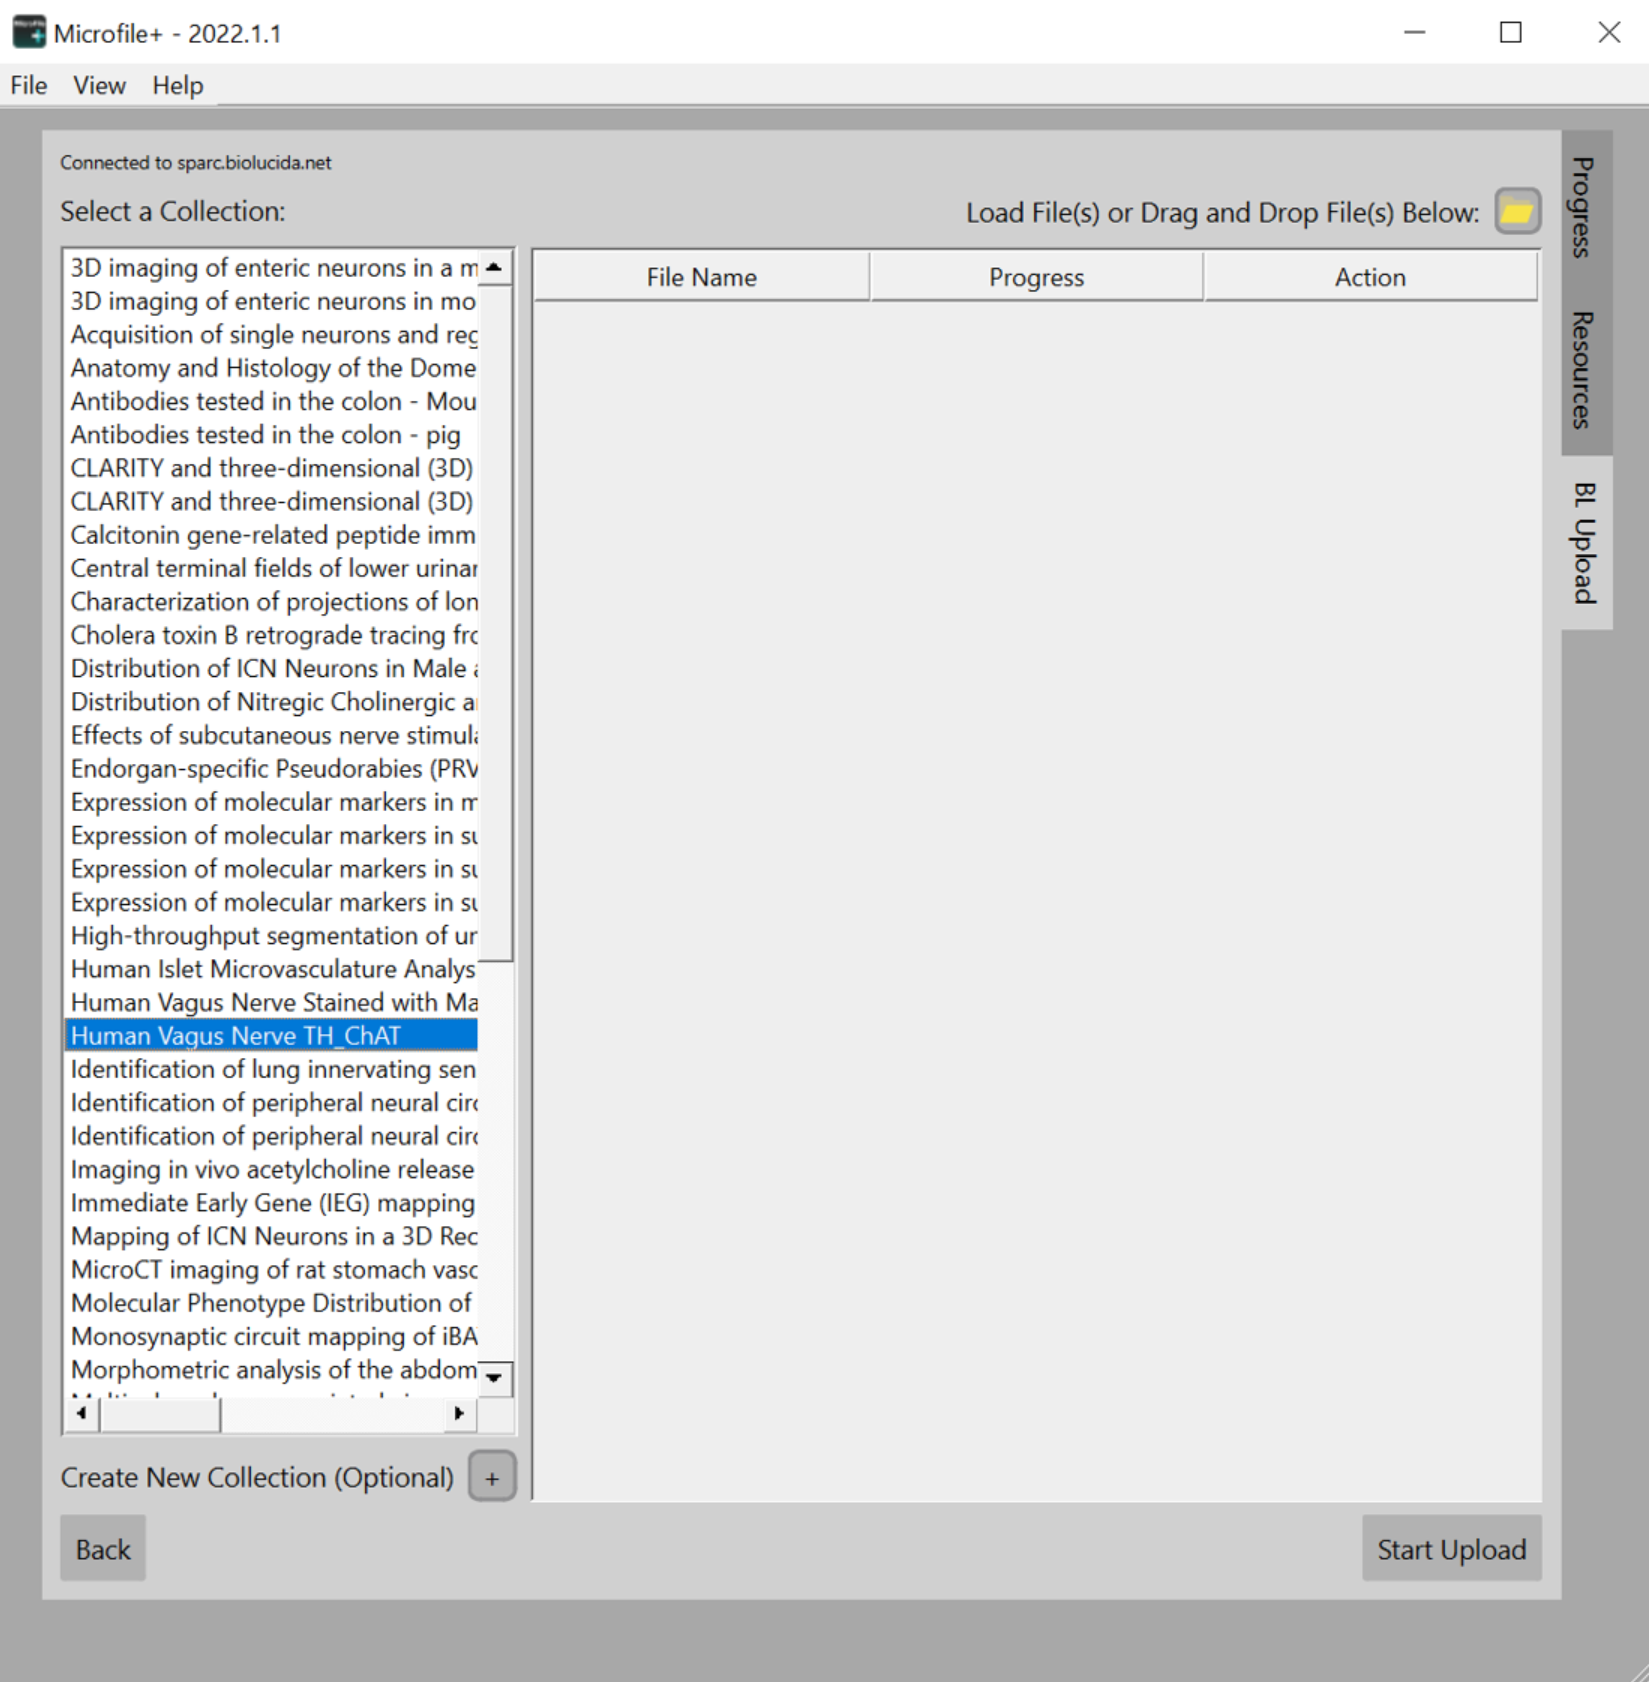
- Enter sparc.biolcuida.net in the Server URL field, and your username and password.

Note:Each collection corresponds to a SPARC dataset. All public collections will be visible to you, but you will only have access to upload to your assigned collections.
- Select the appropriate collection in the left window.
- Select the file icon or drag and drop file(s) to upload your converted JPEG2000 files.
- Once all JPEG2000 files are in the upload window queue, select Start Upload to upload your images to your assigned collection.
Note:If you encounter any issues or need assistance during the uploading process, please contact [email protected].
Note:It is possible that you get a message stating “Biolucida File Tracker is still processing the following images, please manually add them to your collection later.” If this happens, please contact [email protected].