Map Annotation Tool
A guide for viewing and creating annotations in a map
This tool enables authorized users to participate in making additions and providing evidence to further enhance the SPARC Anatomical Connectivity, Functional Connectivity and 3D Whole Body maps. To become an authorized user, please see the Access and Authorization section below.
As an authorized user you will be able to annotate the maps by suggesting addition of new and removal or modification of existing features and connections by drawing directly on the maps. Each annotation should be supported by providing evidence (linking a journal paper, dataset, etc.).
The annotations relevant to connectivity will be curated and, where appropriate, ingested into the SCKAN knowledgebase . The curation process determines if, and when, annotations made using this tool become standard knowledge used to construct the maps.
Tool Overview
The annotation tool allows users to perform the following actions:
- Add annotations: Suggest new features or connections.
- Edit annotations: Update or refine existing entries.
- Delete annotations: Remove incorrect or outdated entries
- Provide evidence: Link journal articles, book chapters, datasets, or other sources to support annotations.
- Review connectivity: Review other authorized users annotations
Annotating the Anatomical Connectivity (AC) maps
To access the annotation tool on the AC map scroll down toward the bottom left corner and click on the Change Settings icon, followed by selecting Annotation from Viewing Mode options (see Figure 1).
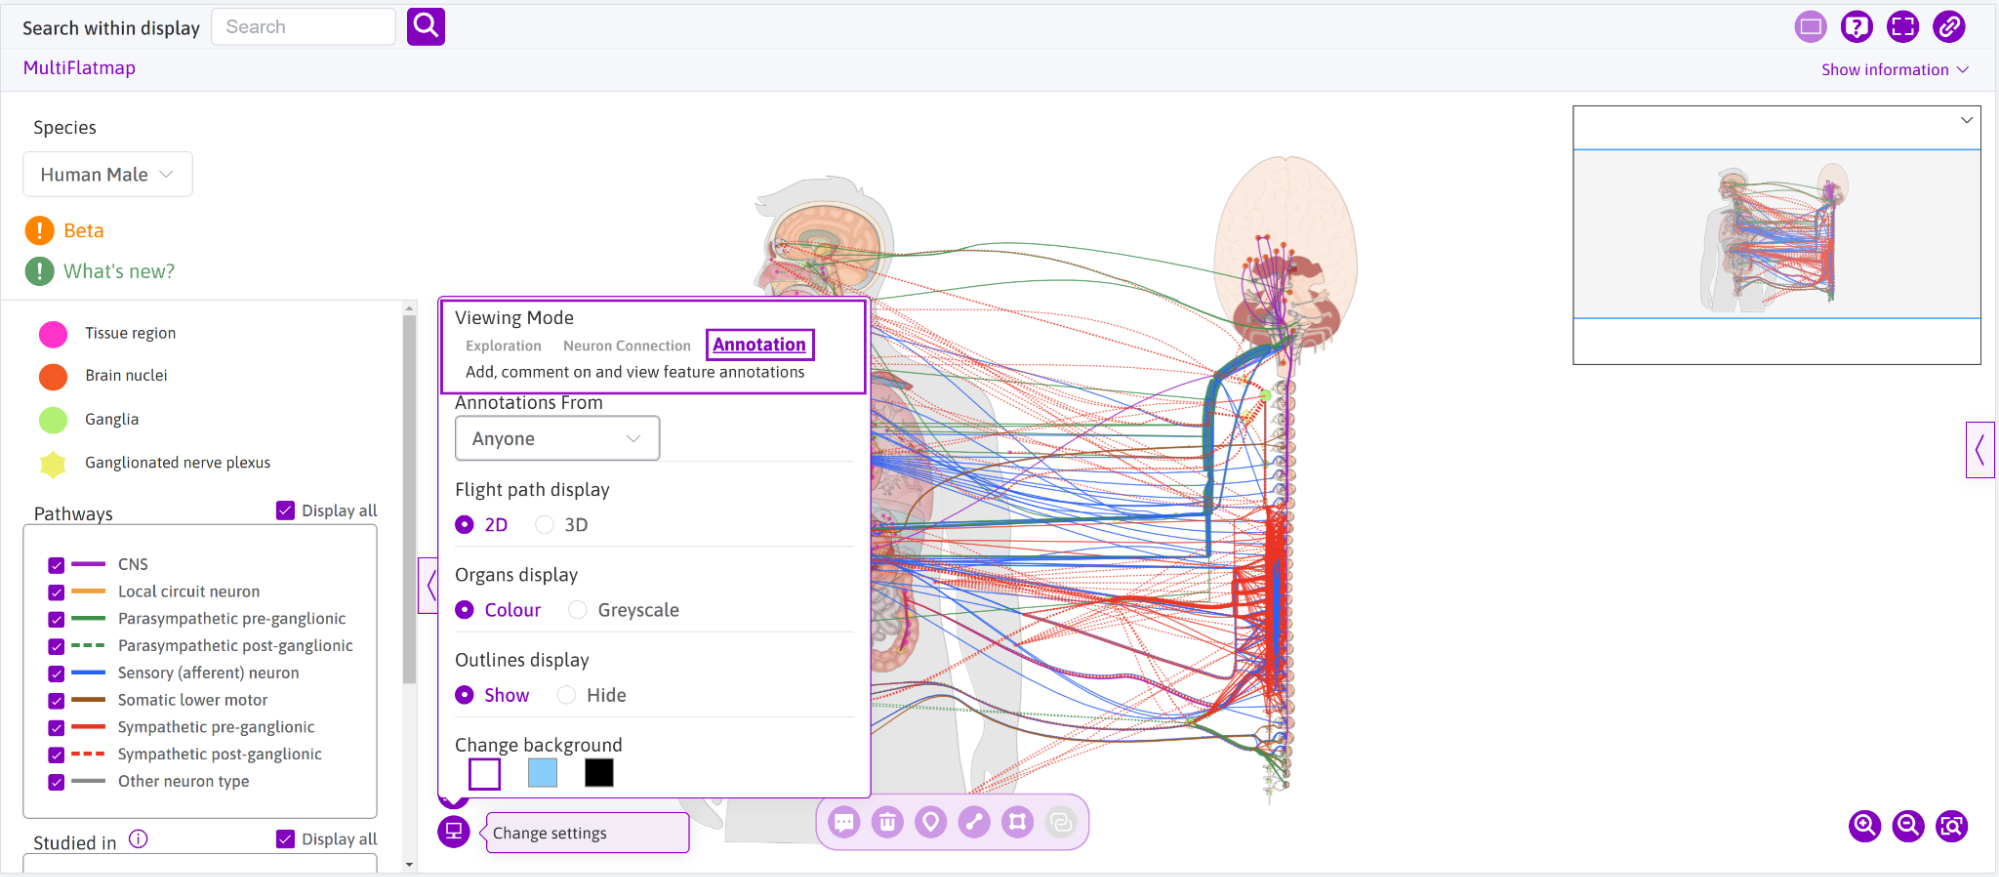
Figure 1: Viewing Mode can be changed using the Change Settings icon.
Alternatively, select the “Launch AC Map in Annotation Mode” from your SPARC Portal profile page (https://sparc.science/user/profile) (see Figure 2).
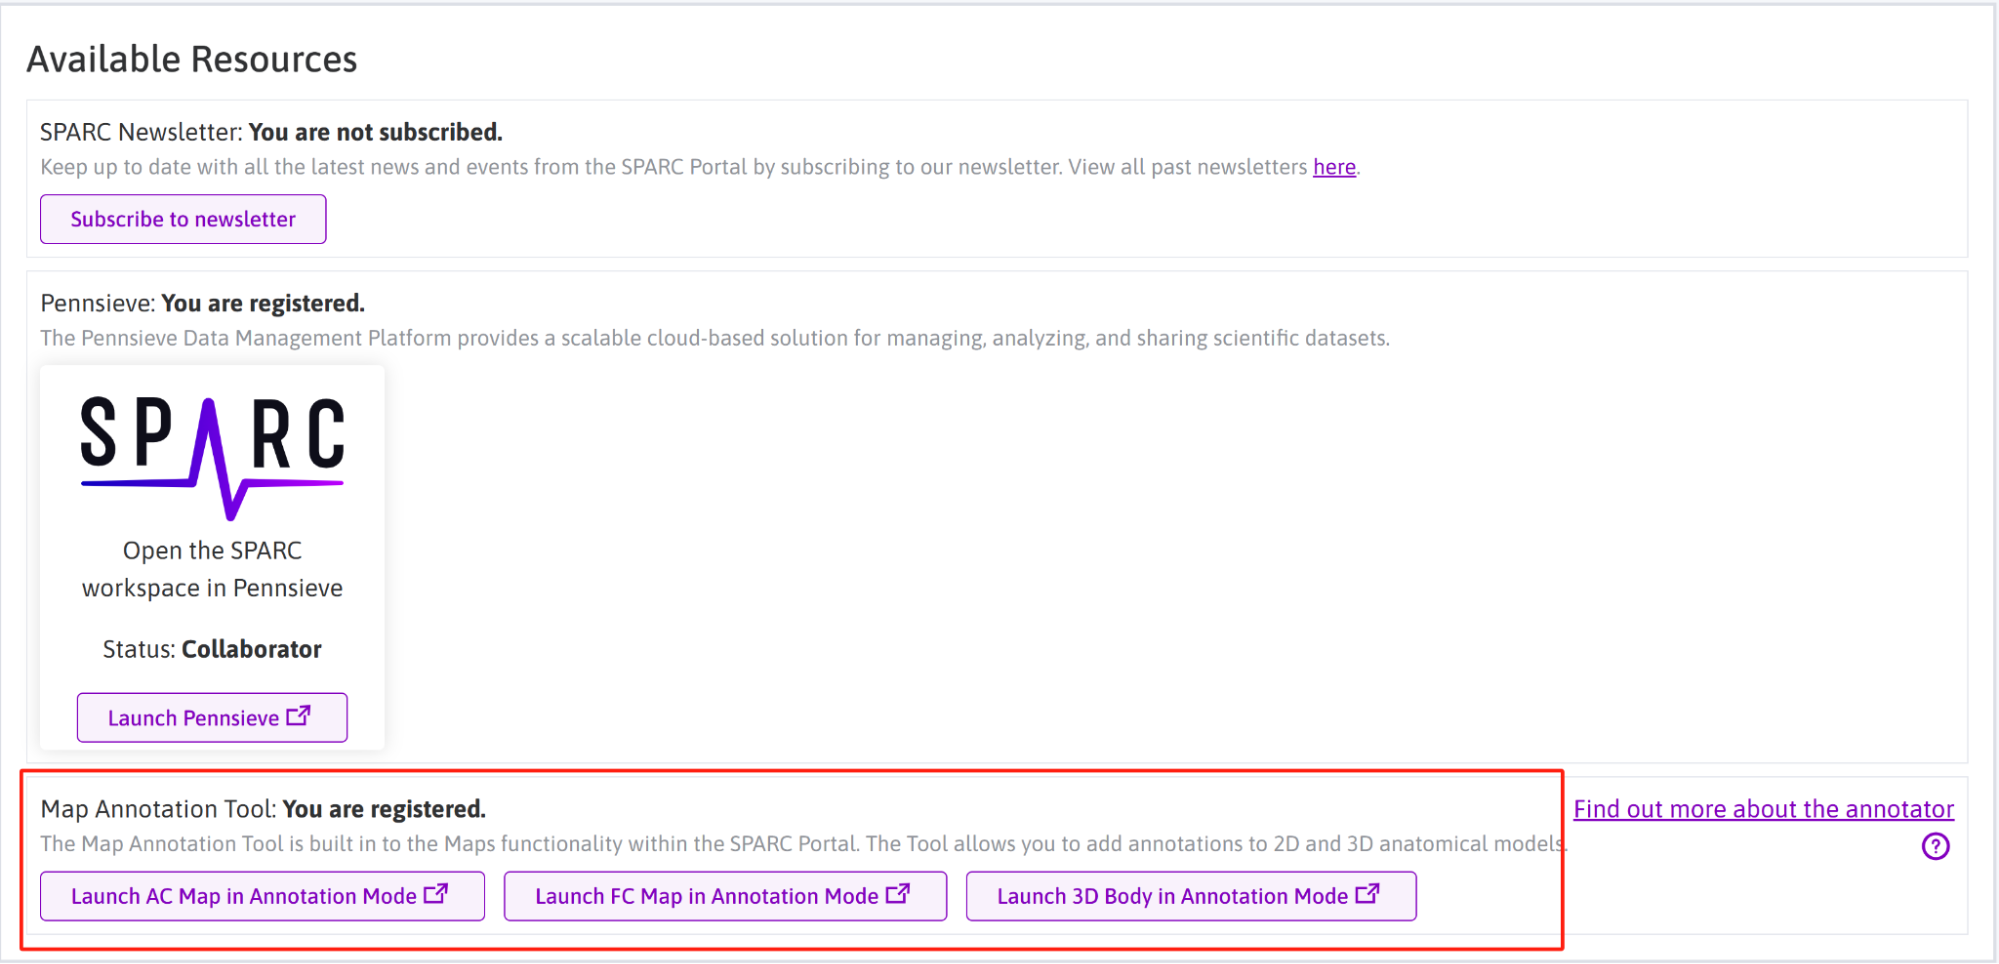
Figure 2: Launch Annotation mode in maps
Toolbar:
In annotation mode, the toolbar appears at the bottom of the screen, offering several functionalities:
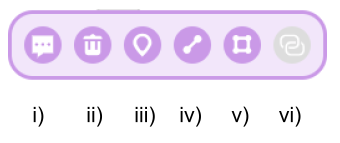
i) Edit mode - Update or refine existing annotations.
ii) Delete mode - Remove incorrect or outdated entries.
iii) Draw Point - Suggest new features: mark a specific location with a point.
iv) Draw LineString - Suggest new connections: draw a line between two or more features/locations.
v) Draw Polygon - Suggest new features: outline an area with three or more points.
vi) Connectivity - View and comment on connectivity annotations made by Draw LineString.
Sidebar:
Without selecting any tool, selecting any map feature opens the sidebar to display existing annotations specific to that feature (see Figure 3).
Sidebar consists of two tabs:
- Search tab - explore SPARC datasets
- Annotation tab - displays information related to the selected feature, including its Feature ID (internal), Label, Ontology, and Resource.
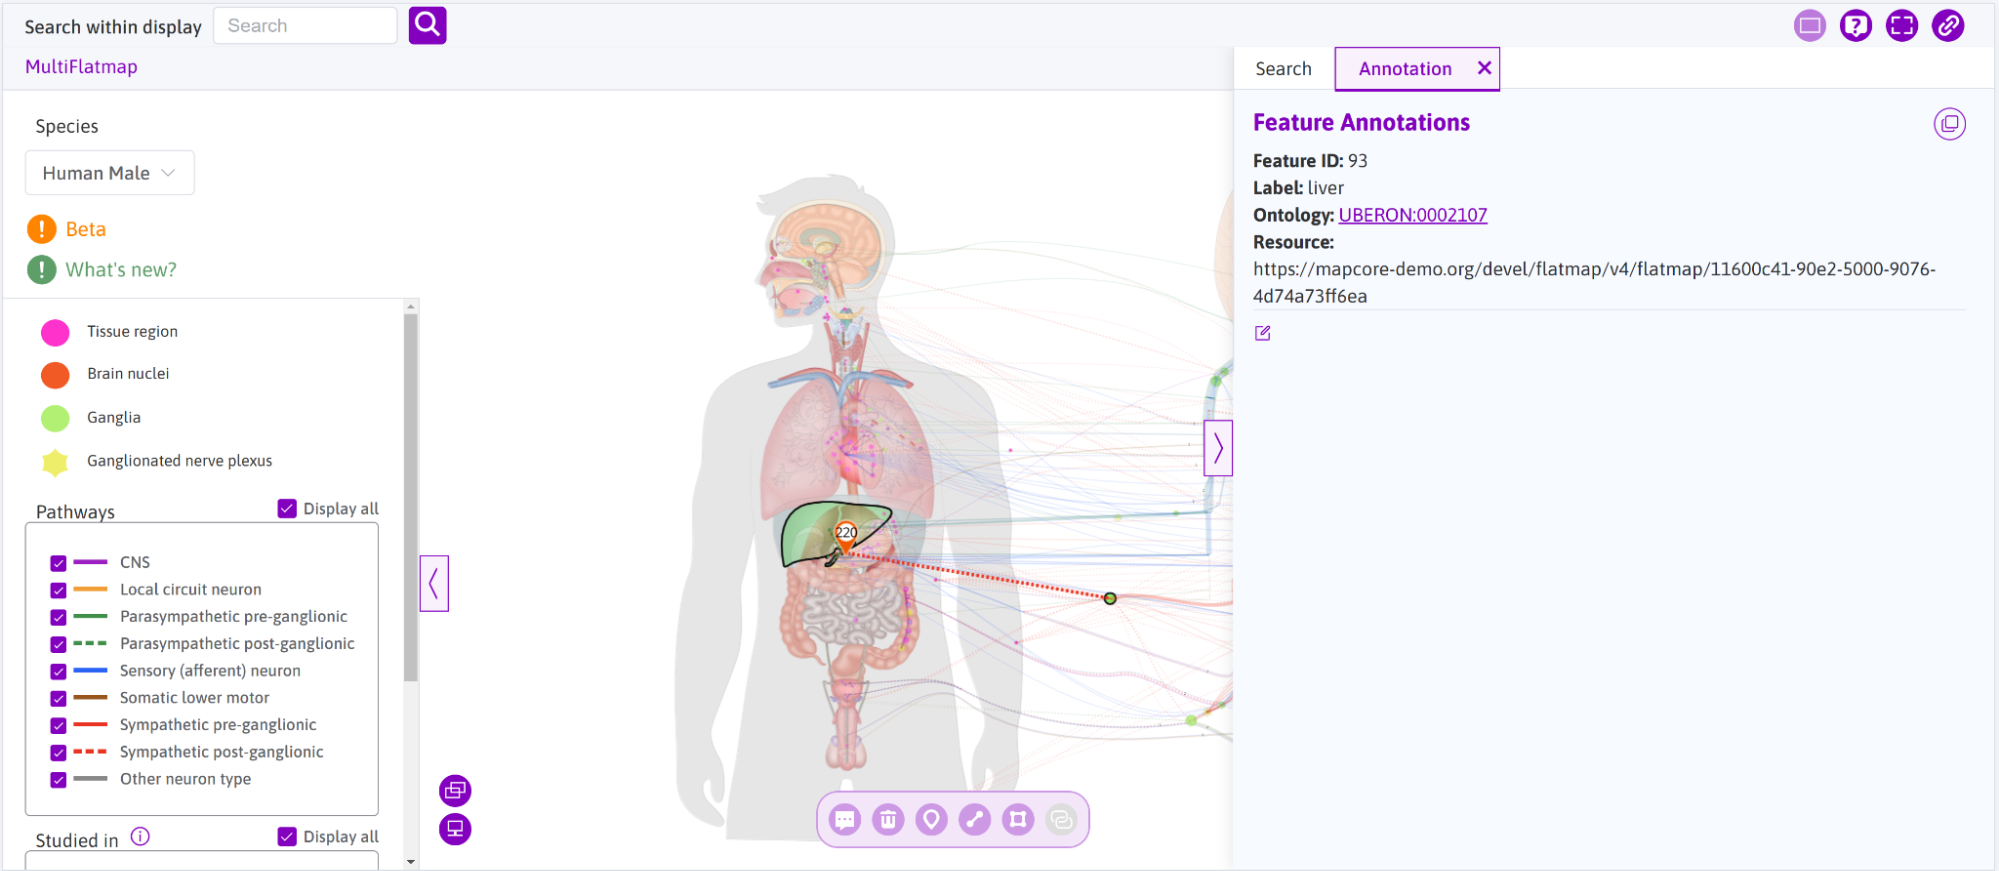
Figure 3: Clicking on any map feature opens the annotation sidebar.
Making annotations on the map
From the toolbar, you can access three drawing tools: Point, LineString and Polygon. All three types are drawn by mouse click.
To draw a point, choose the Draw Point tool and then one mouse click on the desired map location.
To draw a line, choose the Draw LineString tool and then click on the desired starting point, drag the mouse to desired end point and click again.
To draw a feature, choose the Draw Polygon tool and then click on at least three points on the map to define an outline for the polygon.
The escape key can be used to discard selection while drawing.
Press enter/return key or click on the last drawn position to complete the drawing (invalid drawing will be discarded).
Once the drawing is completed, the Finalize drawing dialog will be displayed (see Figure 4).
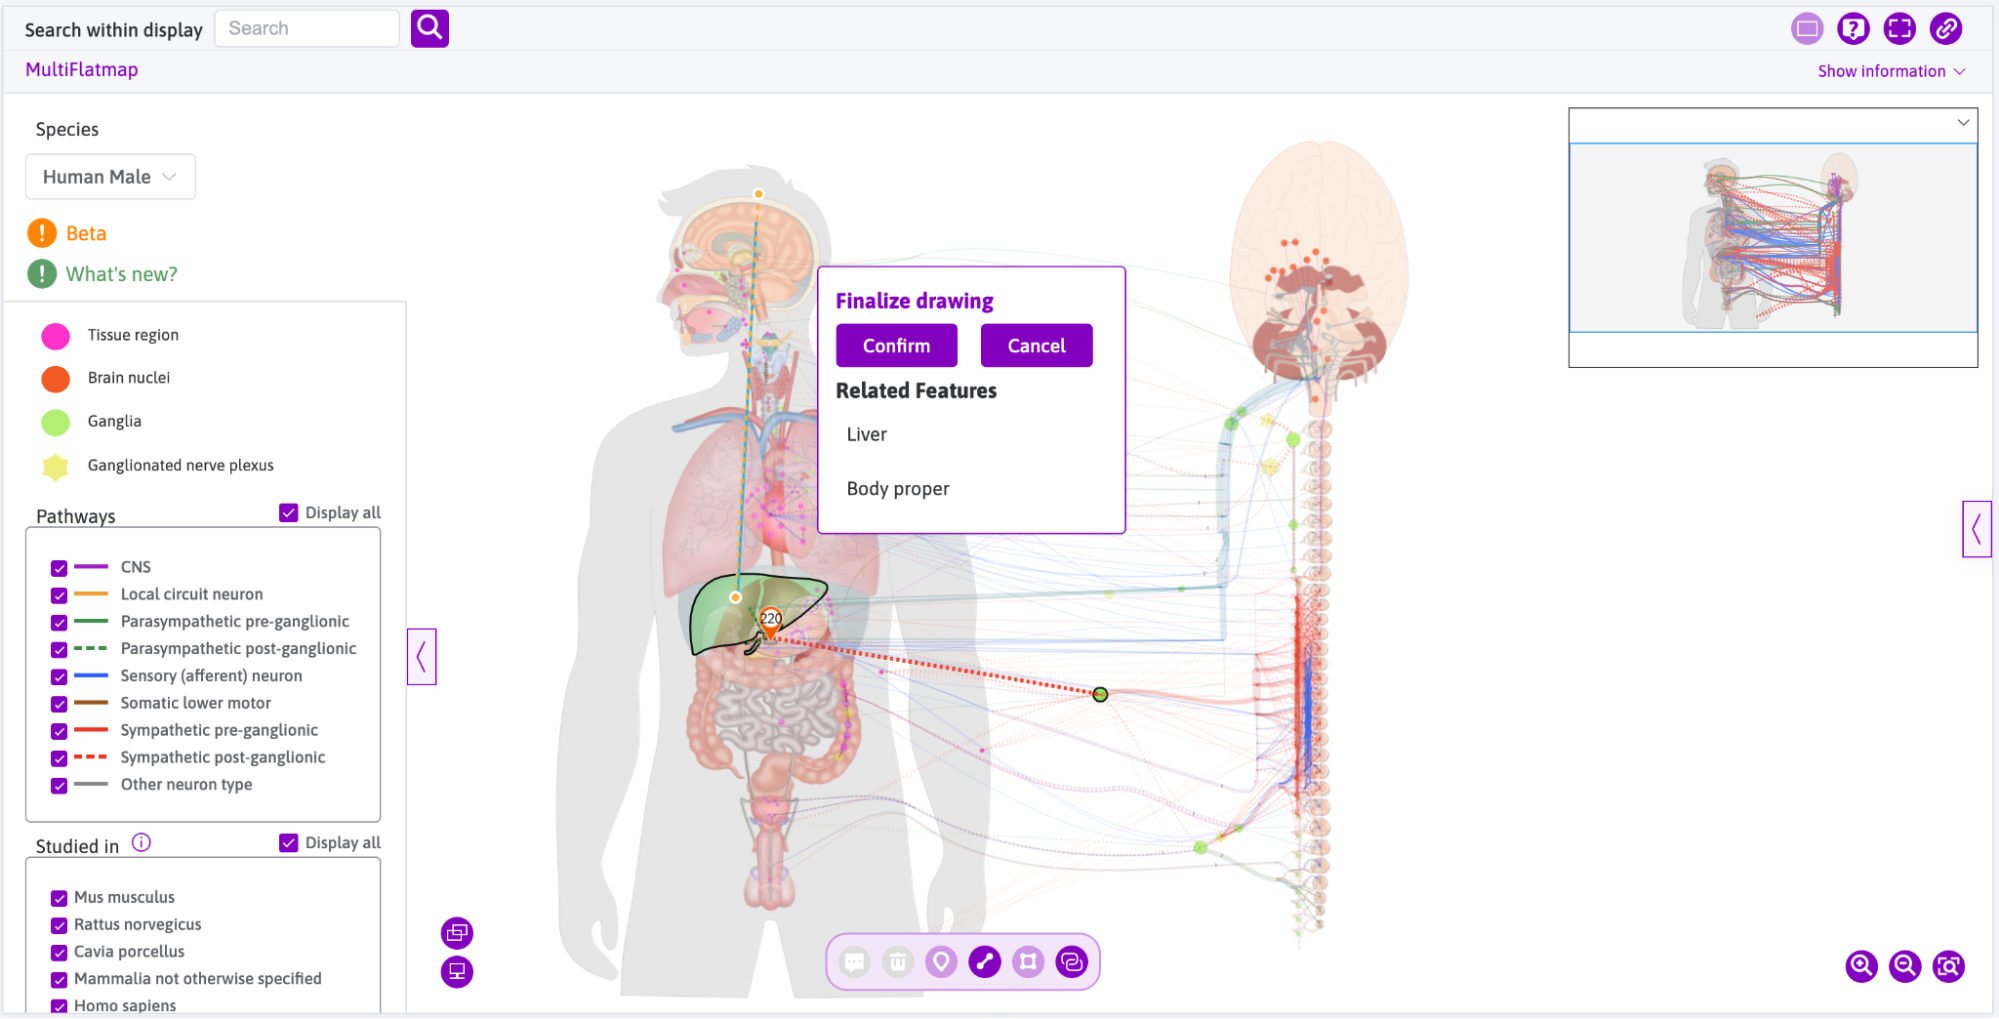
Figure 4: Finalise drawing confirmation dialog.
Click on Confirm to open the sidebar with Feature Annotations details for the drawn feature. From here you can add evidence for the annotation.
Click on the pencil icon ( ) to open the Suggested changes section. Evidence provided can contain a URL (dropdown menu: DOI and PMID and Other) to journal paper/book chapter/dataset. Multiple URLs can be added.
The Comment field is a free text field where any additional information can be added.
Once completed, click on Submit. The entry will now appear as a ‘Previous submission’. You can click on the pencil icon again to add more suggested changes.
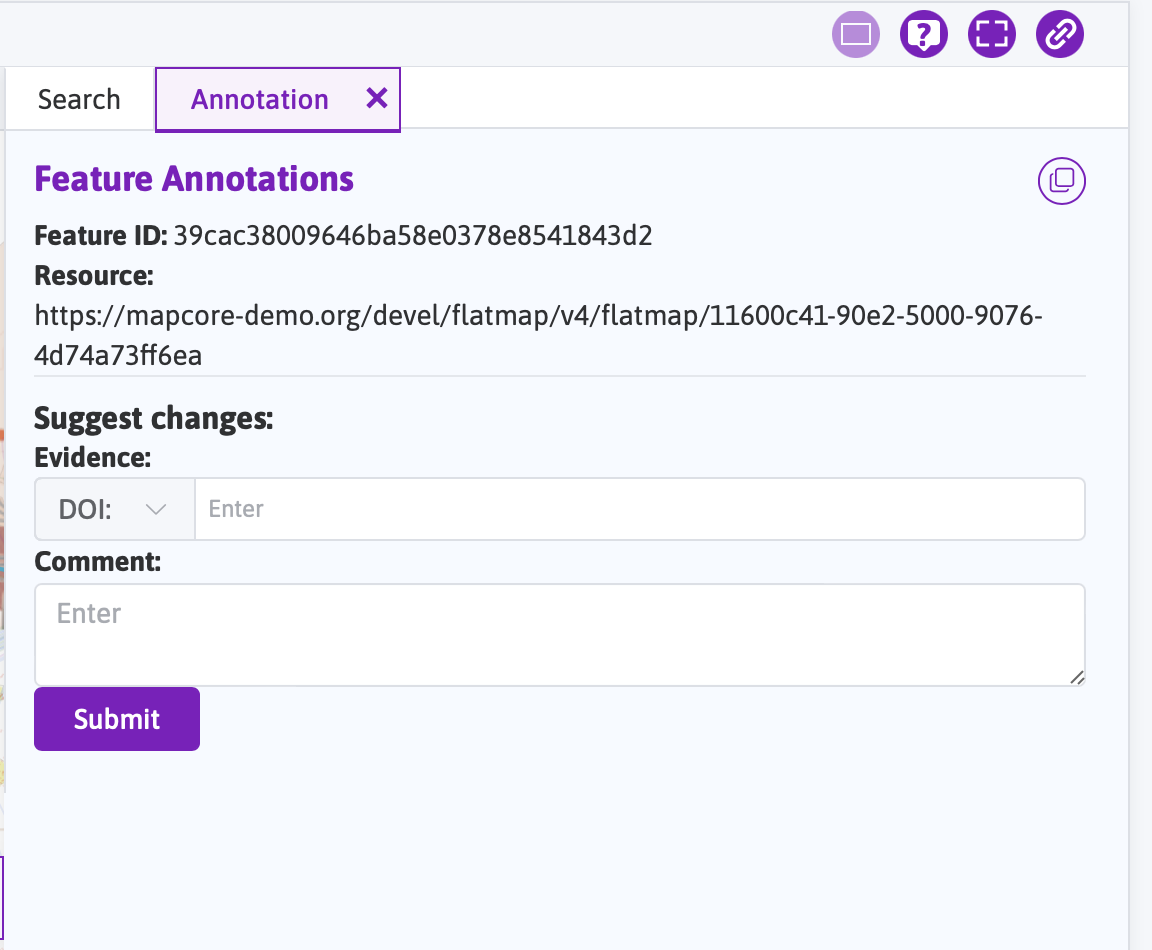
Figure 5: Adding Evidence to annotations.
Edit or Delete annotations
Edit
Select Edit Mode from the Toolbar.
To add another annotation to an existing feature - double-click on the drawn feature and the sidebar will open. Update the annotation in the same way as shown in Figure 5.
To update the position of a drawn annotation - single-click on the drawn feature, and drag its position to update. The sidebar will open with two options: the pencil icon allows for a comment to be added using the Suggest changes dialog (see Figure 5) and the tick icon will confirm the position update.
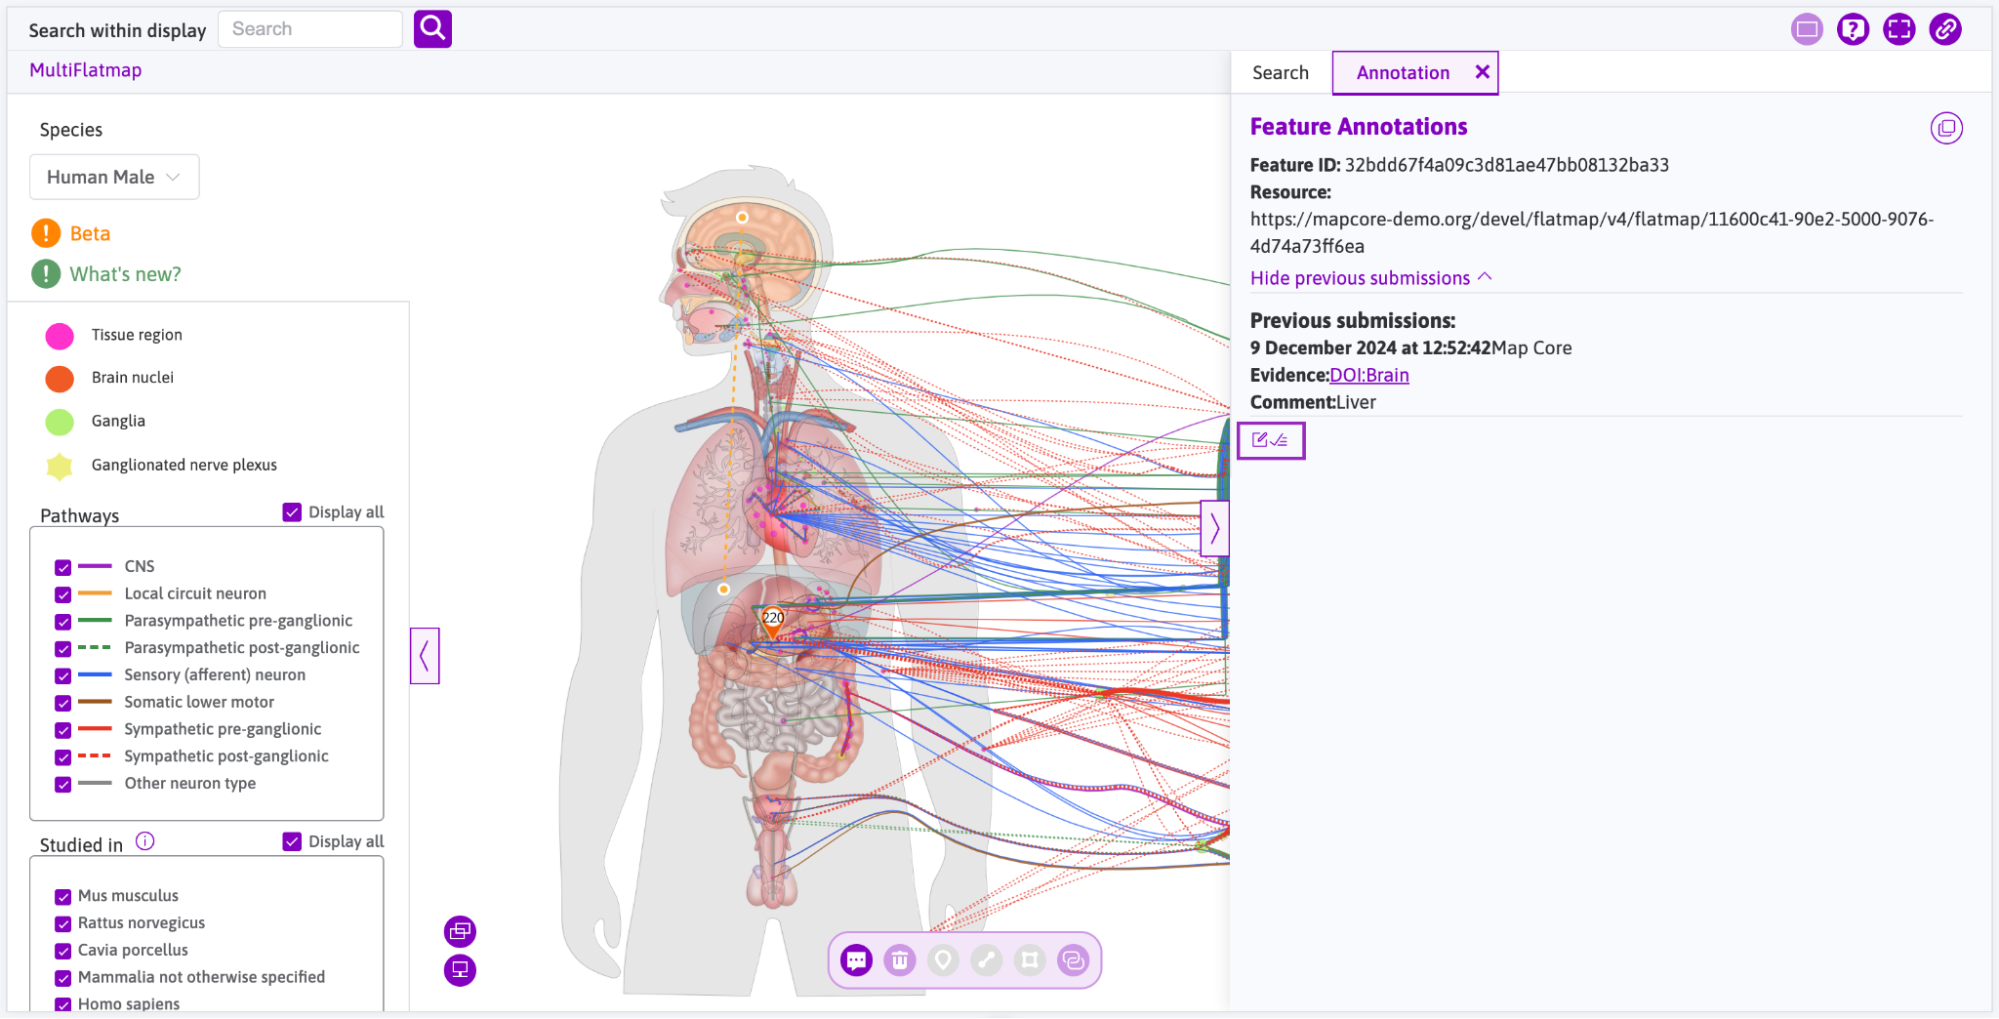
Figure 6: Select the pencil icon to add comment and tick icon to confirm change in position.
Delete
Select Delete Mode from the Toolbar.
Clicking on any drawn annotation will open the sidebar with the Feature Annotation section (see Figure 7)
Two options are provided for deleting: delete the annotation directly (click on the trash icon) or submit a comment by clicking on pencil icon first, once the comment is submitted the annotation feature will be automatically deleted.
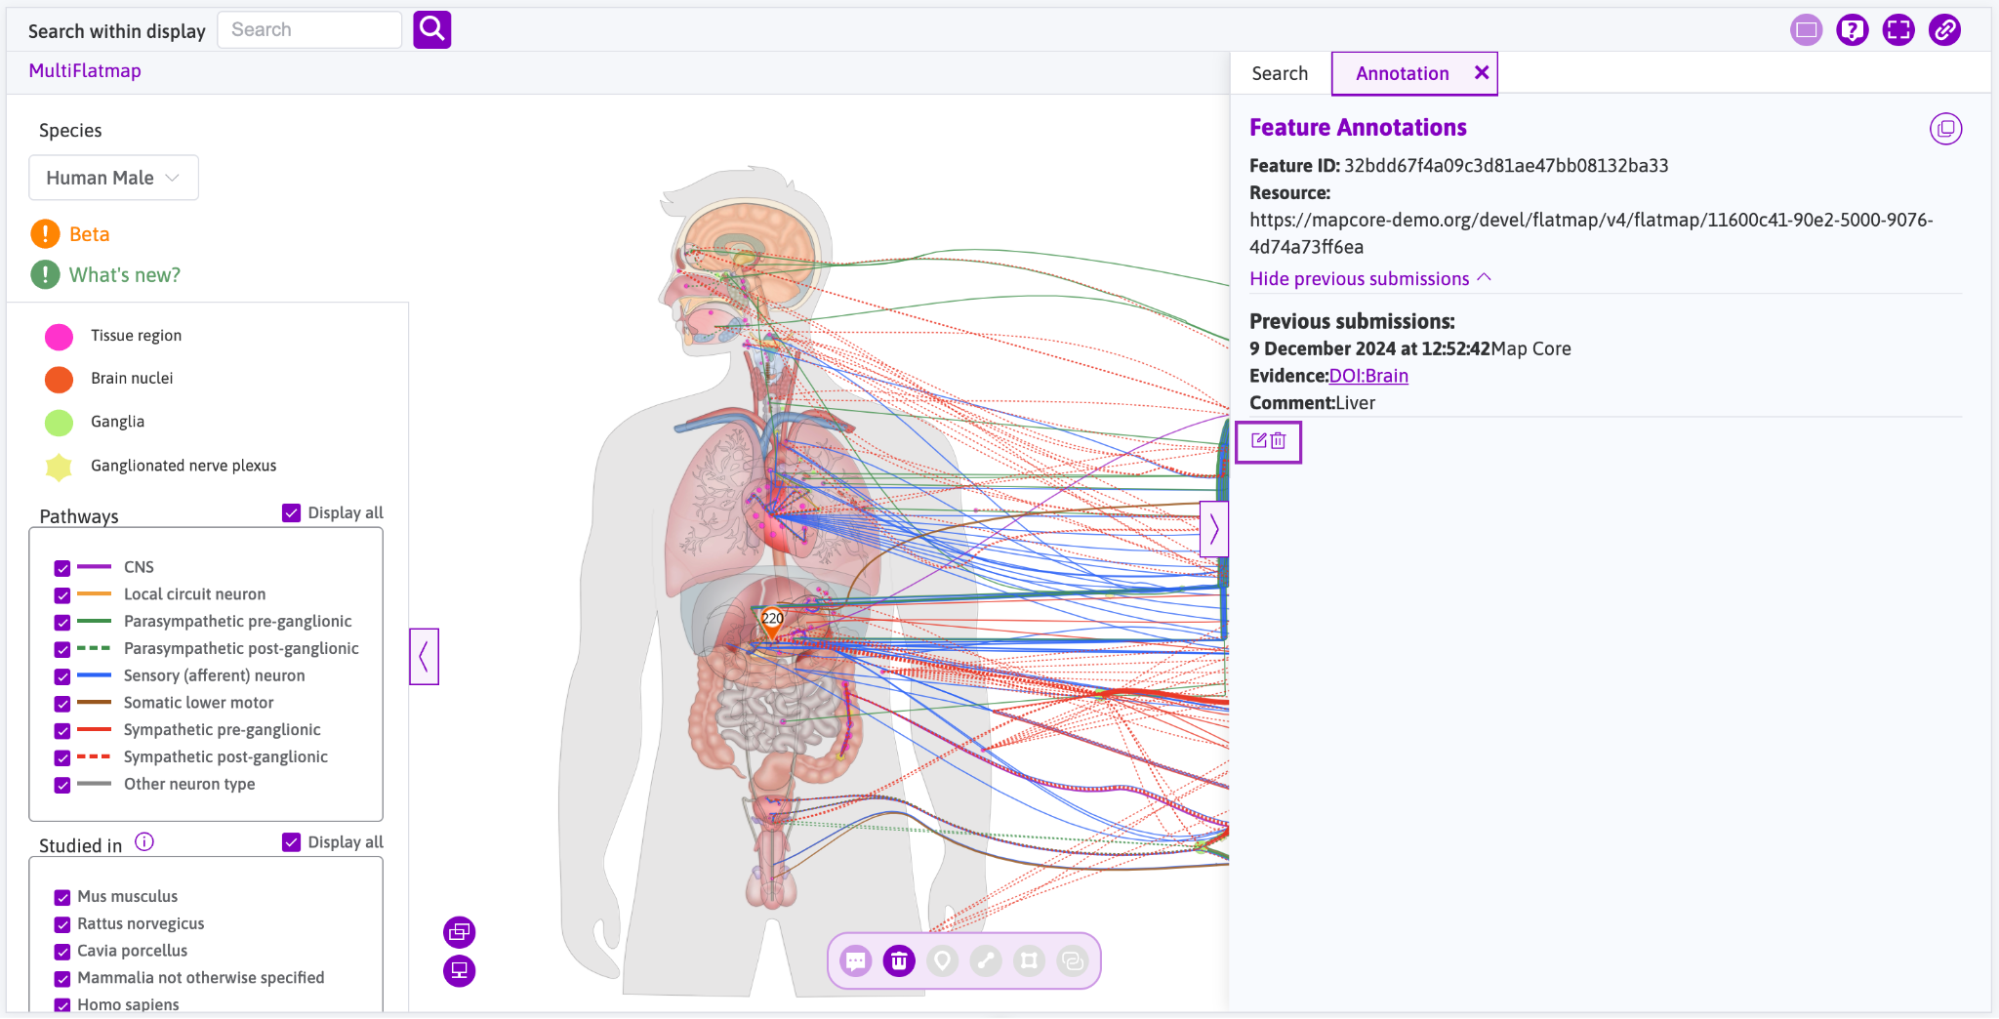
Figure 7: Feature annotations dialog for deleting drawn feature.
Edit suggested connections
Clicking on an existing Draw LineString feature allows the user to select Connectivity feature from the toolbar .
A draggable Visualize connection dialog pops up and shows the feature nodes that the drawn line feature passed through (see Figure 8). Clicking on the name of Related Features annotations shows its Feature Annotations dialog in the sidebar (see Figure 9).
To add suggested evidence for the specific feature click on the pencil icon.
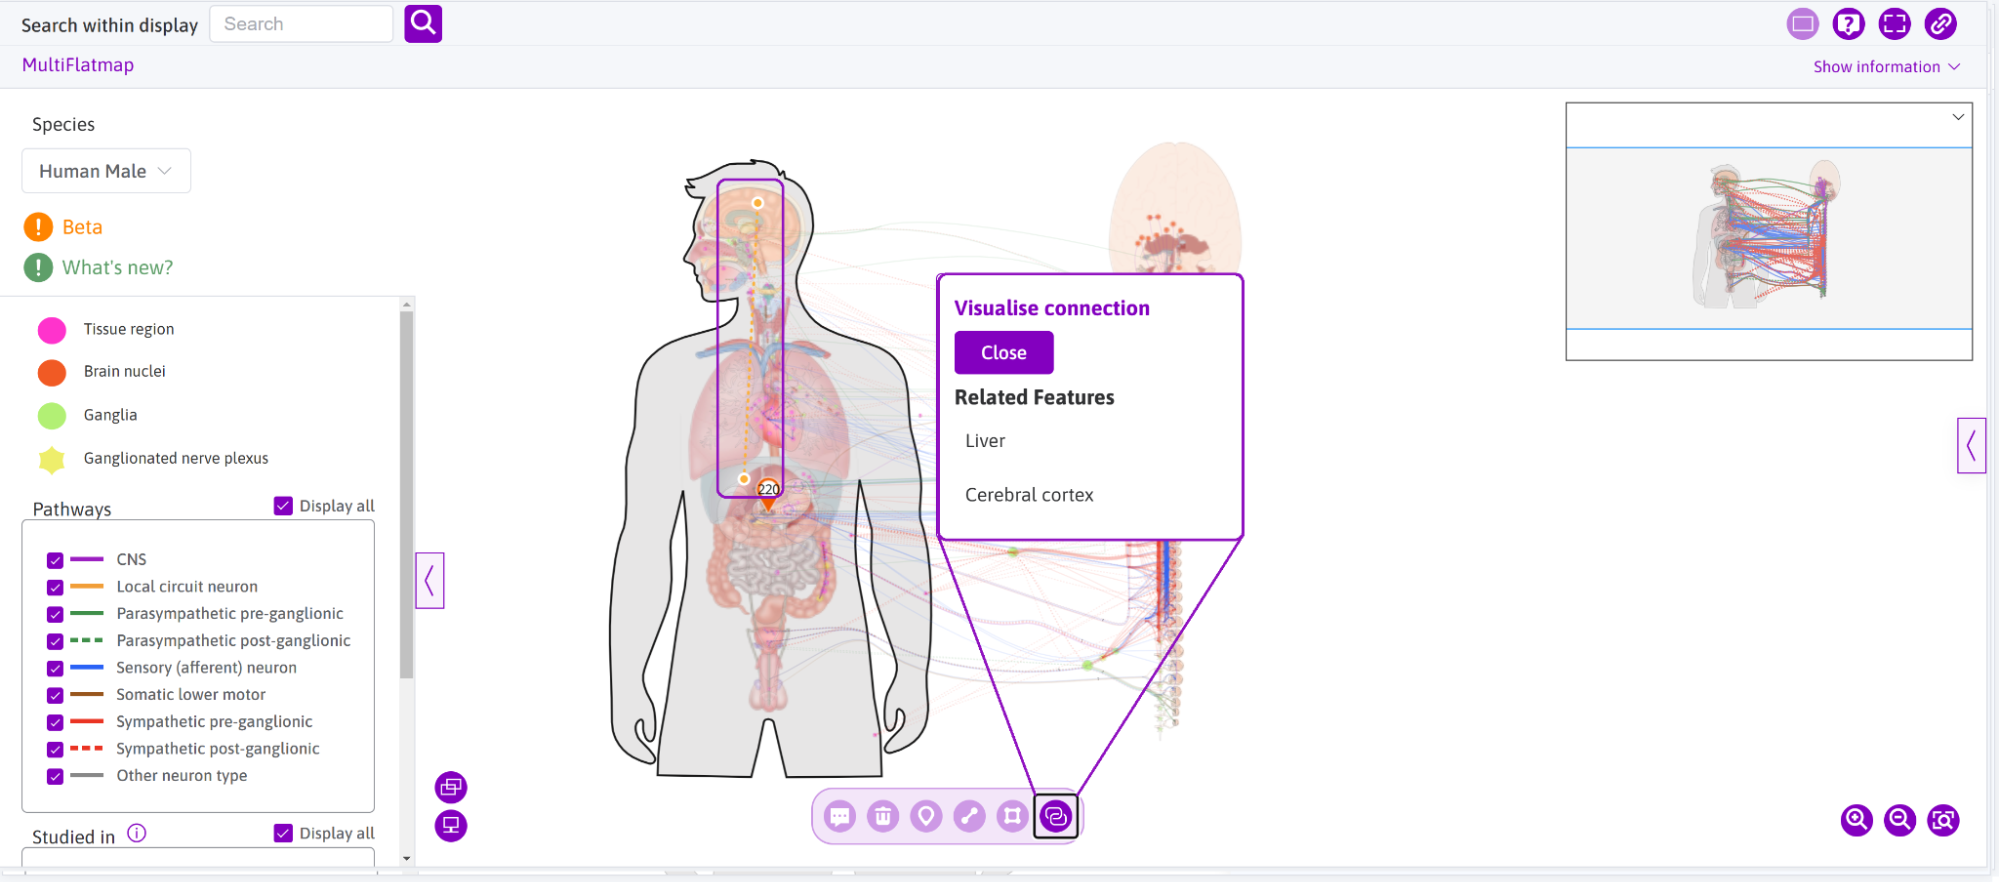
Figure 8: Connectivity drawn line feature can pop up the dialog to check related features.
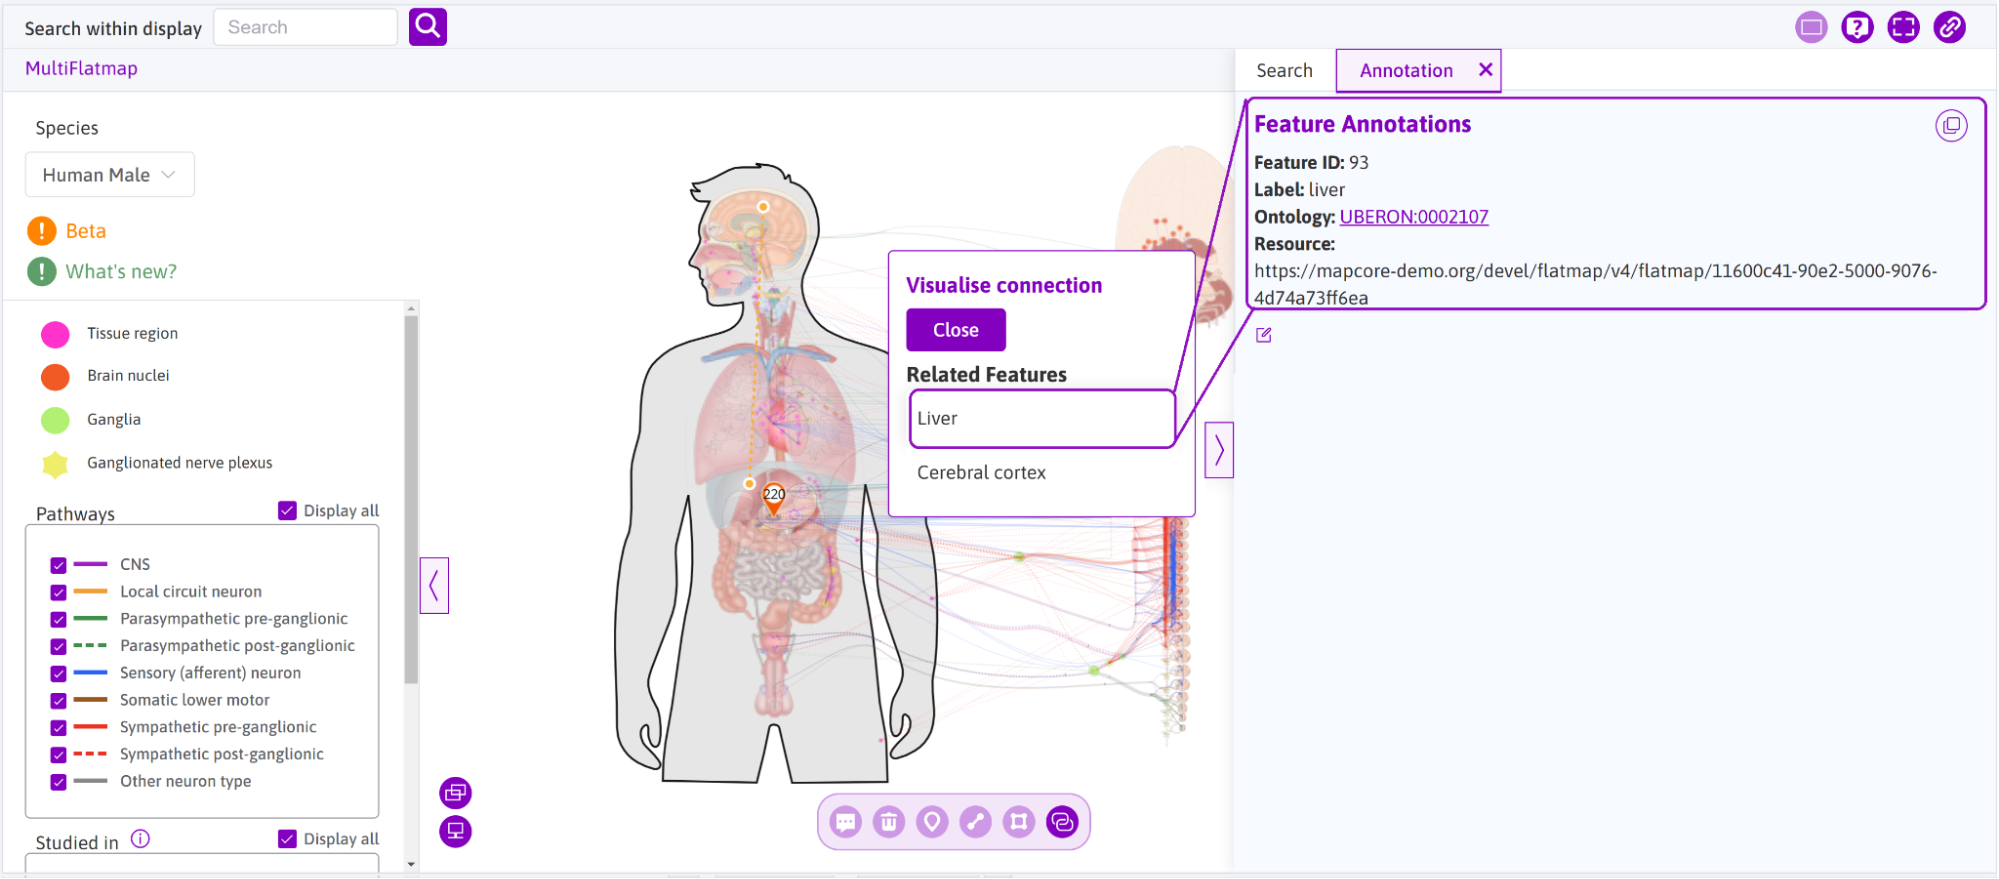
Figure 9: Clicking on the Related Feature, opens the sidebar in annotation view displaying feature annotations.
Review annotations
From the Change setting menu (see Figure 1) the Annotations From menu (see Figure 10) will display the drawn annotation features, either by:
- Anyone - all annotations made by all authorized users that have not undergone curation
- Me - all annotations made by me that have not undergone curation
- Others - all annotations made by other authorized users that have not undergone curation
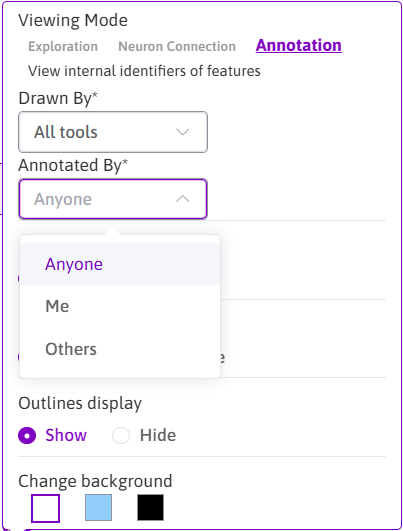
Figure 10: The Annotated By selection will be displayed in the Change Settings menu.
Functional Connectivity and 3D whole body scaffold maps
Annotation tool is also available and behaves similarly for the Functional Connectivity and 3D scaffold maps.
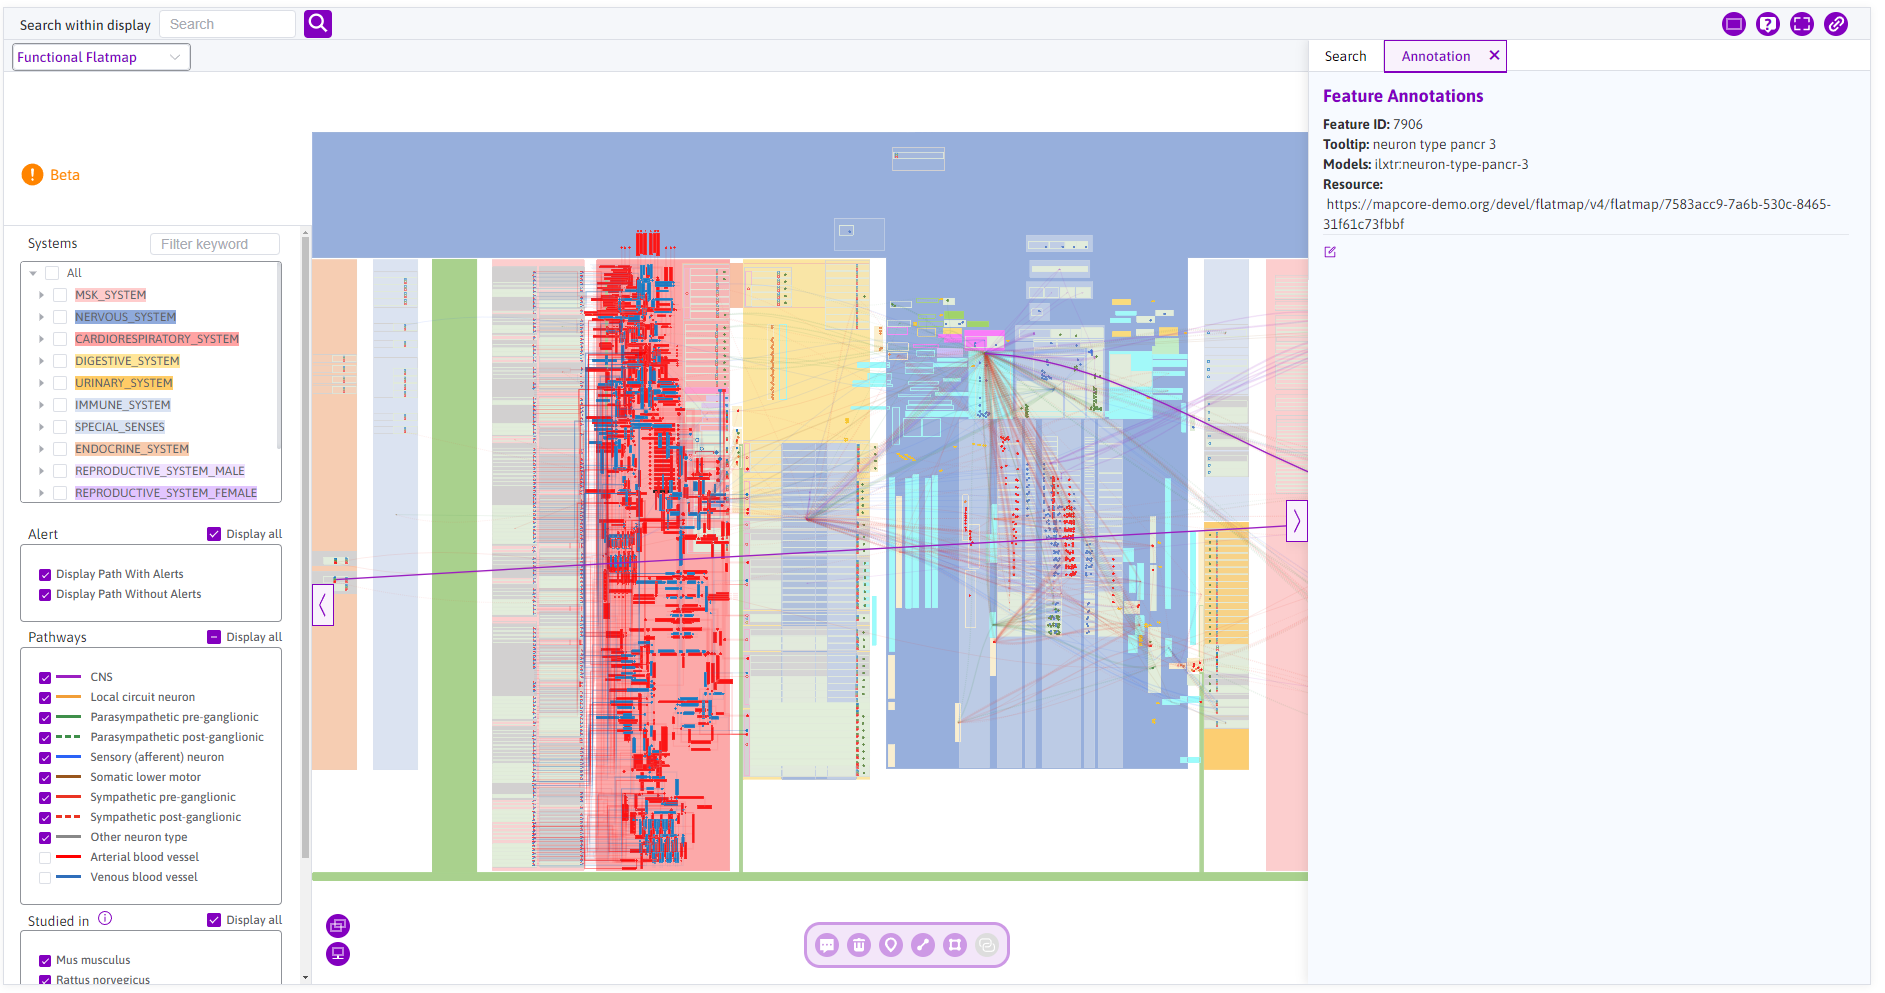
Figure 11: The annotation tool on the FC map.
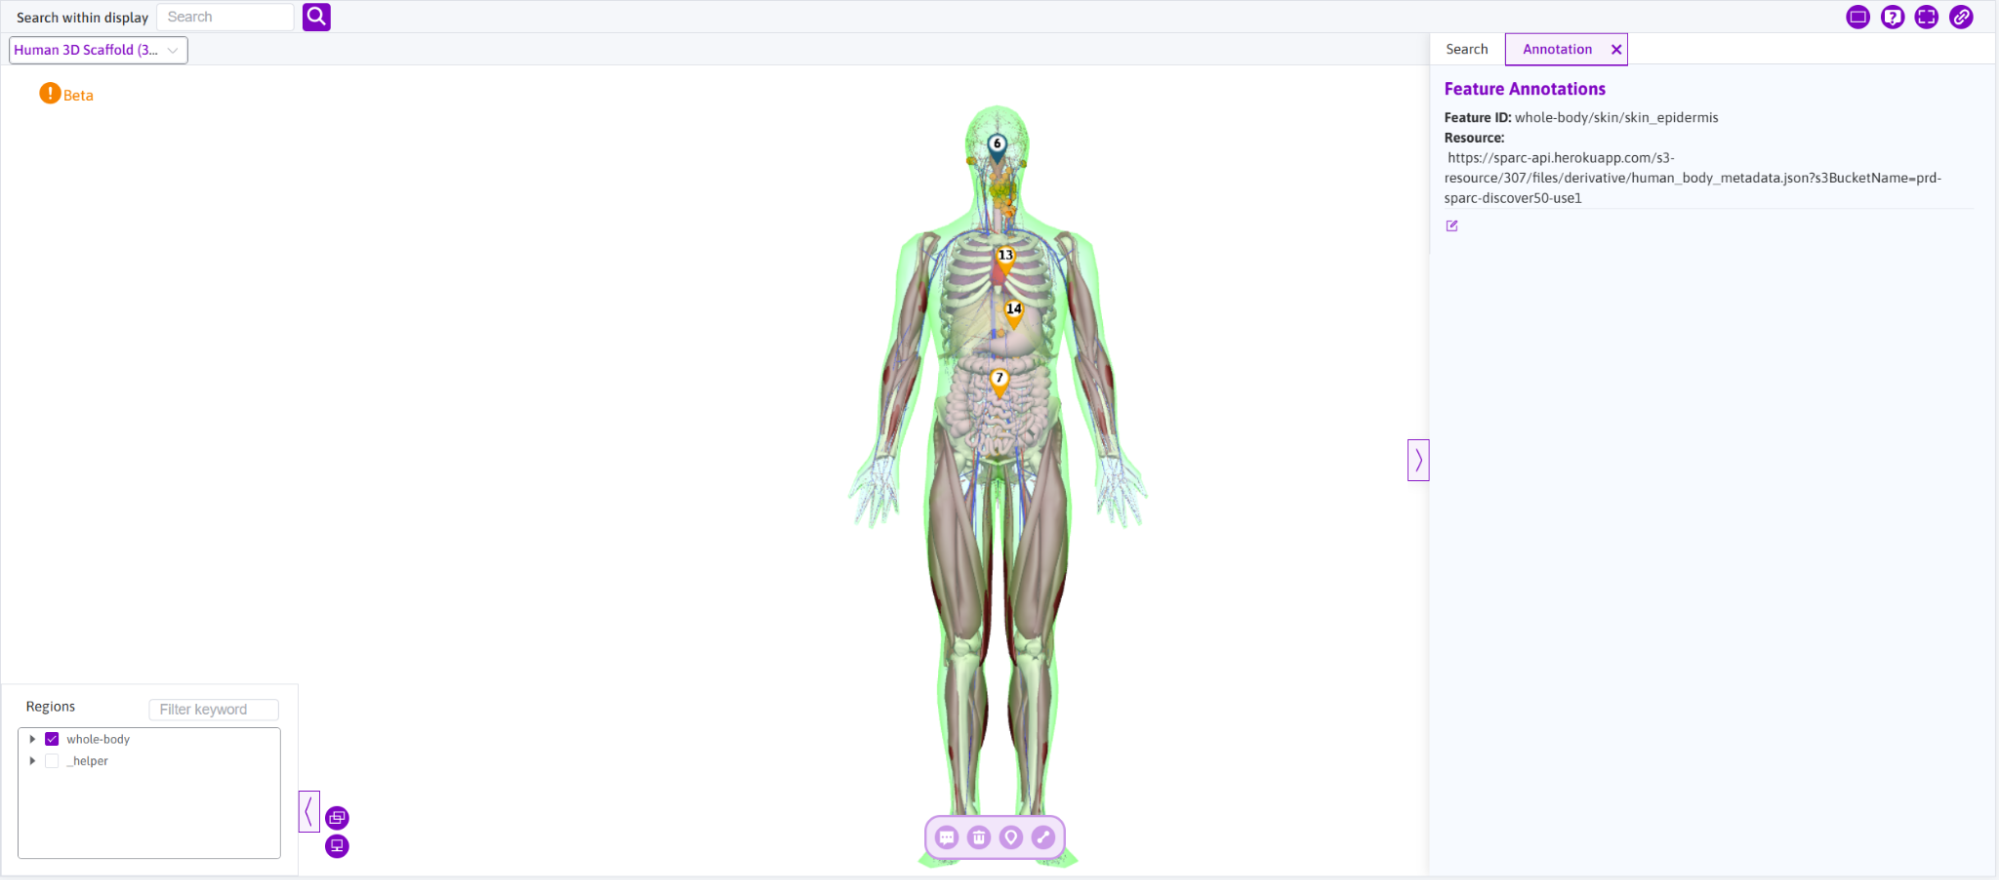
Figure 12: The annotation tool on 3D whole body scaffold map.

Figure 13: The annotation features are also available for scaffolds.
Access and Authorization
At this time, we envision only invited users to be authorized to use this capability on the SPARC Portal. Authorization can be requested, however, via the SPARC Portal by utilizing the Contact Us page.
To request authorization, click on the Contact Us icon in the top right corner of sparc.science (see Figure 7) and select Share Feedback with the reason I am interested in a SPARC Service (see Figure 8). Enter your details, and under Additional information, express your interest in being a part of the Annotation Team for the SPARC Maps.
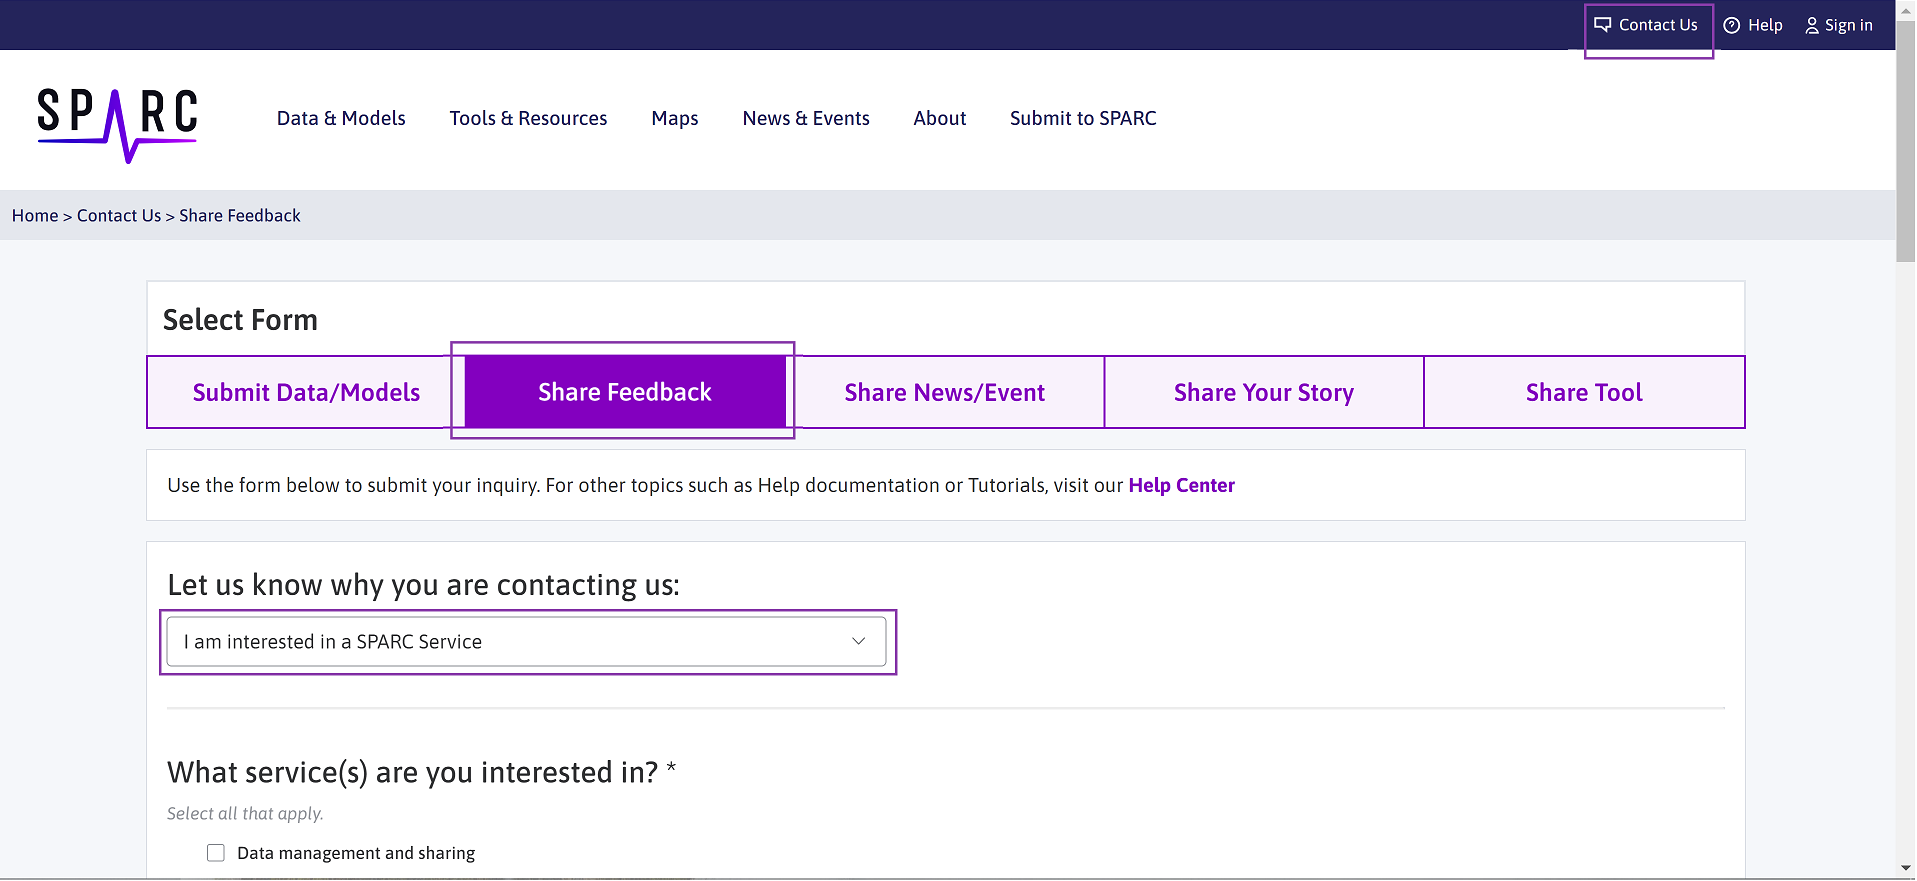
Figure 14: The Share Feedback section of the contact page. Requests for annotation access can be made here.
Future development
The future of the SPARC maps and scaffolds annotation tool will involve the capability for users to draw shapes, paths and drop pins on maps. Maps will also be extended to allow the annotation layer to be turned on and off. Annotations will also have the capability to be extracted and fed into SPARC curation tools. The annotations tool will also be tested by various anatomical experts for validation.
Tutorials
Updated about 1 year ago