Reusing Scaffolds
Export scaffold maps for reuse in visualization and/or modeling purposes
Availability of scaffold maps datasets on the SPARC Portal makes it possible for users to not only explore the maps, it also allows export and interoperability of the scaffold maps with other software systems for applications such as schematically locate data points in the scaffold coordinate system or providing a scaffold for computational purposes in other modeling software or environment.
Generic organ scaffolds are typically exported in reusable STL and VTK formats. These formats are generated with the SPARC default organ scaffolds workflow and they can be found and downloaded directly from the derivative folder of generic organ scaffold datasets. If the dataset lacks STL or VTK files, the missing files can be generated by following the steps given below.
We will use the Generic mouse colon scaffold dataset to demonstrate how to load the published scaffold in the Scaffold Mapping Tool and how to generate exports of the scaffold in STL and VTK formats for reuse by other software.
Use Scaffold Mapping Tool to export scaffold to VTK file
Step 1: Identify provenance of scaffold
First, look under Files of the SPARC dataset and in the primary folder, download provenance.json (Figure 1).
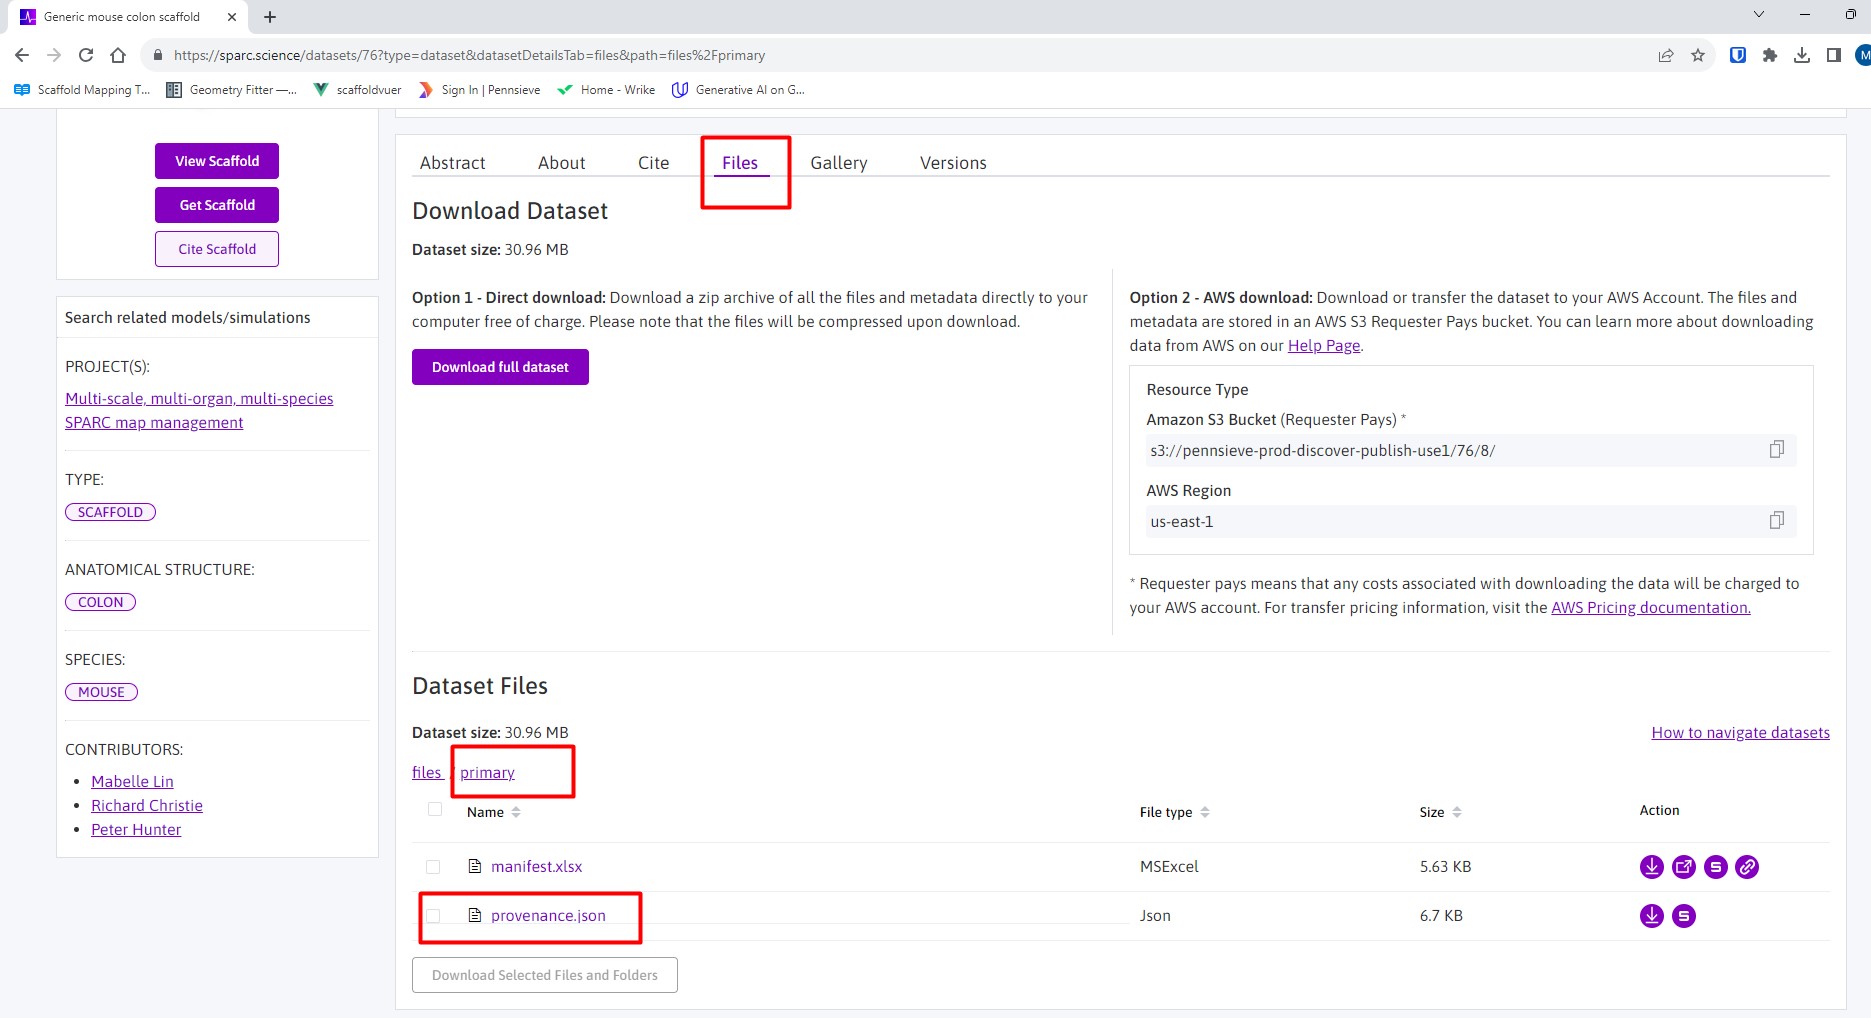
Figure 1: Location of the provenance data in a scaffold map dataset.
In provenance.json, look for the version of MAPClient used for generating this scaffold as shown in Figure 2. Download the same version of Mapping Tools from here.
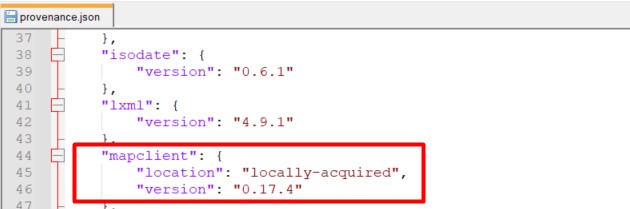
Figure 2: Version of MAPClient Mapping Tools in the provenance data of a scaffold map dataset.
Start the correct version of Mapping Tools.
Step 2: Create a workflow
You can create a new workflow anywhere but here we will create one on the Desktop.
Using Windows Explorer, or similar, create a new directory on the Desktop and name it Scaffold Export. Create a new folder exports in Scaffold Export.
From the File menu in Mapping Tools select the New > Workflow (CTRL-SHIFT-N) to start a new workflow. Navigate to the Desktop and select the Scaffold Export directory created earlier.
Next, you need to prepare the workflow for execution. Set up the workflow as shown in Figure 3 by dragging the steps highlighted in the red boxes from the step list box onto the workflow panel. Connect the steps as demonstrated in Figure 3.
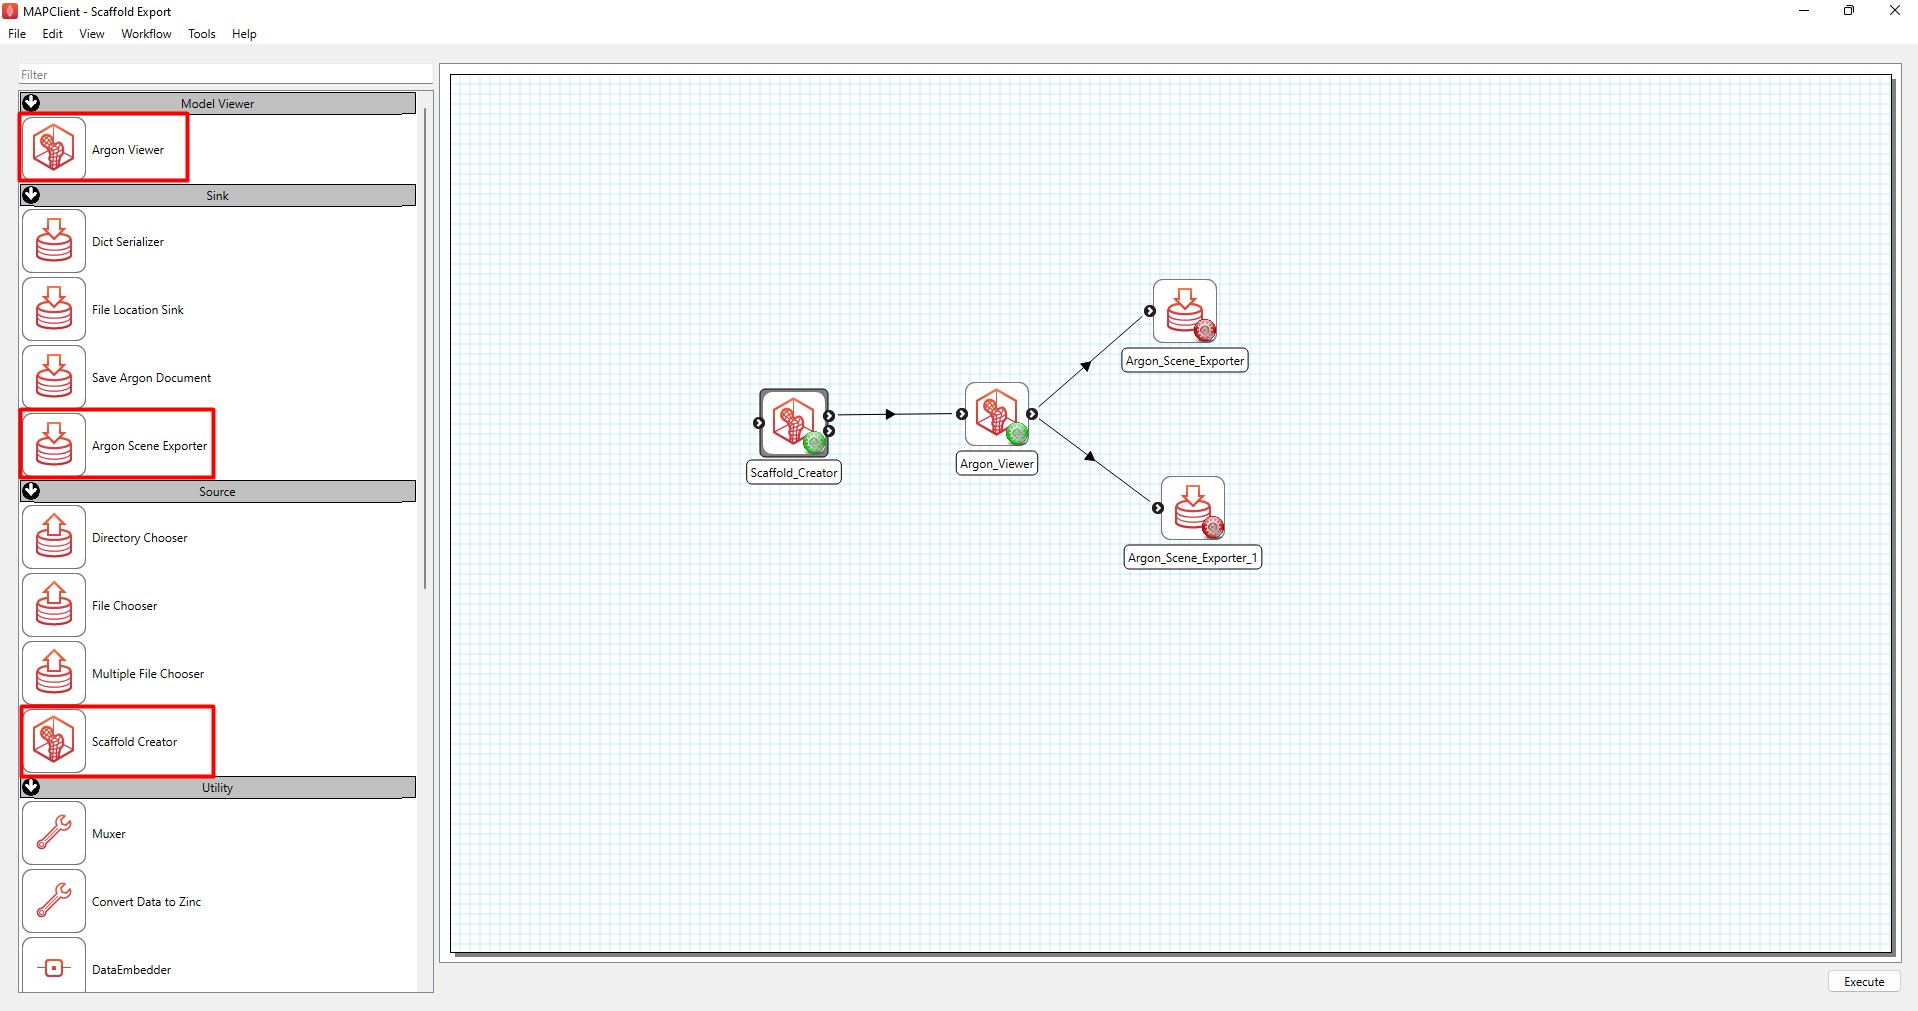
Figure 3: Layout of steps for generating scaffold exports with steps highlighted with a red box in the step list box.
The next step is to configure the Argon_Scene_Exporter steps. Click on the red wheel icon on the first Argon_Scene_Exporter step. Rename the Identifier to STL. Enter mouseColon under Prefix. For Output directory, select the exports folder in the Scaffold Export folder that you created on the Desktop. Finally, select stl from the drop-down list of Export type. Click OK and make sure that the red wheel icon is now green (Figure 4).
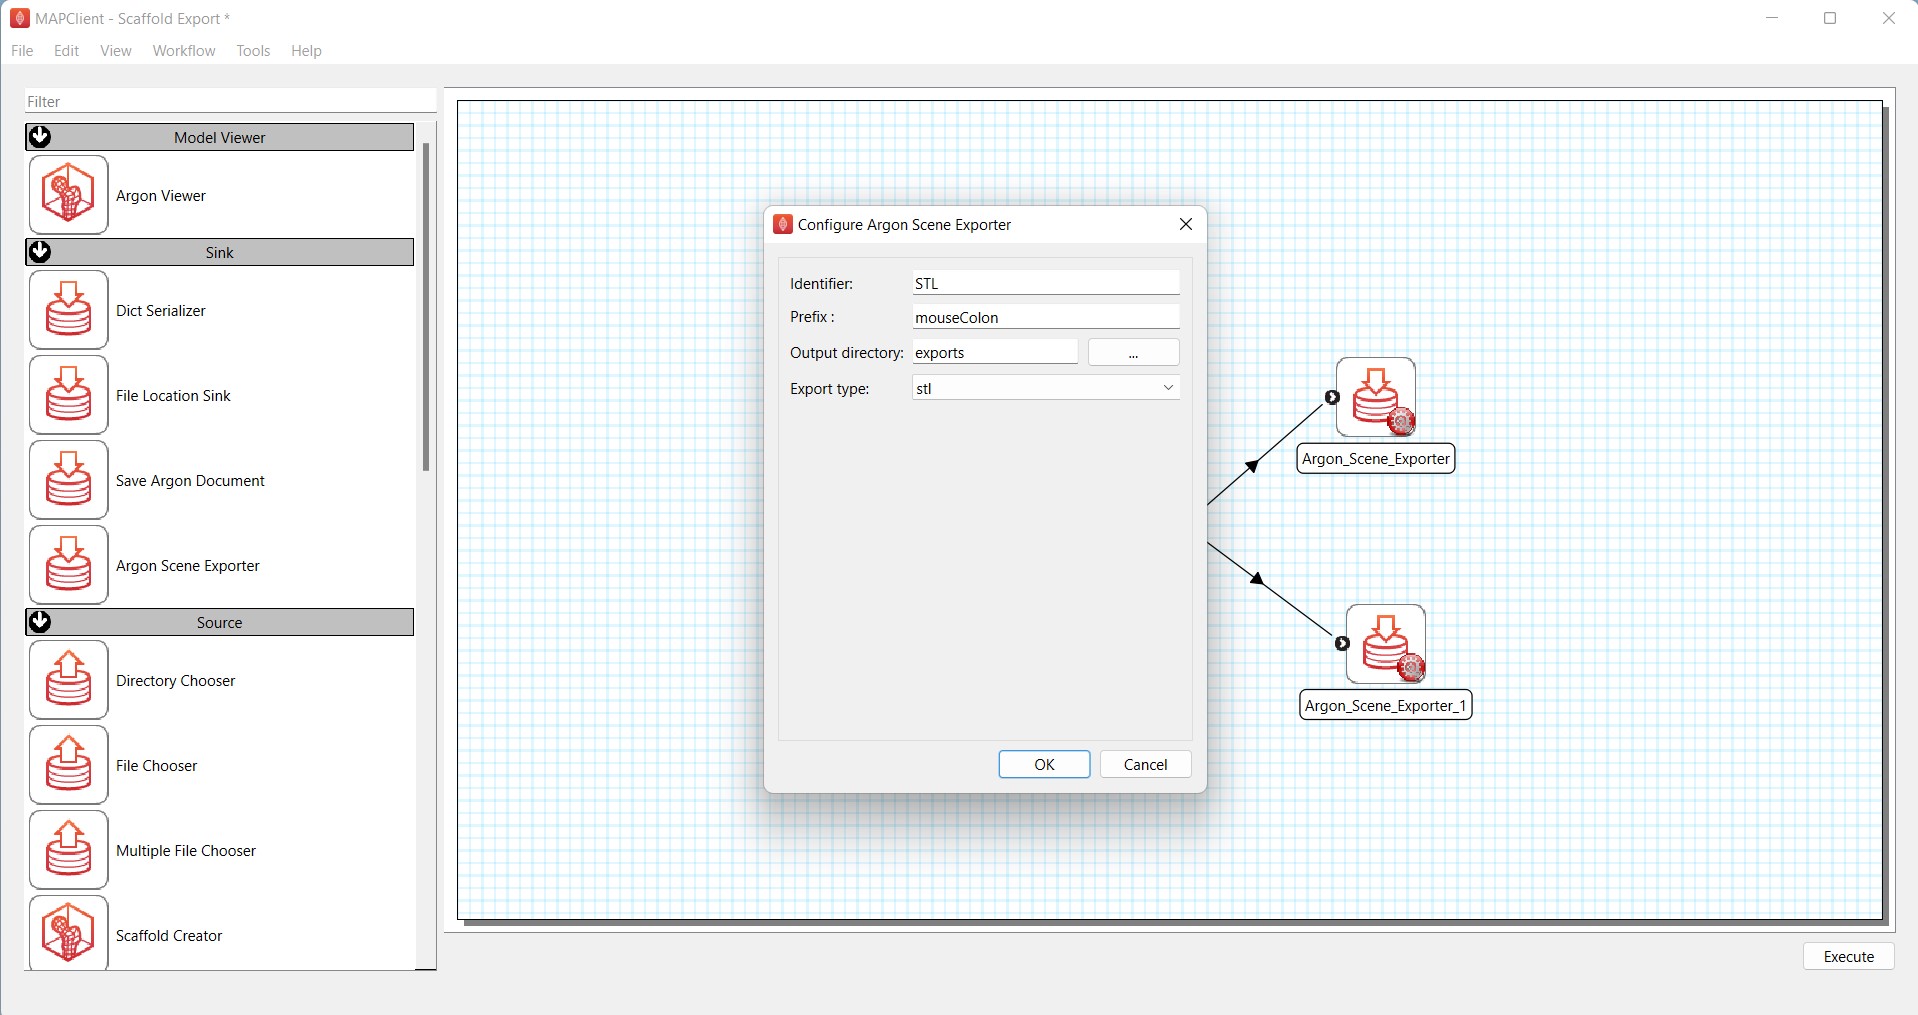
Figure 4: Configuration of Argon_Scene_Exporter to generate STL export of the scaffold.
For the second Argon_Scene_Exporter step, we can use it to generate the VTK export of the scaffold. Here, change the Identifier field to VTK. Enter mouseColon as the Prefix, select the same exports folder for Output directory and choose vtk under the Export type drop-down list (Figure 5).
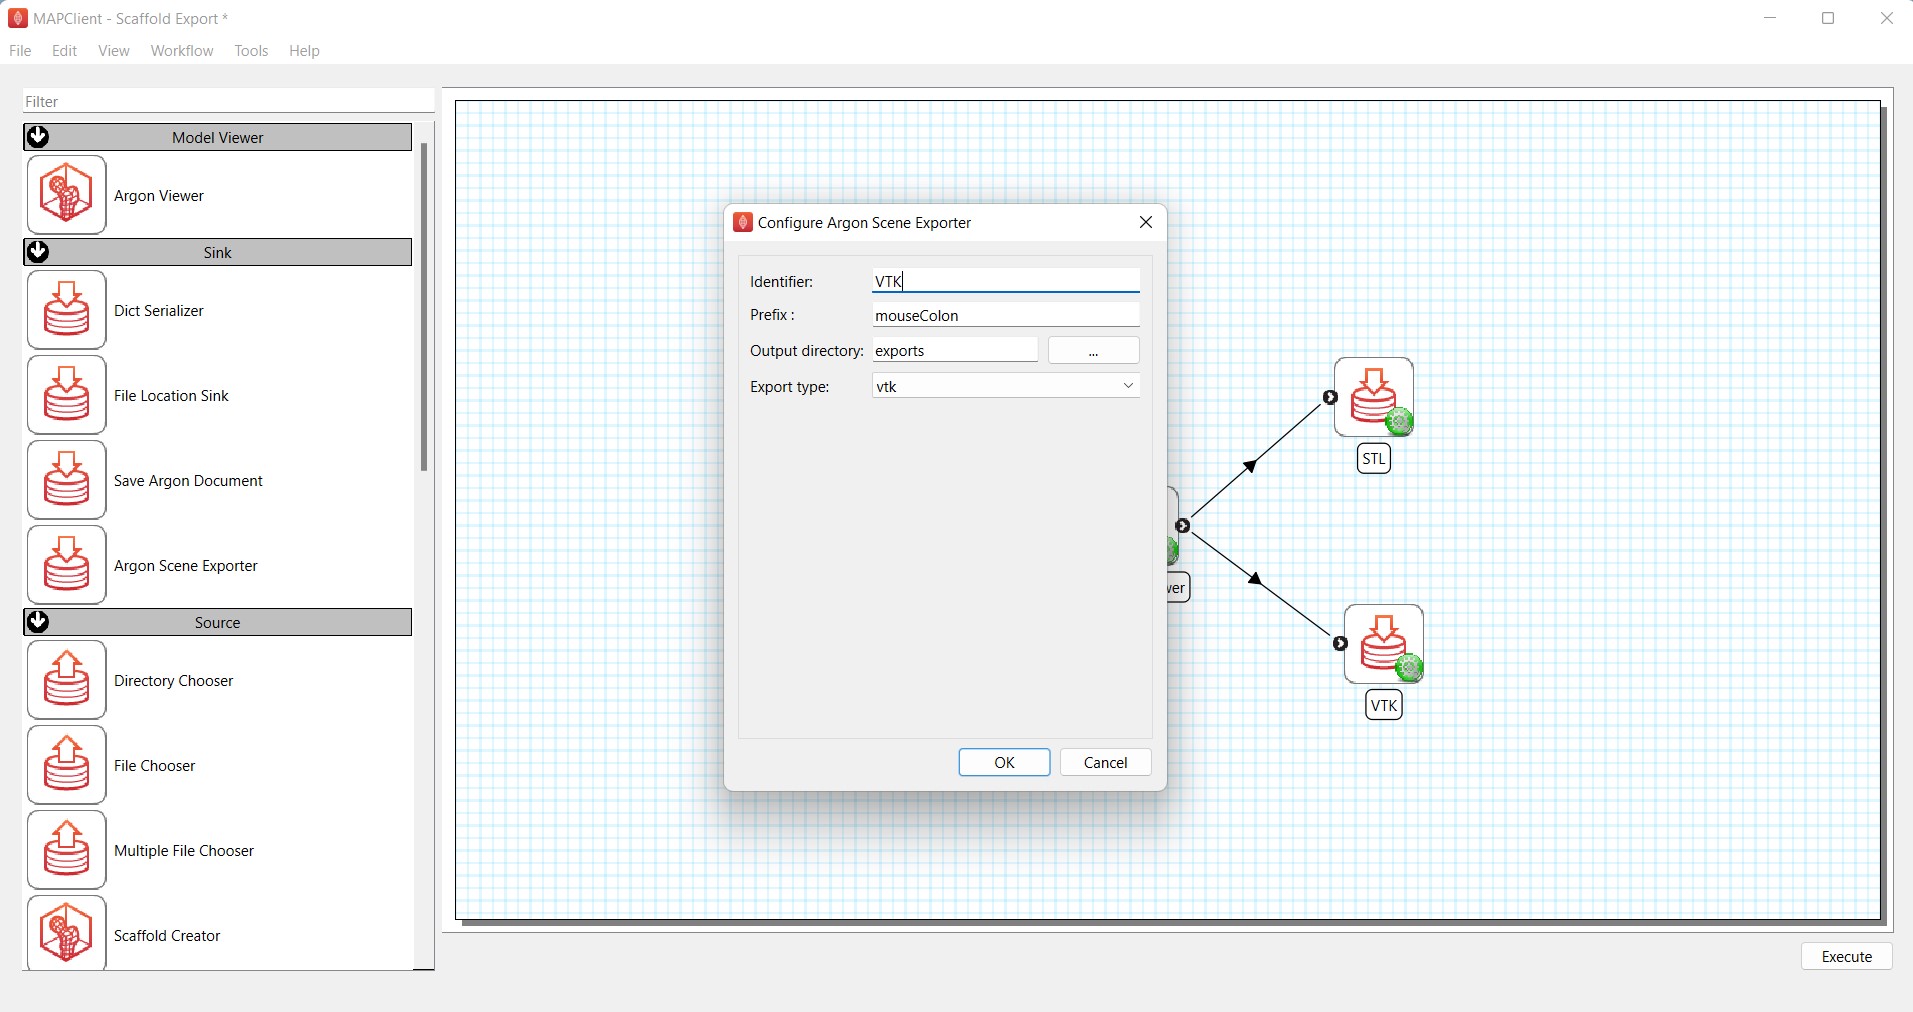
Figure 5: Configuration of Argon_Scene_Exporter for generating VTK export of the scaffold.
Save the workflow.
At this point the workflow has been created and is ready for executing. Execute the workflow by pressing the Execute button in the lower right corner of the application main window or Ctrl+X.
Step 3: Select the scaffold
Using the Scaffold Creator interface, set the Scaffold type to 3D Colon 1. Set the Parameter set to Mouse 1.
Use the View All and Std. Views button to center the generated scaffold in the viewing panel (Figure 6).
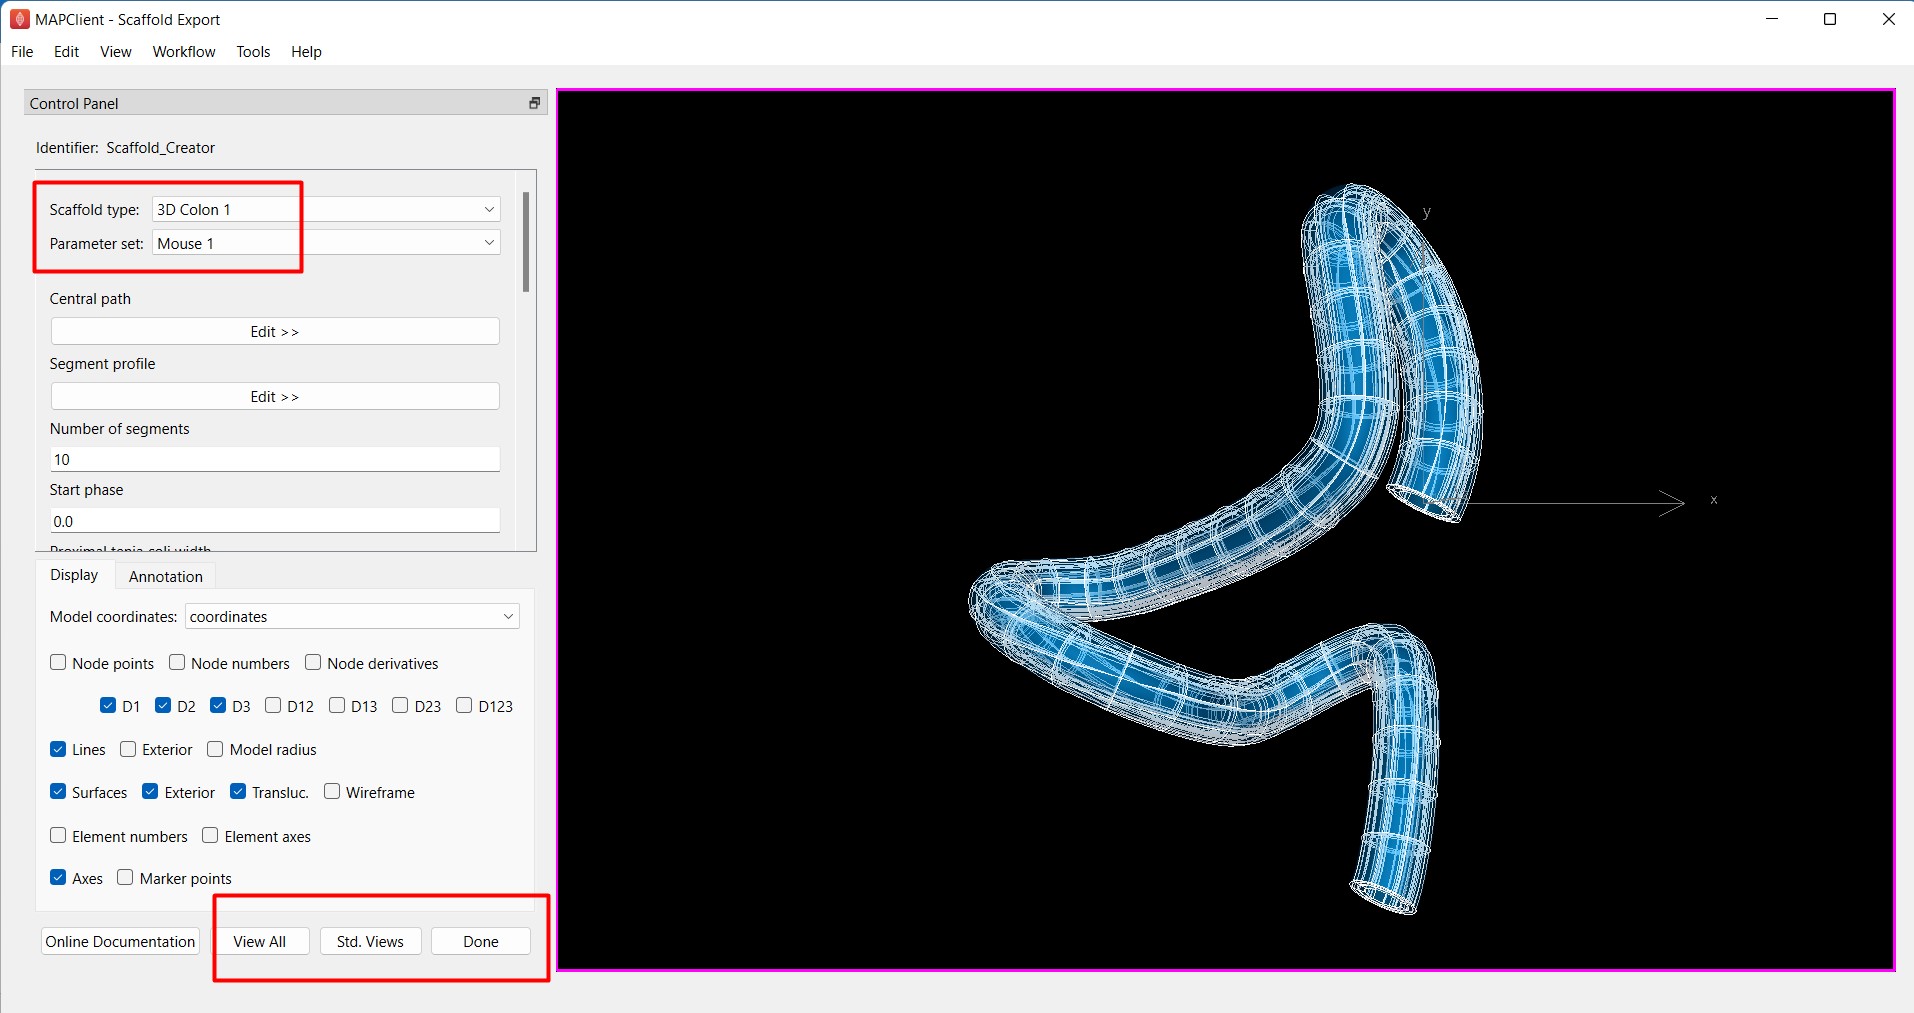
Figure 6: Scaffold Creator configured for a mouse 3D colon scaffold, the view has been manipulated to show a non-default view.
Click the Done button to finalize the settings and move onto the next step in the workflow.
Step 4: Visualize the scaffold
In this step, we create surface visualization for the scaffold.
First, use the Model Sources editor to load the scaffold (Scaffold_Creator.exf) in the root region / by clicking on the green plus icon (Figure 7). The icon switches to a gray minus sign when the scaffold has been successfully loaded in the region.
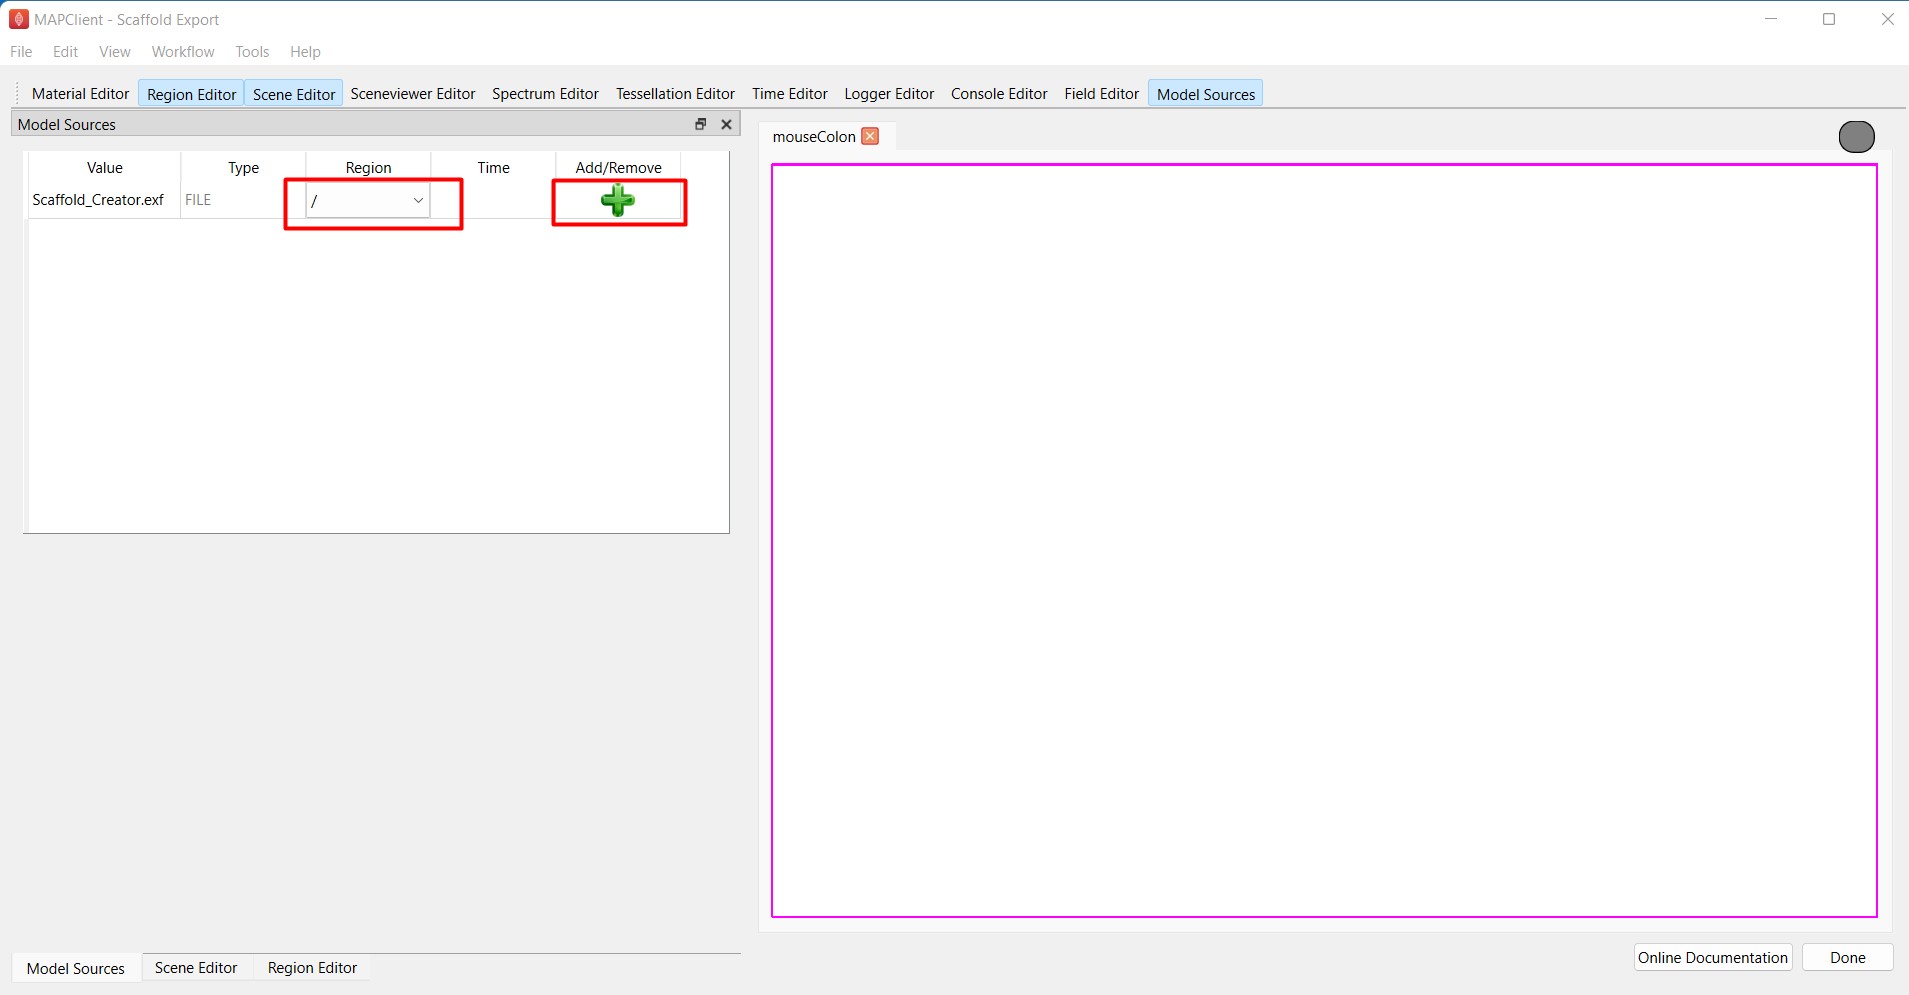
Figure 7: Loading the scaffold to the root region.
Note that if you are only interested in generating the VTK export of the scaffold, you can skip the following steps and proceed to click Done.
However, to generate a STL export, we will need to use Add View to create a view window (Figure 8). Steps on how to add views are detailed in Step 1 here.
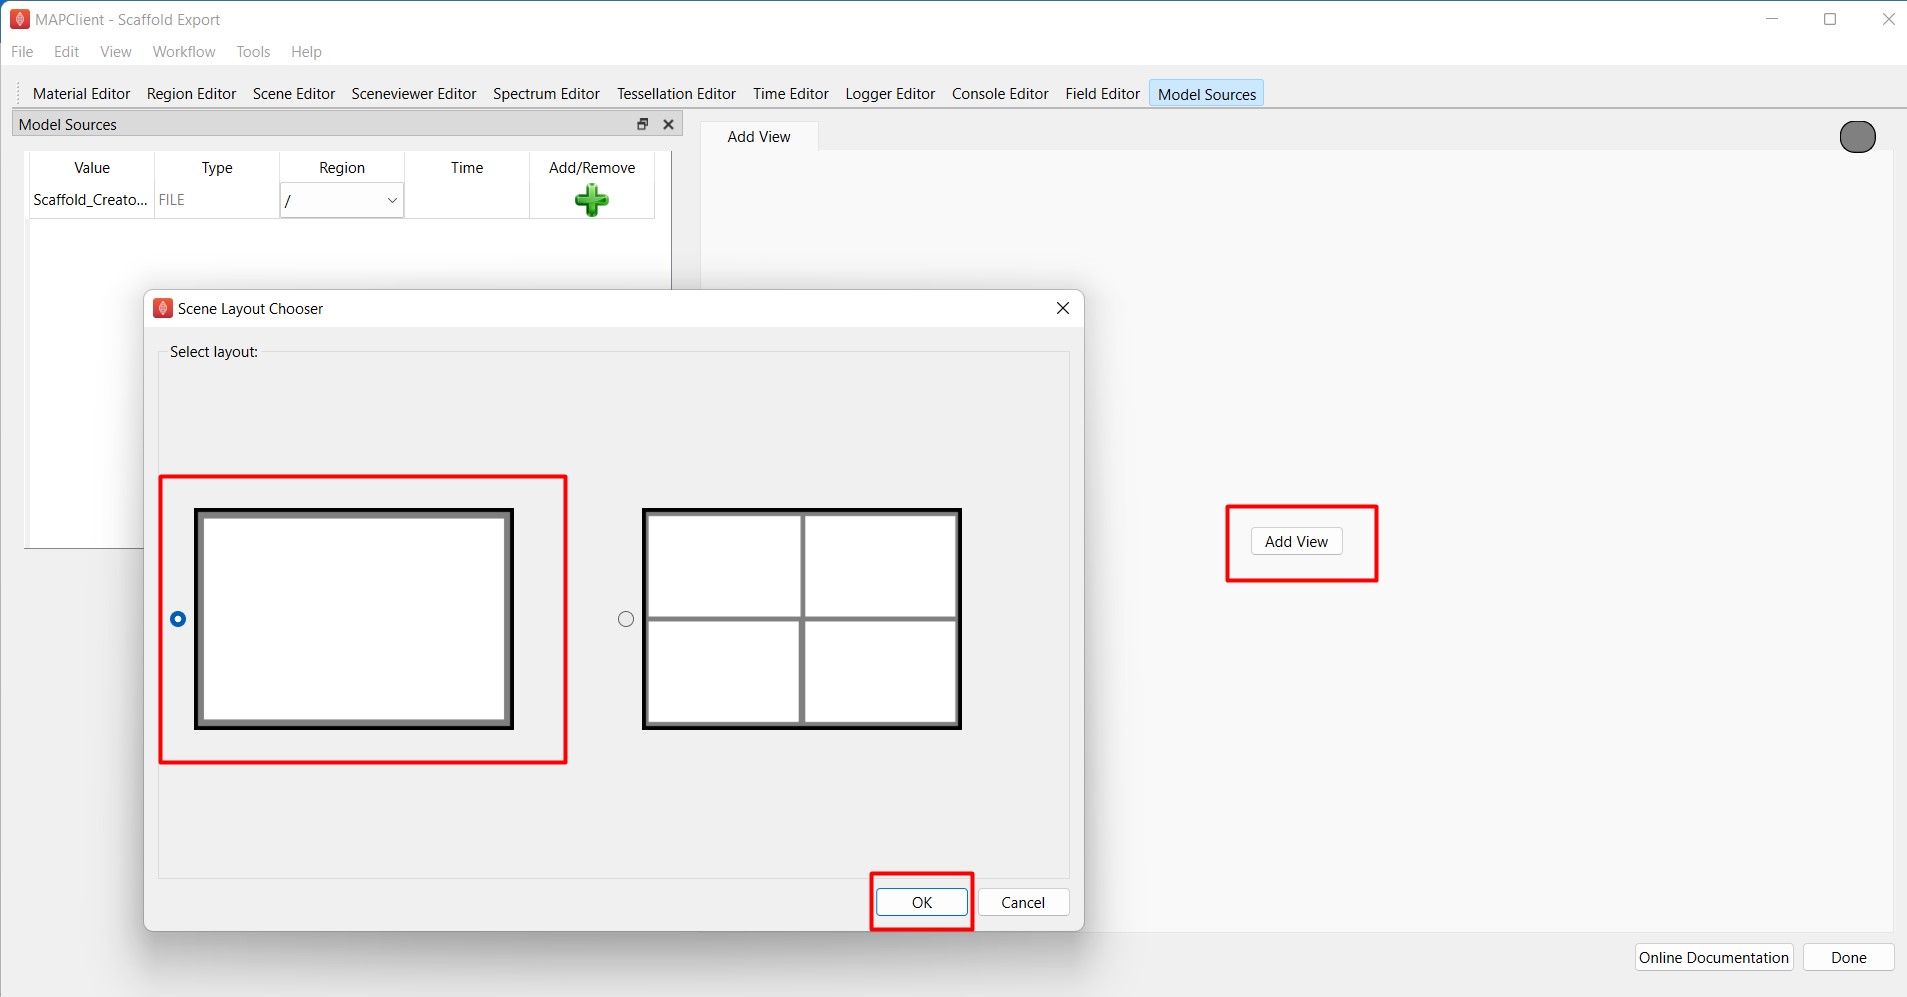
Figure 8: Use Add View to select a view layout for visualization.
Next, use the Scene Editor to add surface elements of the scaffold as shown in Figure 9. Addition of surface elements in the Argon Viewer is necessary for the generation of triangulated surfaces defined by the unit normal and vertices in the STL format. More details on how to customize the visualization can be found in Step 4 described here.
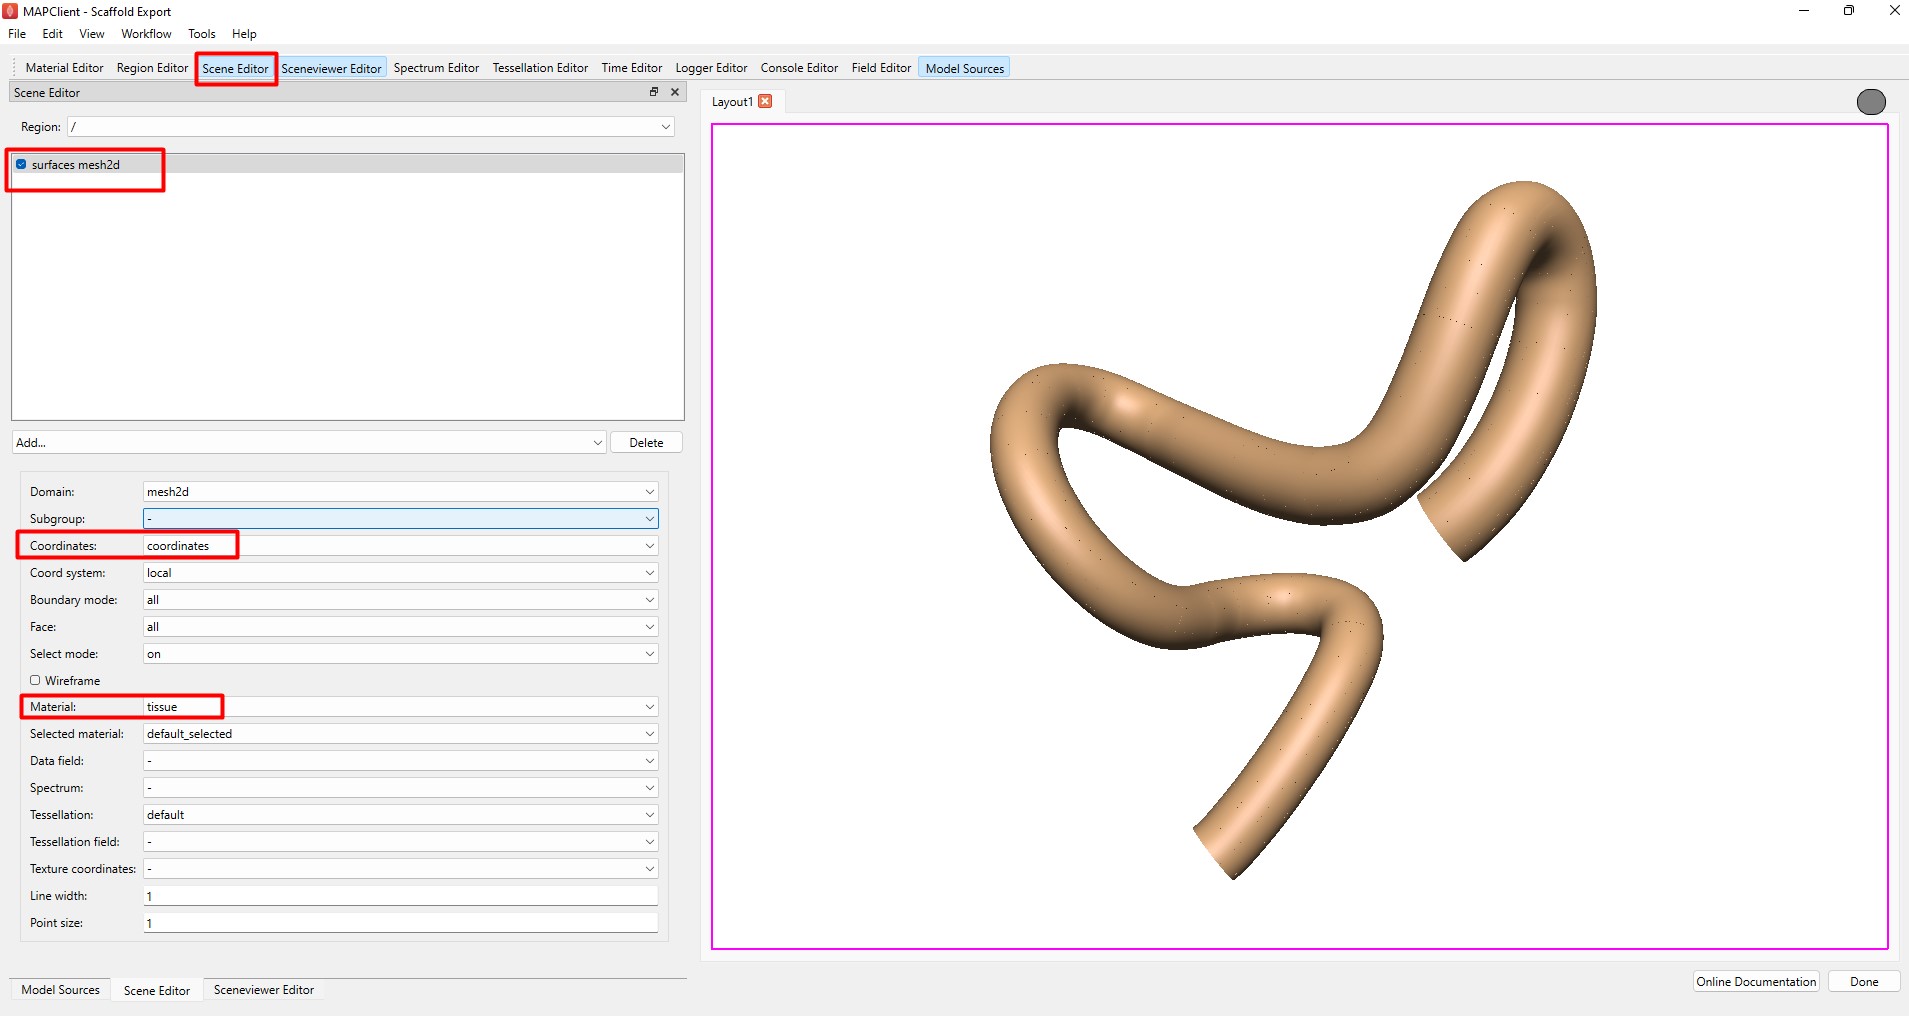
Figure 9: Scene Editor settings for visualizing the 2D surface of the scaffold.
Click Done.
Once the workflow has finished executing (returned to its initial state), navigate to the derivative folder (Desktop\Scaffold Export\exports) to view the output files. For the example above, the output files are as follows:
- mouseColon_root.vtk is the VTK export of the linear mesh representation of the scaffold.
- mouseColon_zinc_graphics.stl is the STL export of the triangulated representation of the scaffold defined by unit normals and vertices.
These export files can be read into modeling or CAD softwares such as ParaView. Figures 10 and 11 show the mouse colon in VTK and STL formats loaded in ParaView, respectively.
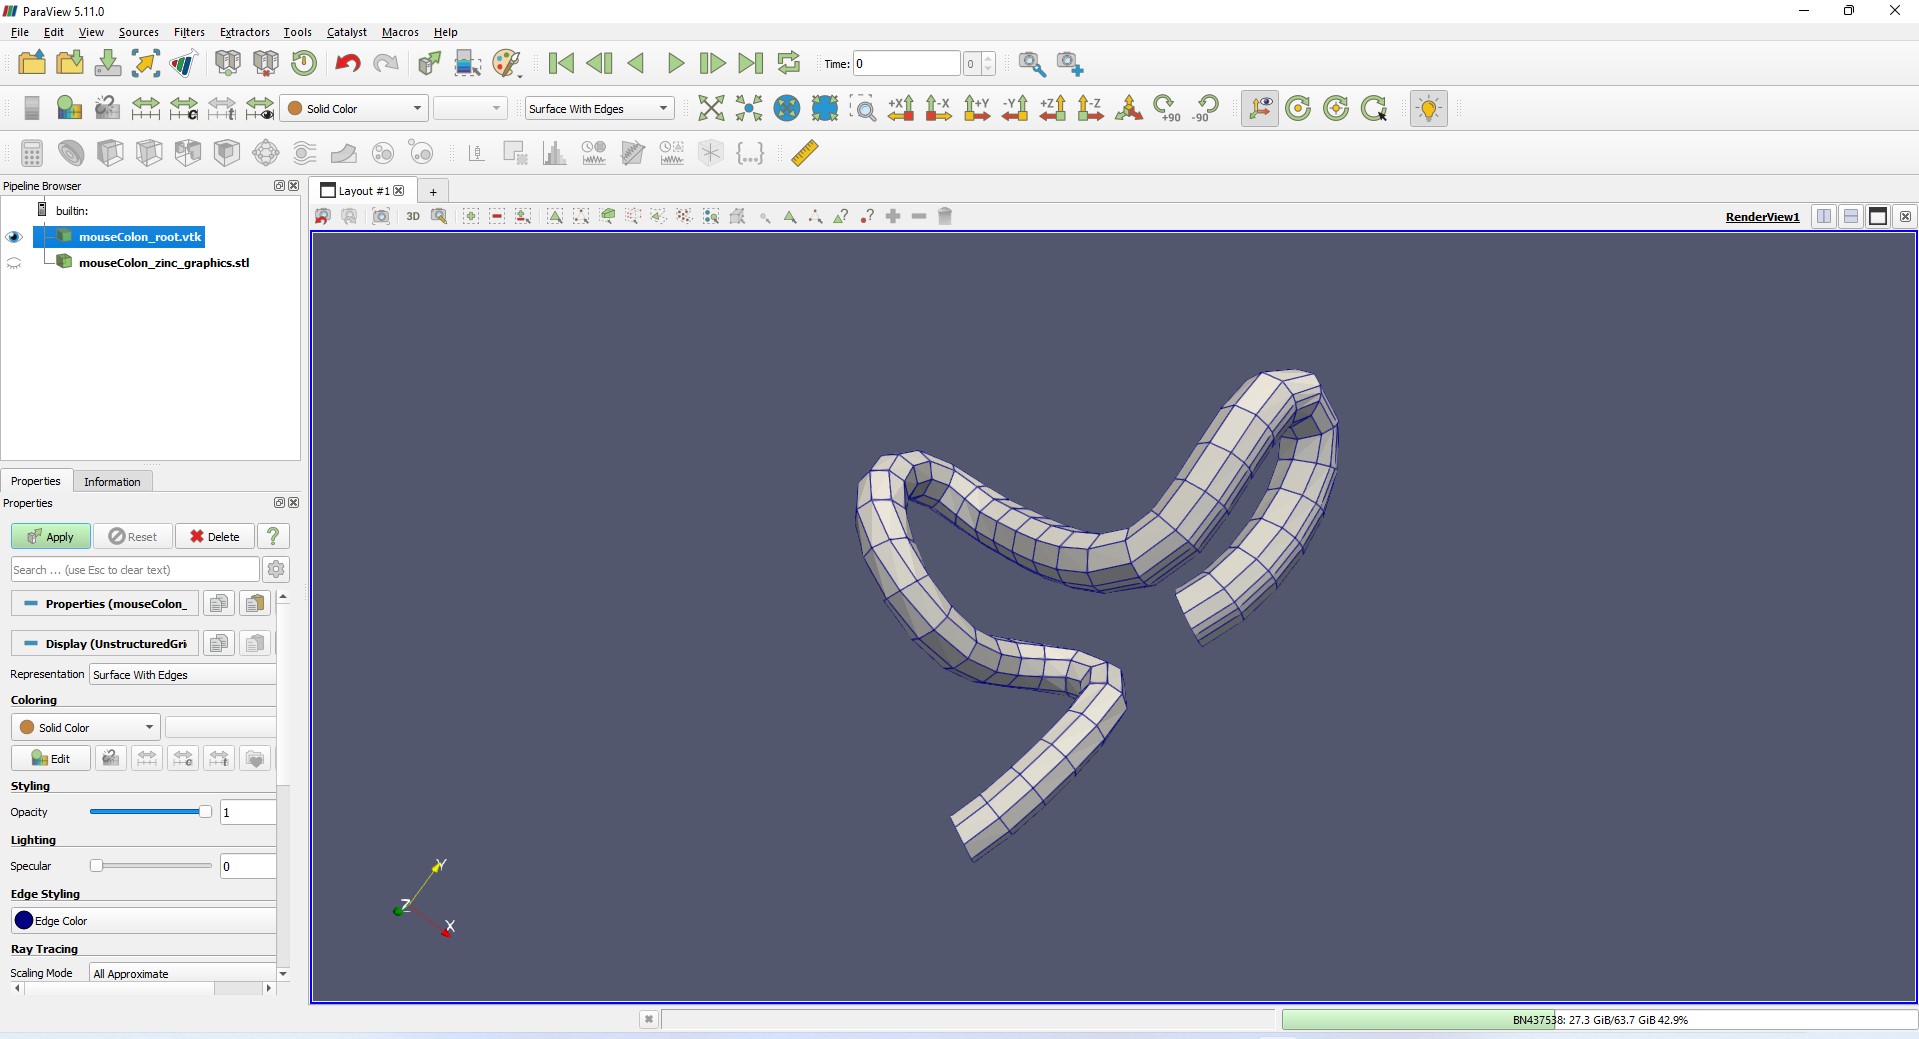
Figure 10: Linear representation of the mouse colon scaffold in VTK format loaded in ParaView.
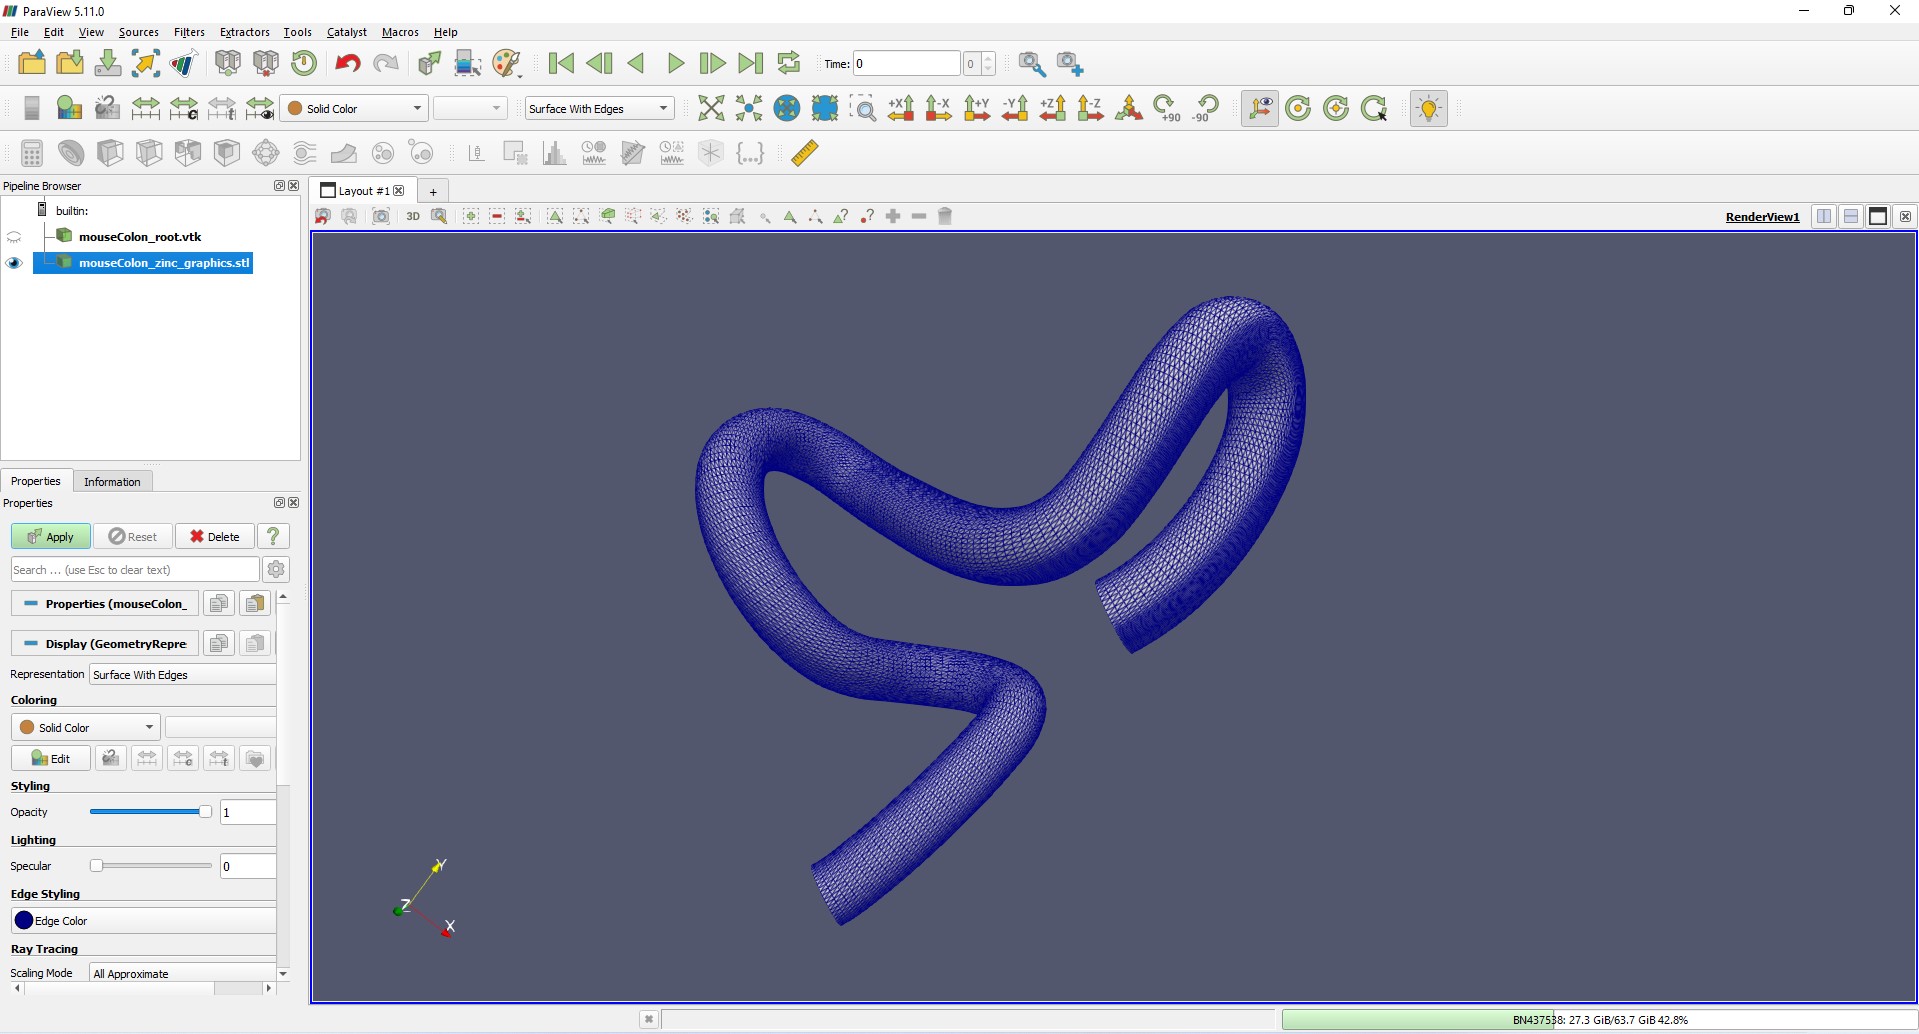
Figure 11: Triangulated surface representation of the mouse colon scaffold in STL format loaded in ParaView.
Apart from using scaffolds from SPARC datasets, the Mapping Tools also provides the ability to customize an organ scaffold. This can be done either through adjustment of the parameters in Scaffold Creator or fitting of a generic scaffold to a sample data cloud using the Geometry Fitter. The resultant scaffold can then be visualized using Argon Viewer in the Mapping tool followed by export to VTK or STL formats for further computational or research applications.
Use Python SPARC Client Library to export scaffold to VTK file
Besides using the MAPClient Mapping Tools, if the dataset contains the scaffold_setting.json file, you can also use the Python Sparc Client Library to easily export scaffold maps to the VTK format using straightforward Python code.
Here, we will use the Scaffold map - Mapping of human gastric enteroendocrine cells to demonstrate how to generate exports of the scaffold in VTK formats by using sparc.client.
To determine the existence of the scaffold_setting.json file, look under Files of the SPARC dataset and check the primary folder (Figure 12). It's unnecessary to download the file.
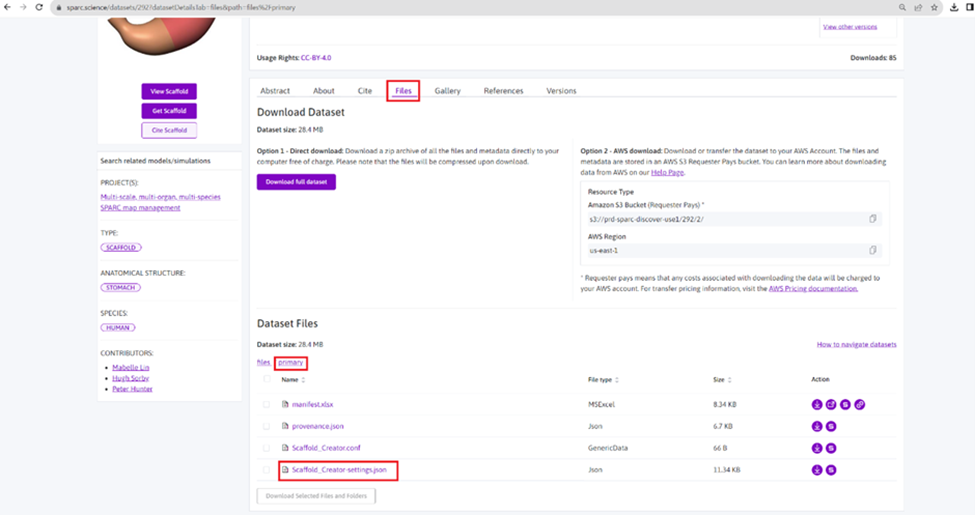
Figure 12: Location of the Scaffold_setting file in a scaffold map dataset.
Step 1: Install pre-requisites
Before we start, make sure you have installed the Python SPARC Client library (sparc.client) and the CMLibs Zinc library (cmlibs.zinc). If you haven't installed them yet, use the following commands:
pip install sparc.client
pip install cmlibs.zinc
Step 2: Load modules
To work with the SPARC Client library and CMLibs Zinc, we need to import the required modules. Additionally, you can load modules from other locations by providing a dictionary with configurations and the path to the module. We will also import the 'os' library, which we will use later in the examples to verify the existence of the output file.
# Import the required modules
import os
from sparc.client.zinchelper import ZincHelper
zinc = ZincHelper()
Step 3: Export scaffold asVTK file
To export a scaffold data to VTK format, use the zinc.getscaffold_vtk() function, which automatically handles the data retrieval. Simply provide the dataset_id and specify the output_file where the scaffold data will be saved in VTK format. After the function call, you can verify the existence of the output file using os.path.exists(output_file).
# Given dataset ID and desired output file name
dataset_id = 292
output_file = "scaffold.vtk"
# Use the get_scaffold_vtk() function to export scaffold data to vtk format
zinc.get_scaffold_vtk(dataset_id, output_file)
# Verify the existence of the output file
if os.path.exists(output_file):
	print(f"Scaffold data successfully exported to VTK: {output_file}")
else:
	print("Export to VTK failed. Please check your inputs and try again.")
Once the scaffold data is successfully exported to the VTK format, you can use the output file for visualization and/or modeling purposes. Figures 13 shows the human stomach in VTK formats loaded in ParaView.
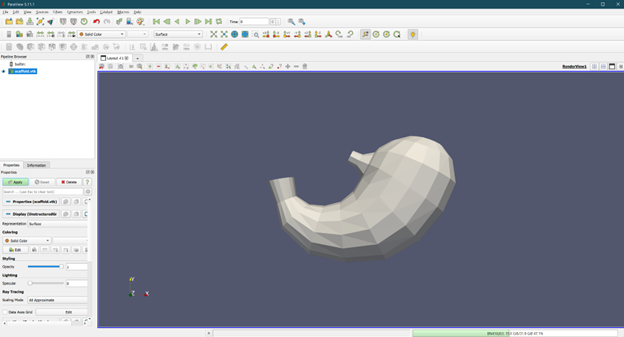
Figure 13: Linear representation of the human stomach scaffold in VTK format loaded in ParaView.
Updated about 1 year ago